First Paper Prototype
Overview
This is an overview of all the parts of our paper prototype. It is meant to be a mobile phone design.
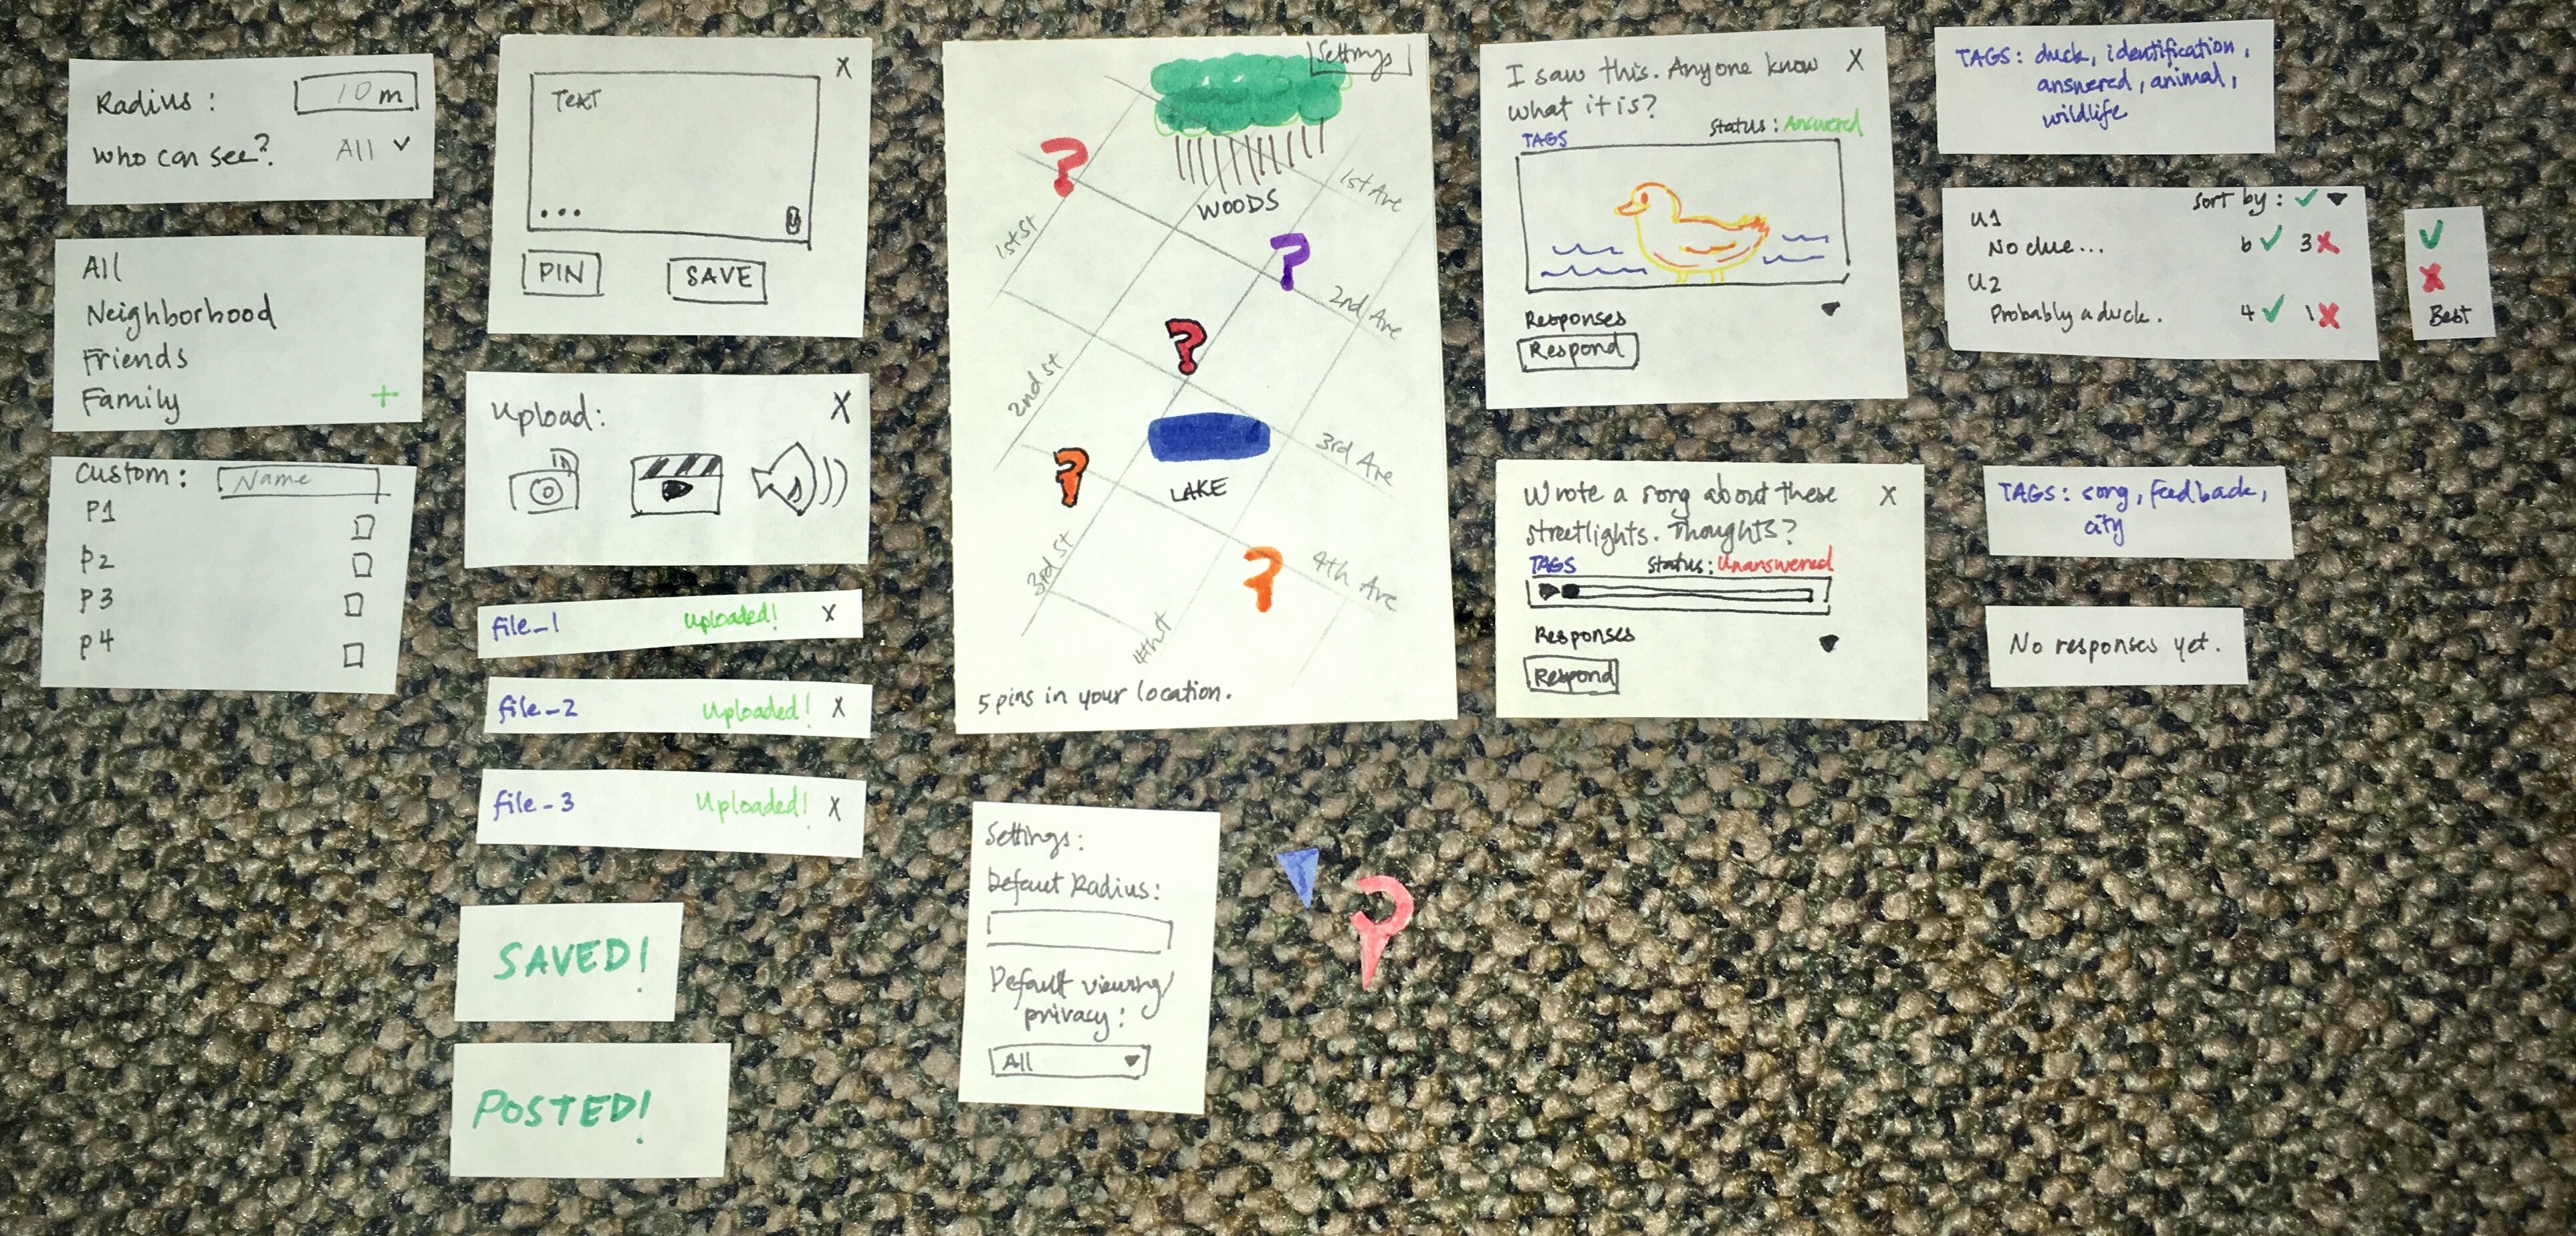
Here is a link to a larger version.
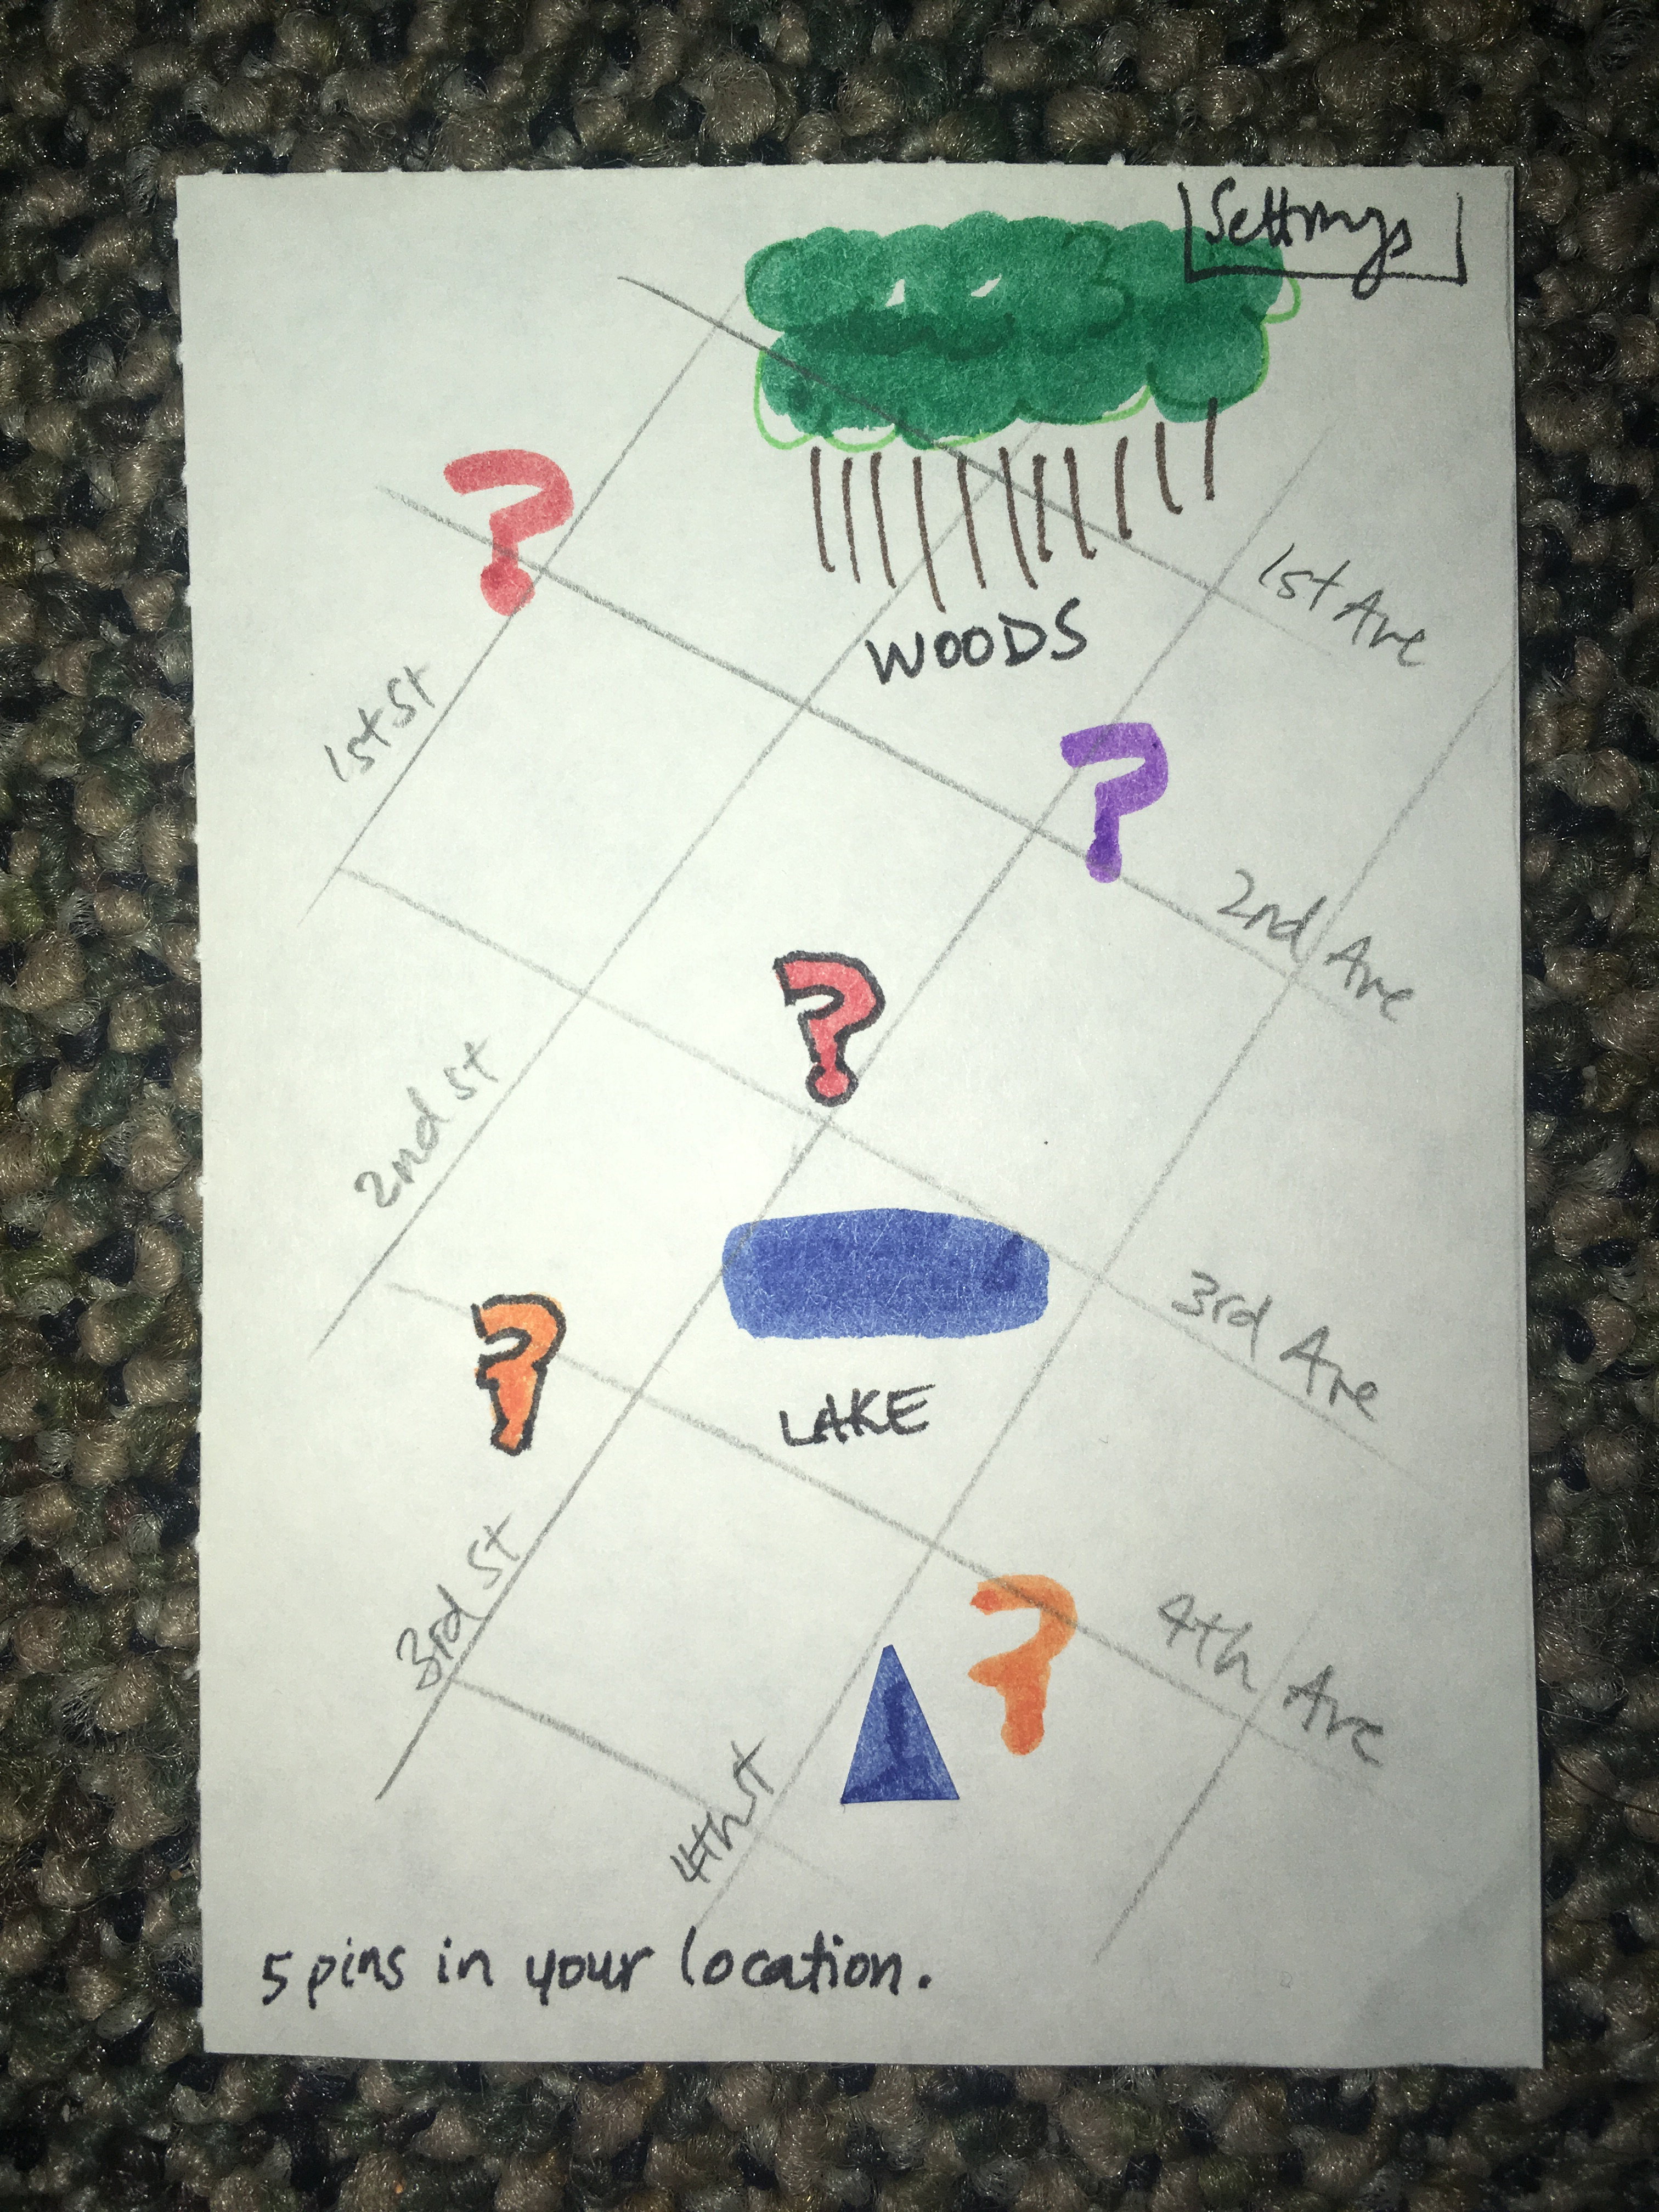
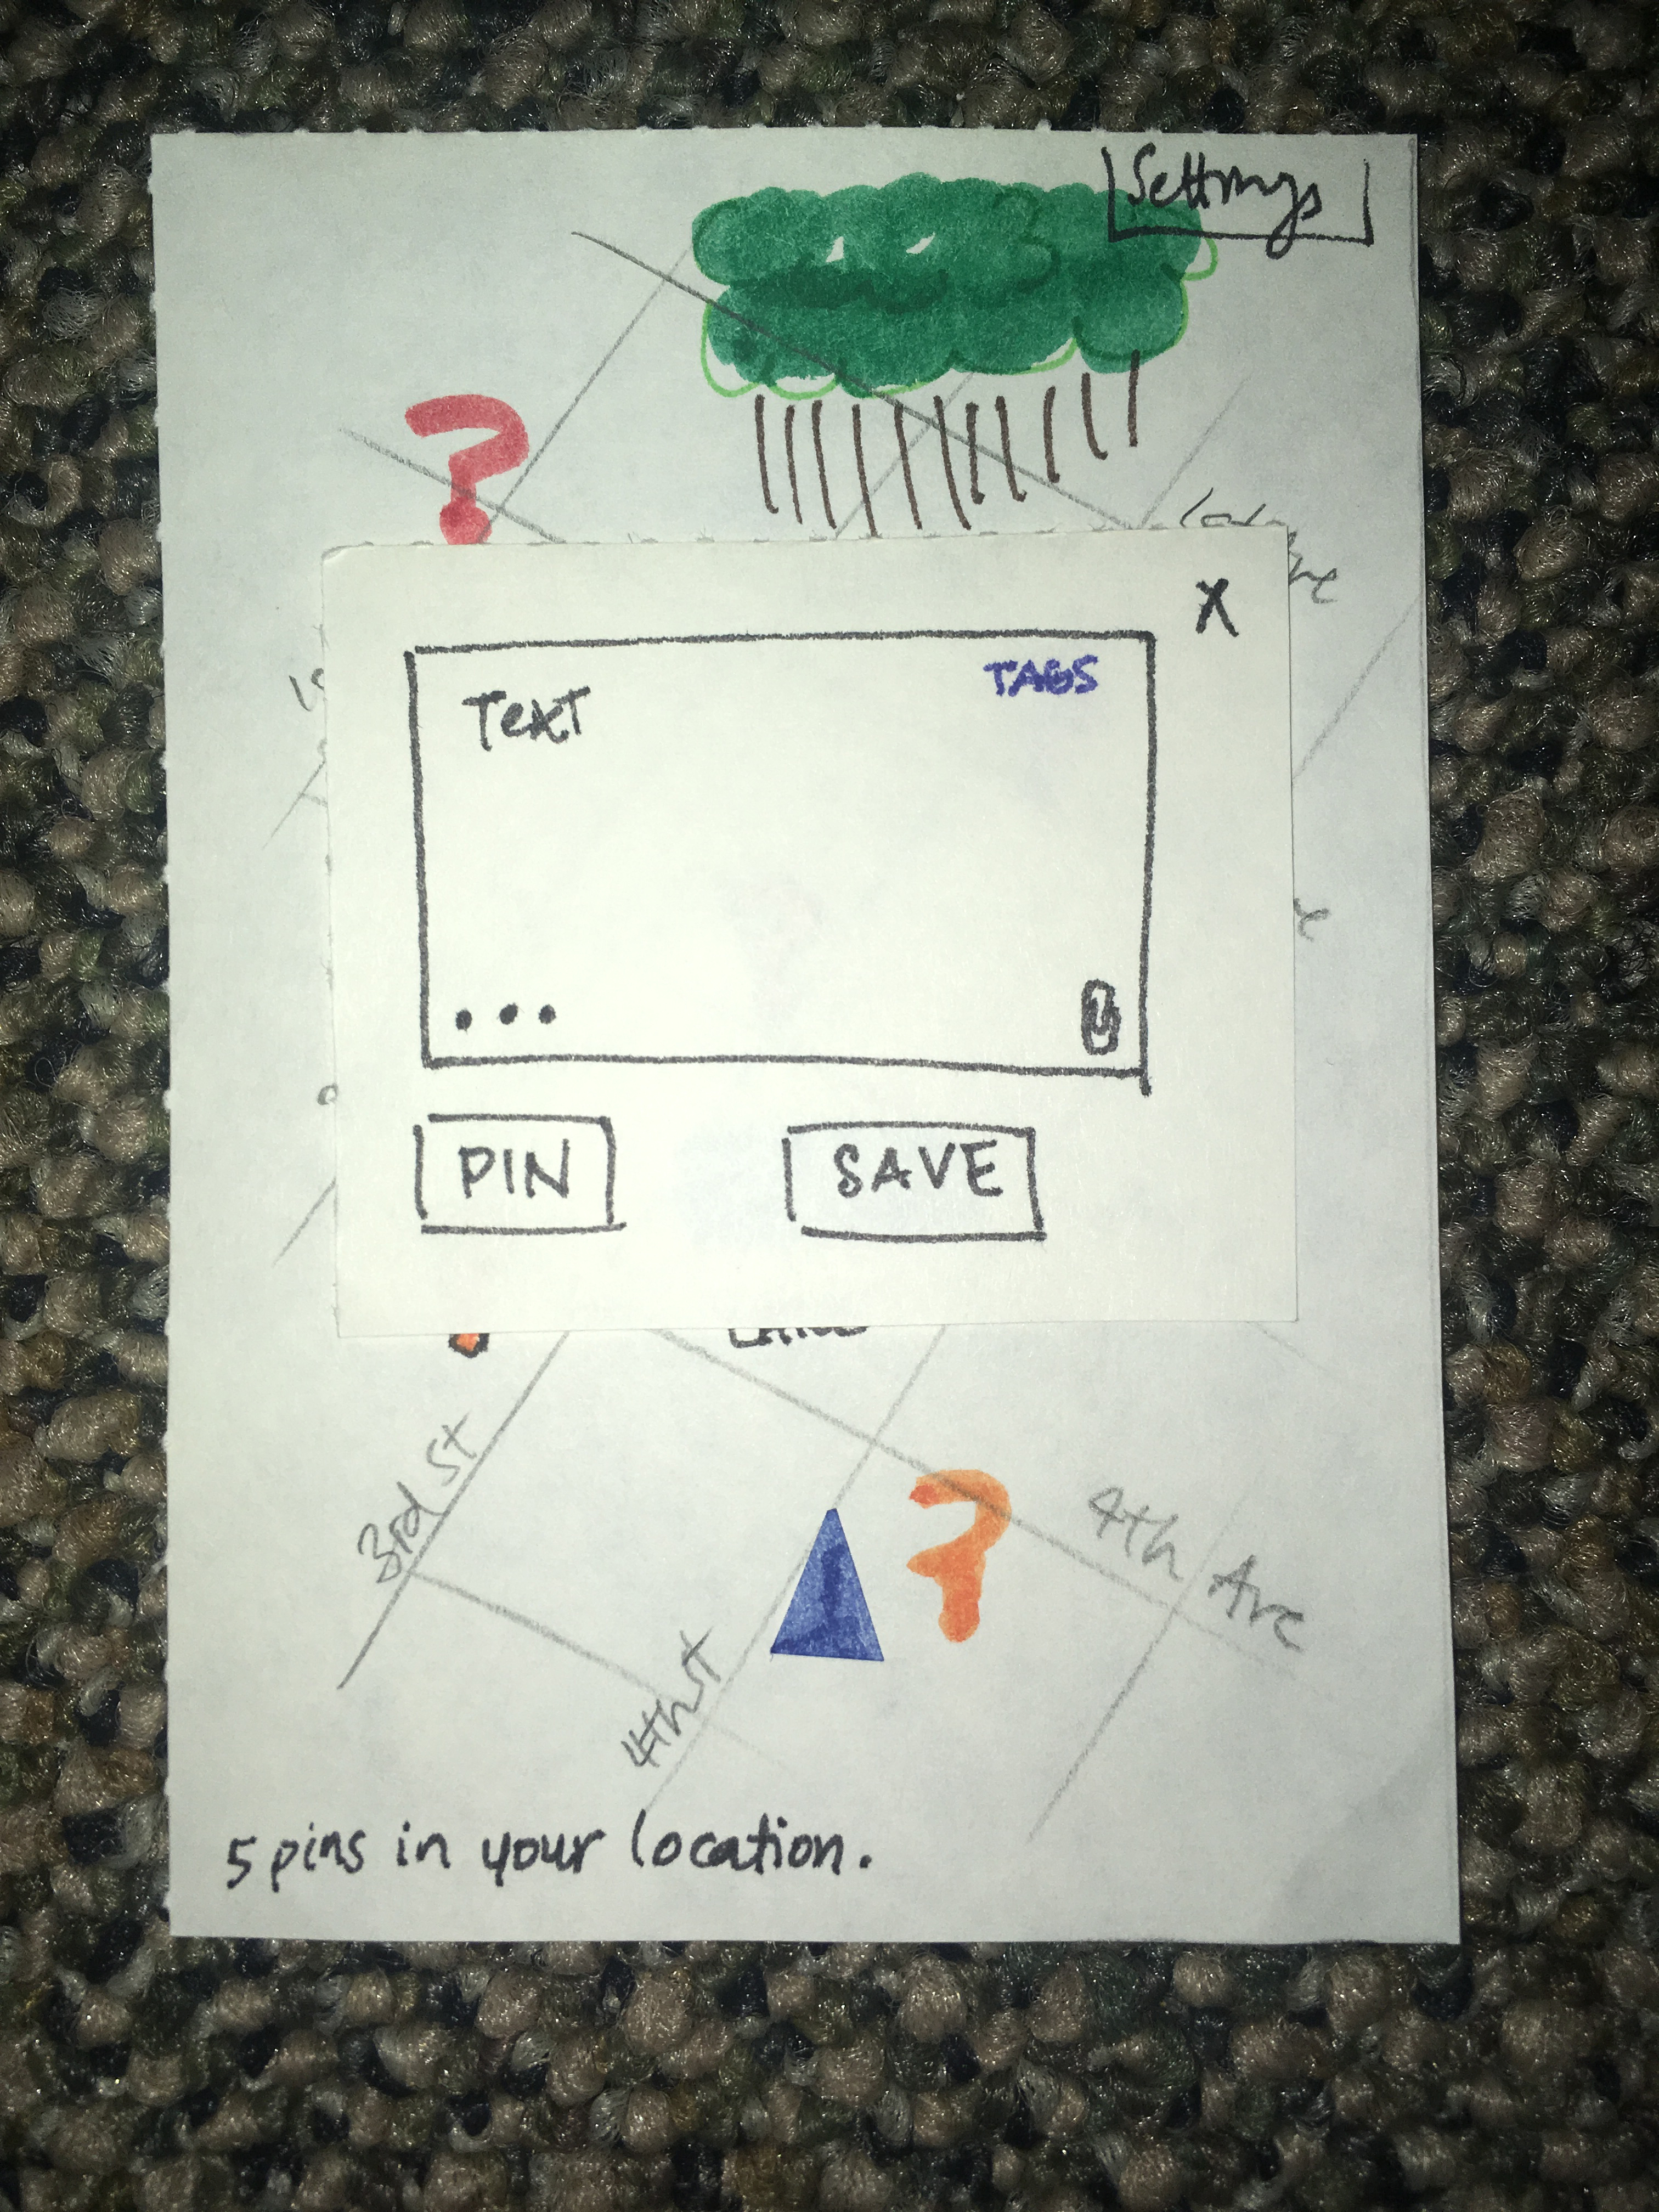
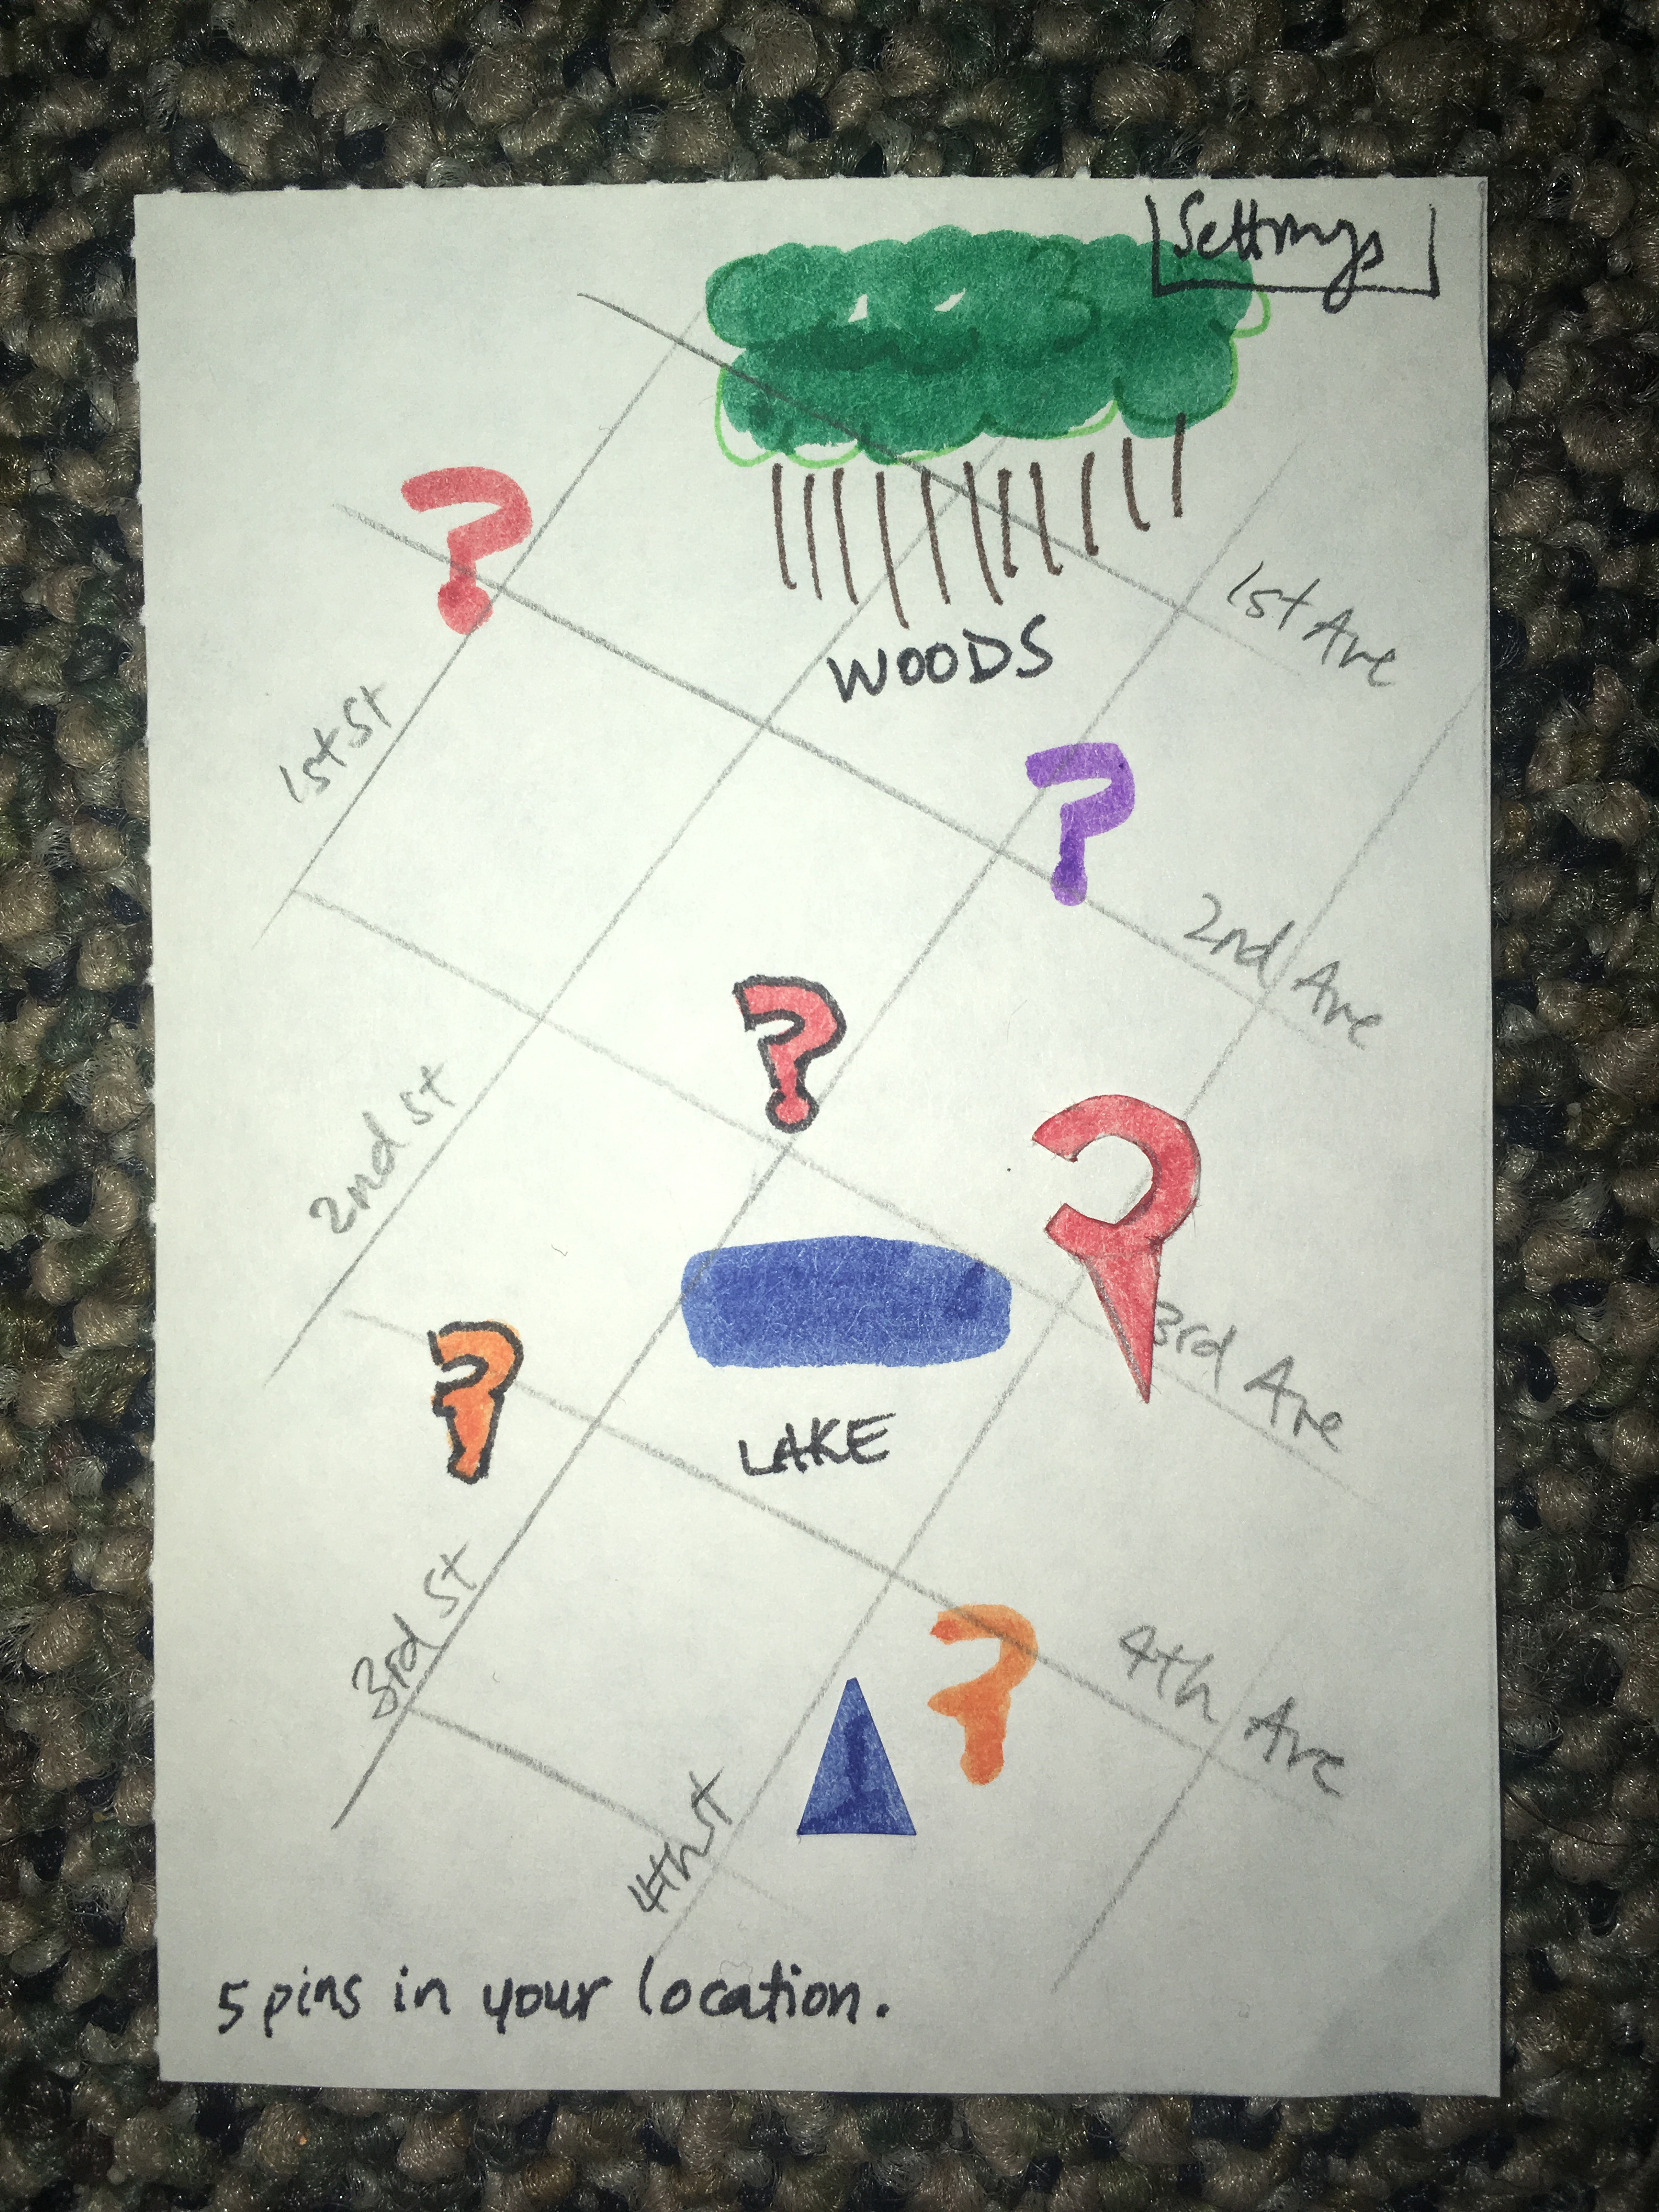
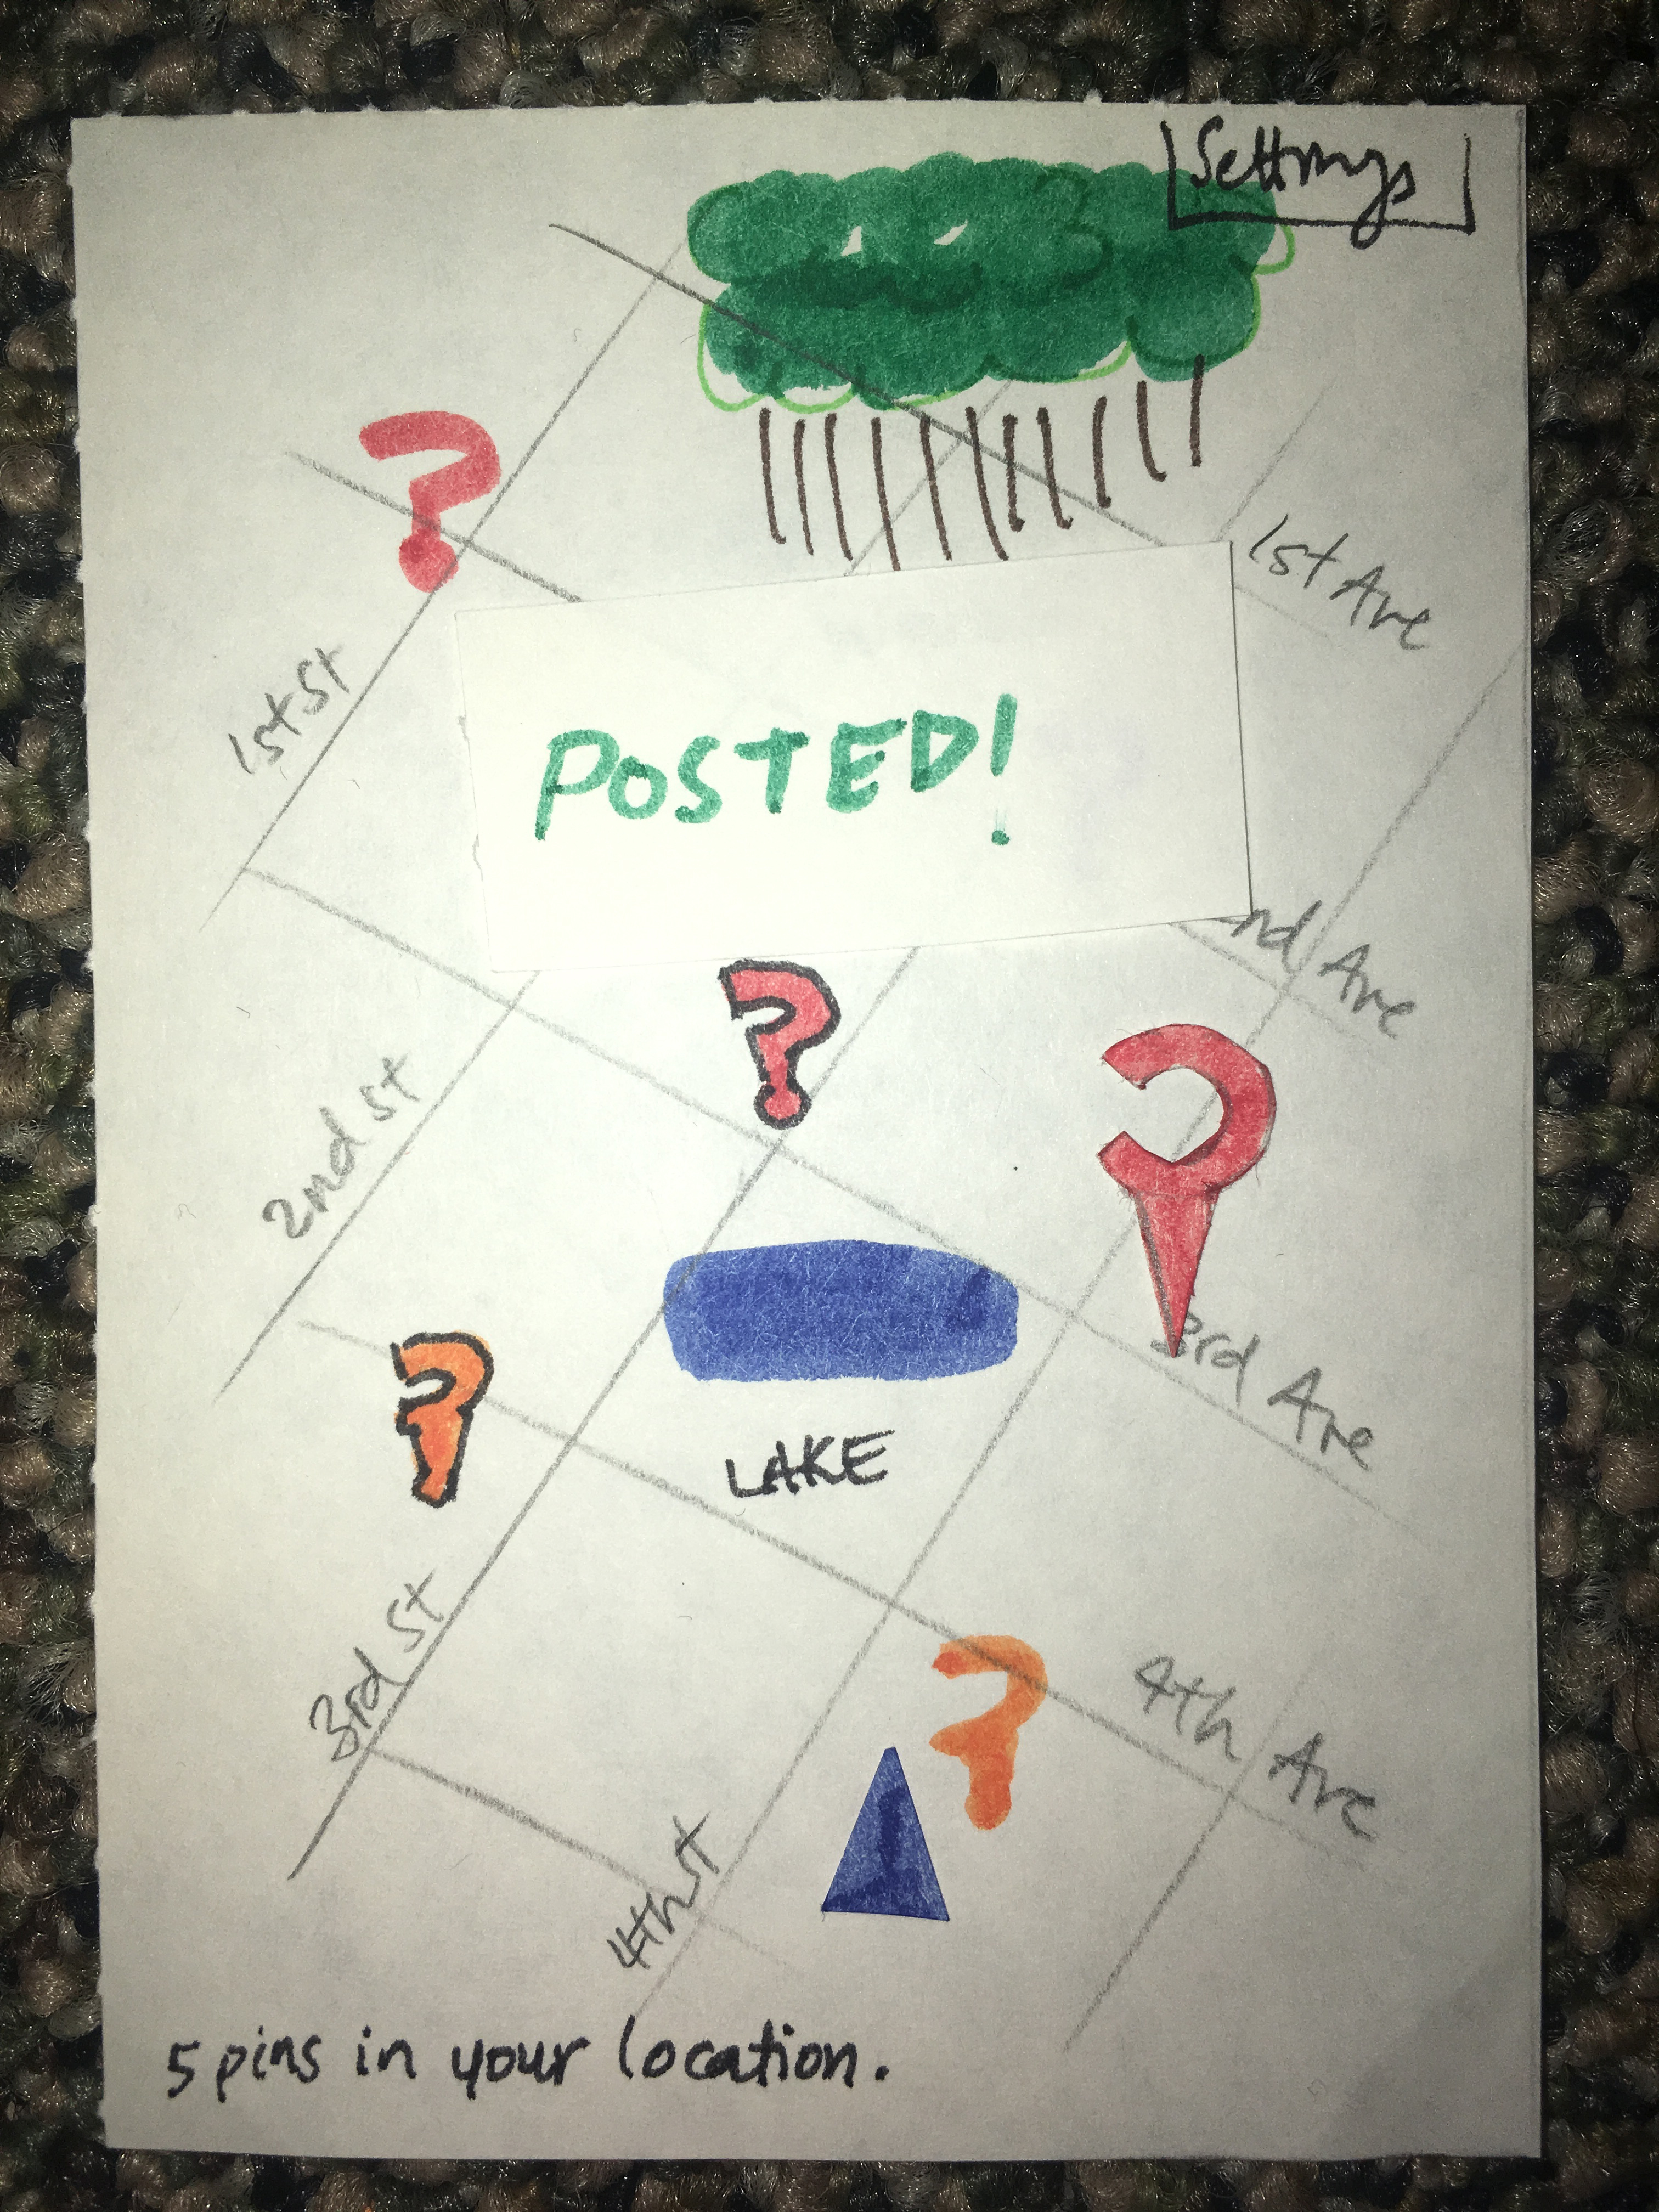
Opening screen. The blue triangle represents current position. The overall background is a map of the area the user is currently in. Pins are visible to indicate other user activity.
Task 1: Asking a Question
Clicking on a location creates a tentative pin at that location.
A text box appears where the user can write their post. Clicking the X will exit the box.
The user can then drag and drop the pin to a new location. This is enabled when tapping outside the text entry pop-up.
Dropping the pin will reopen the text box.
Clicking the TAGS button allows a user to add relevant tags to their post. The tag-adding window will disappear once the user clicks on the text entry box.
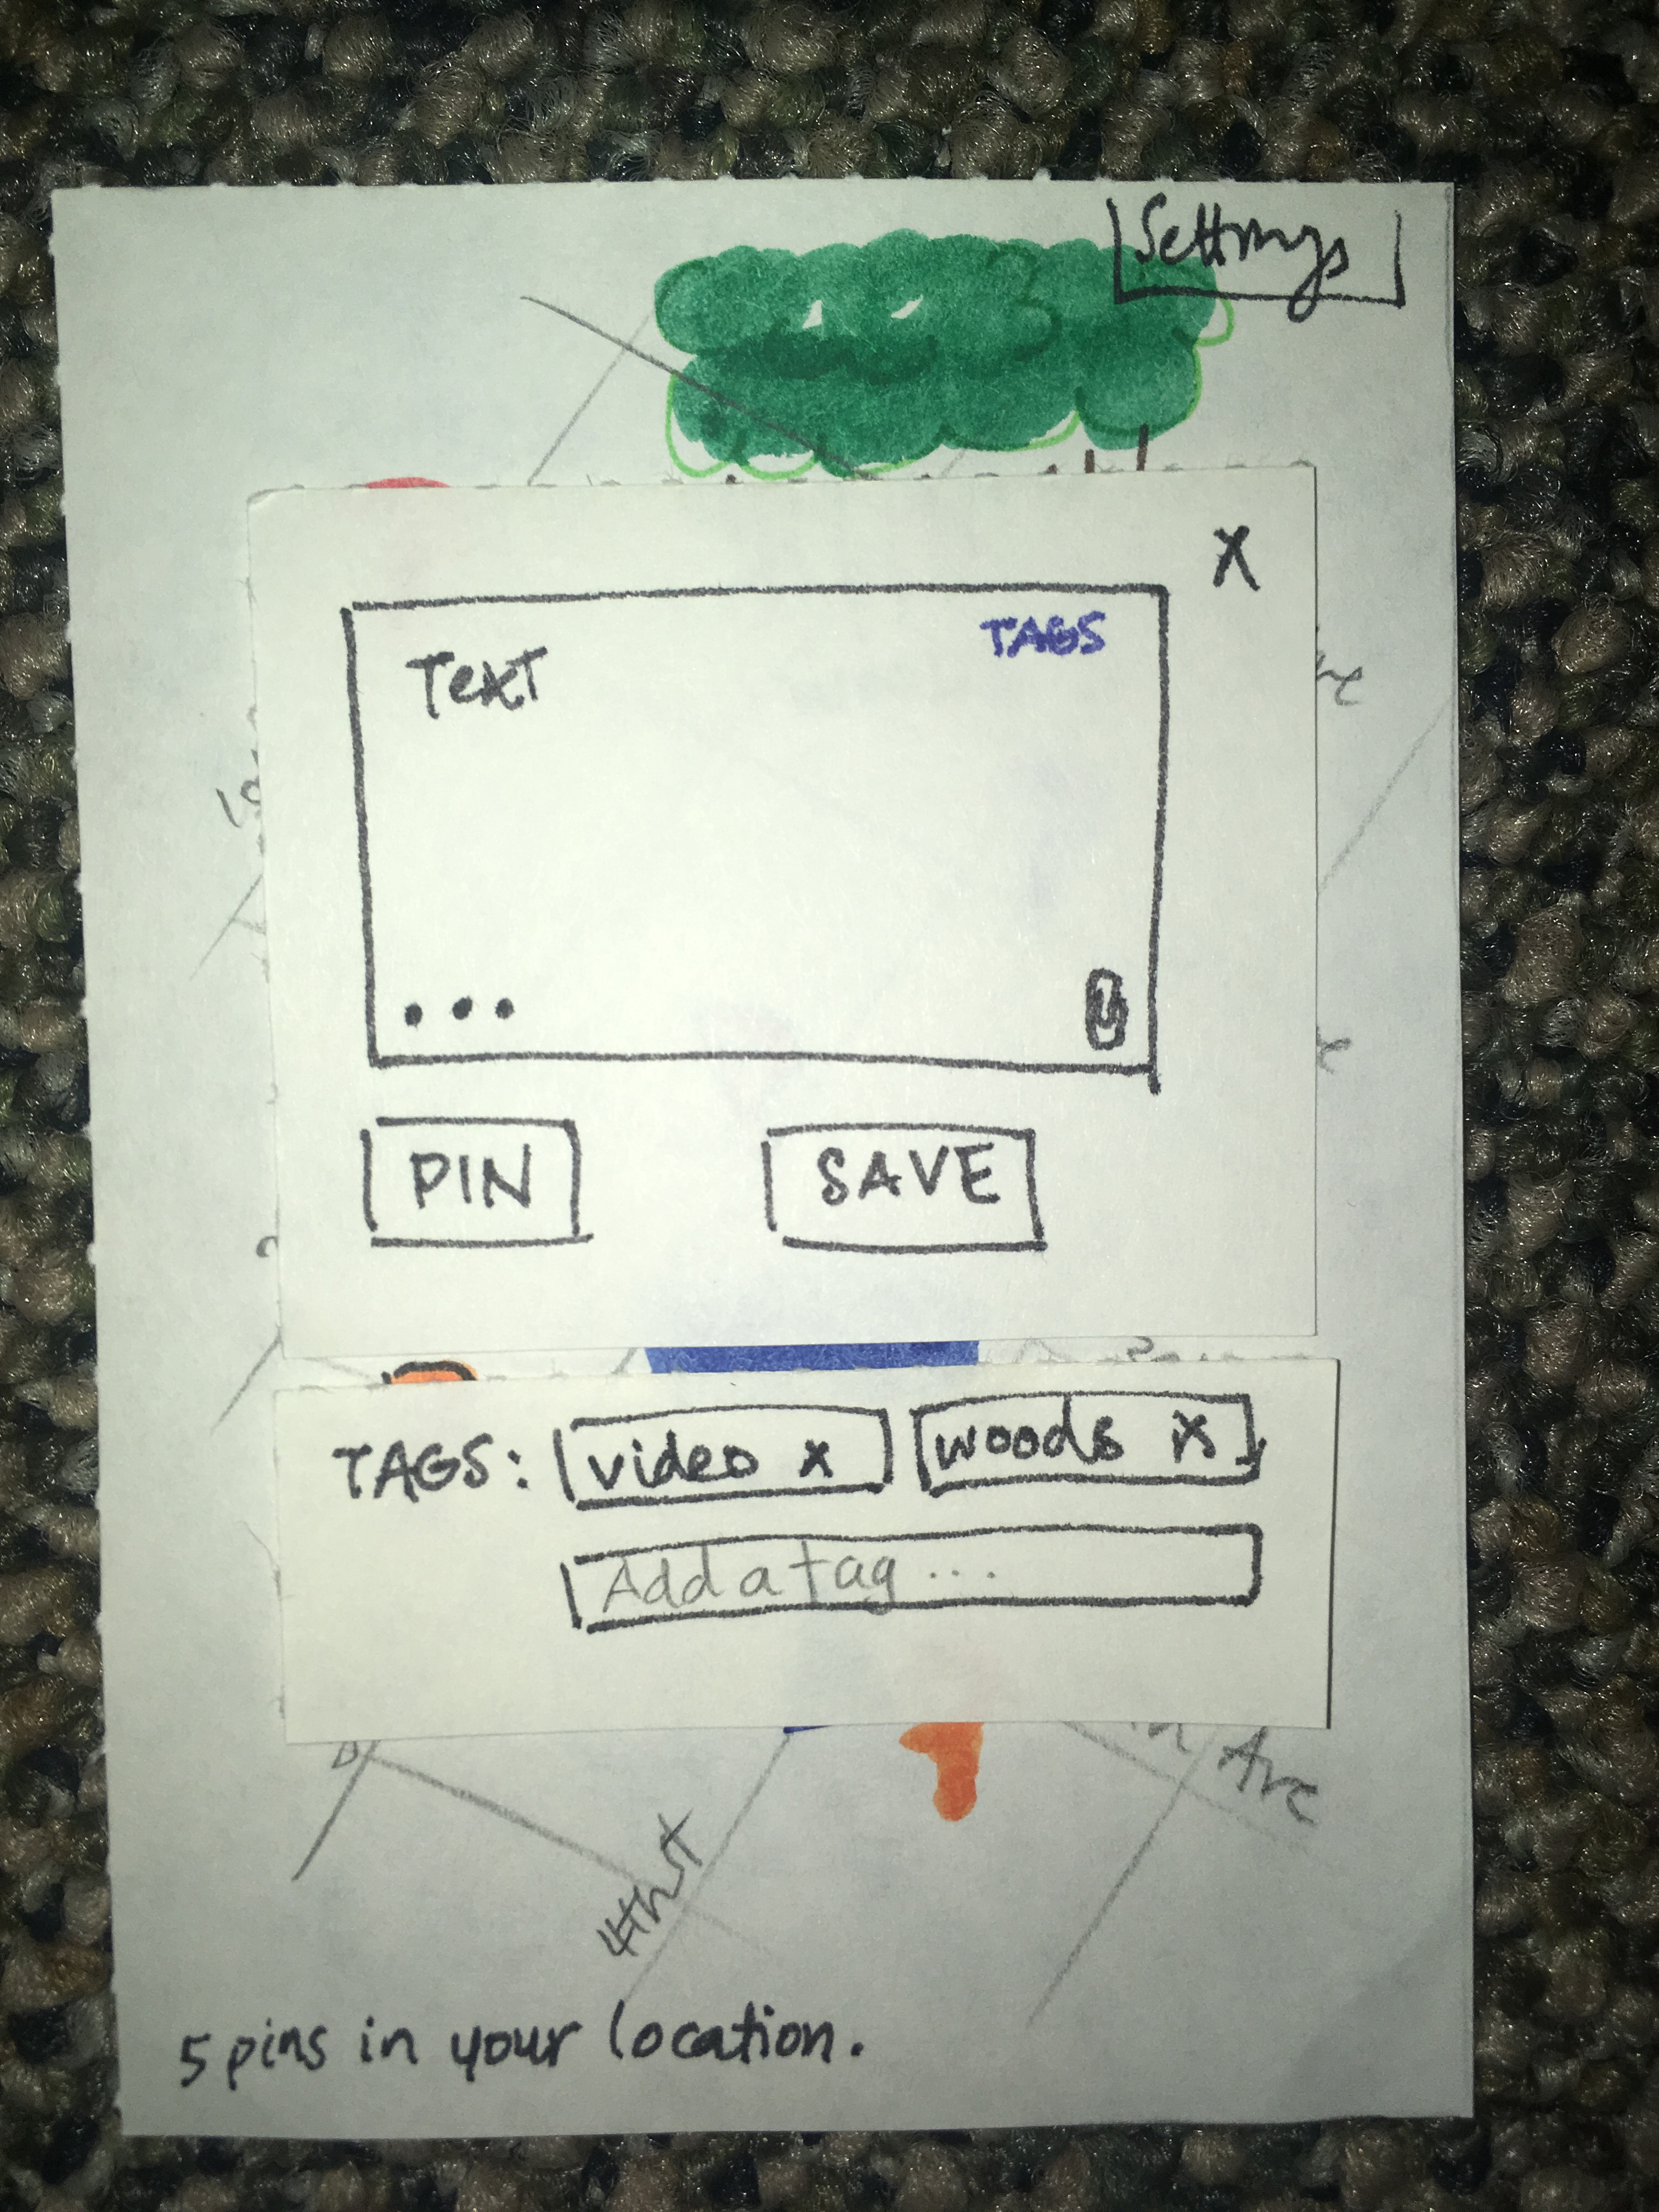
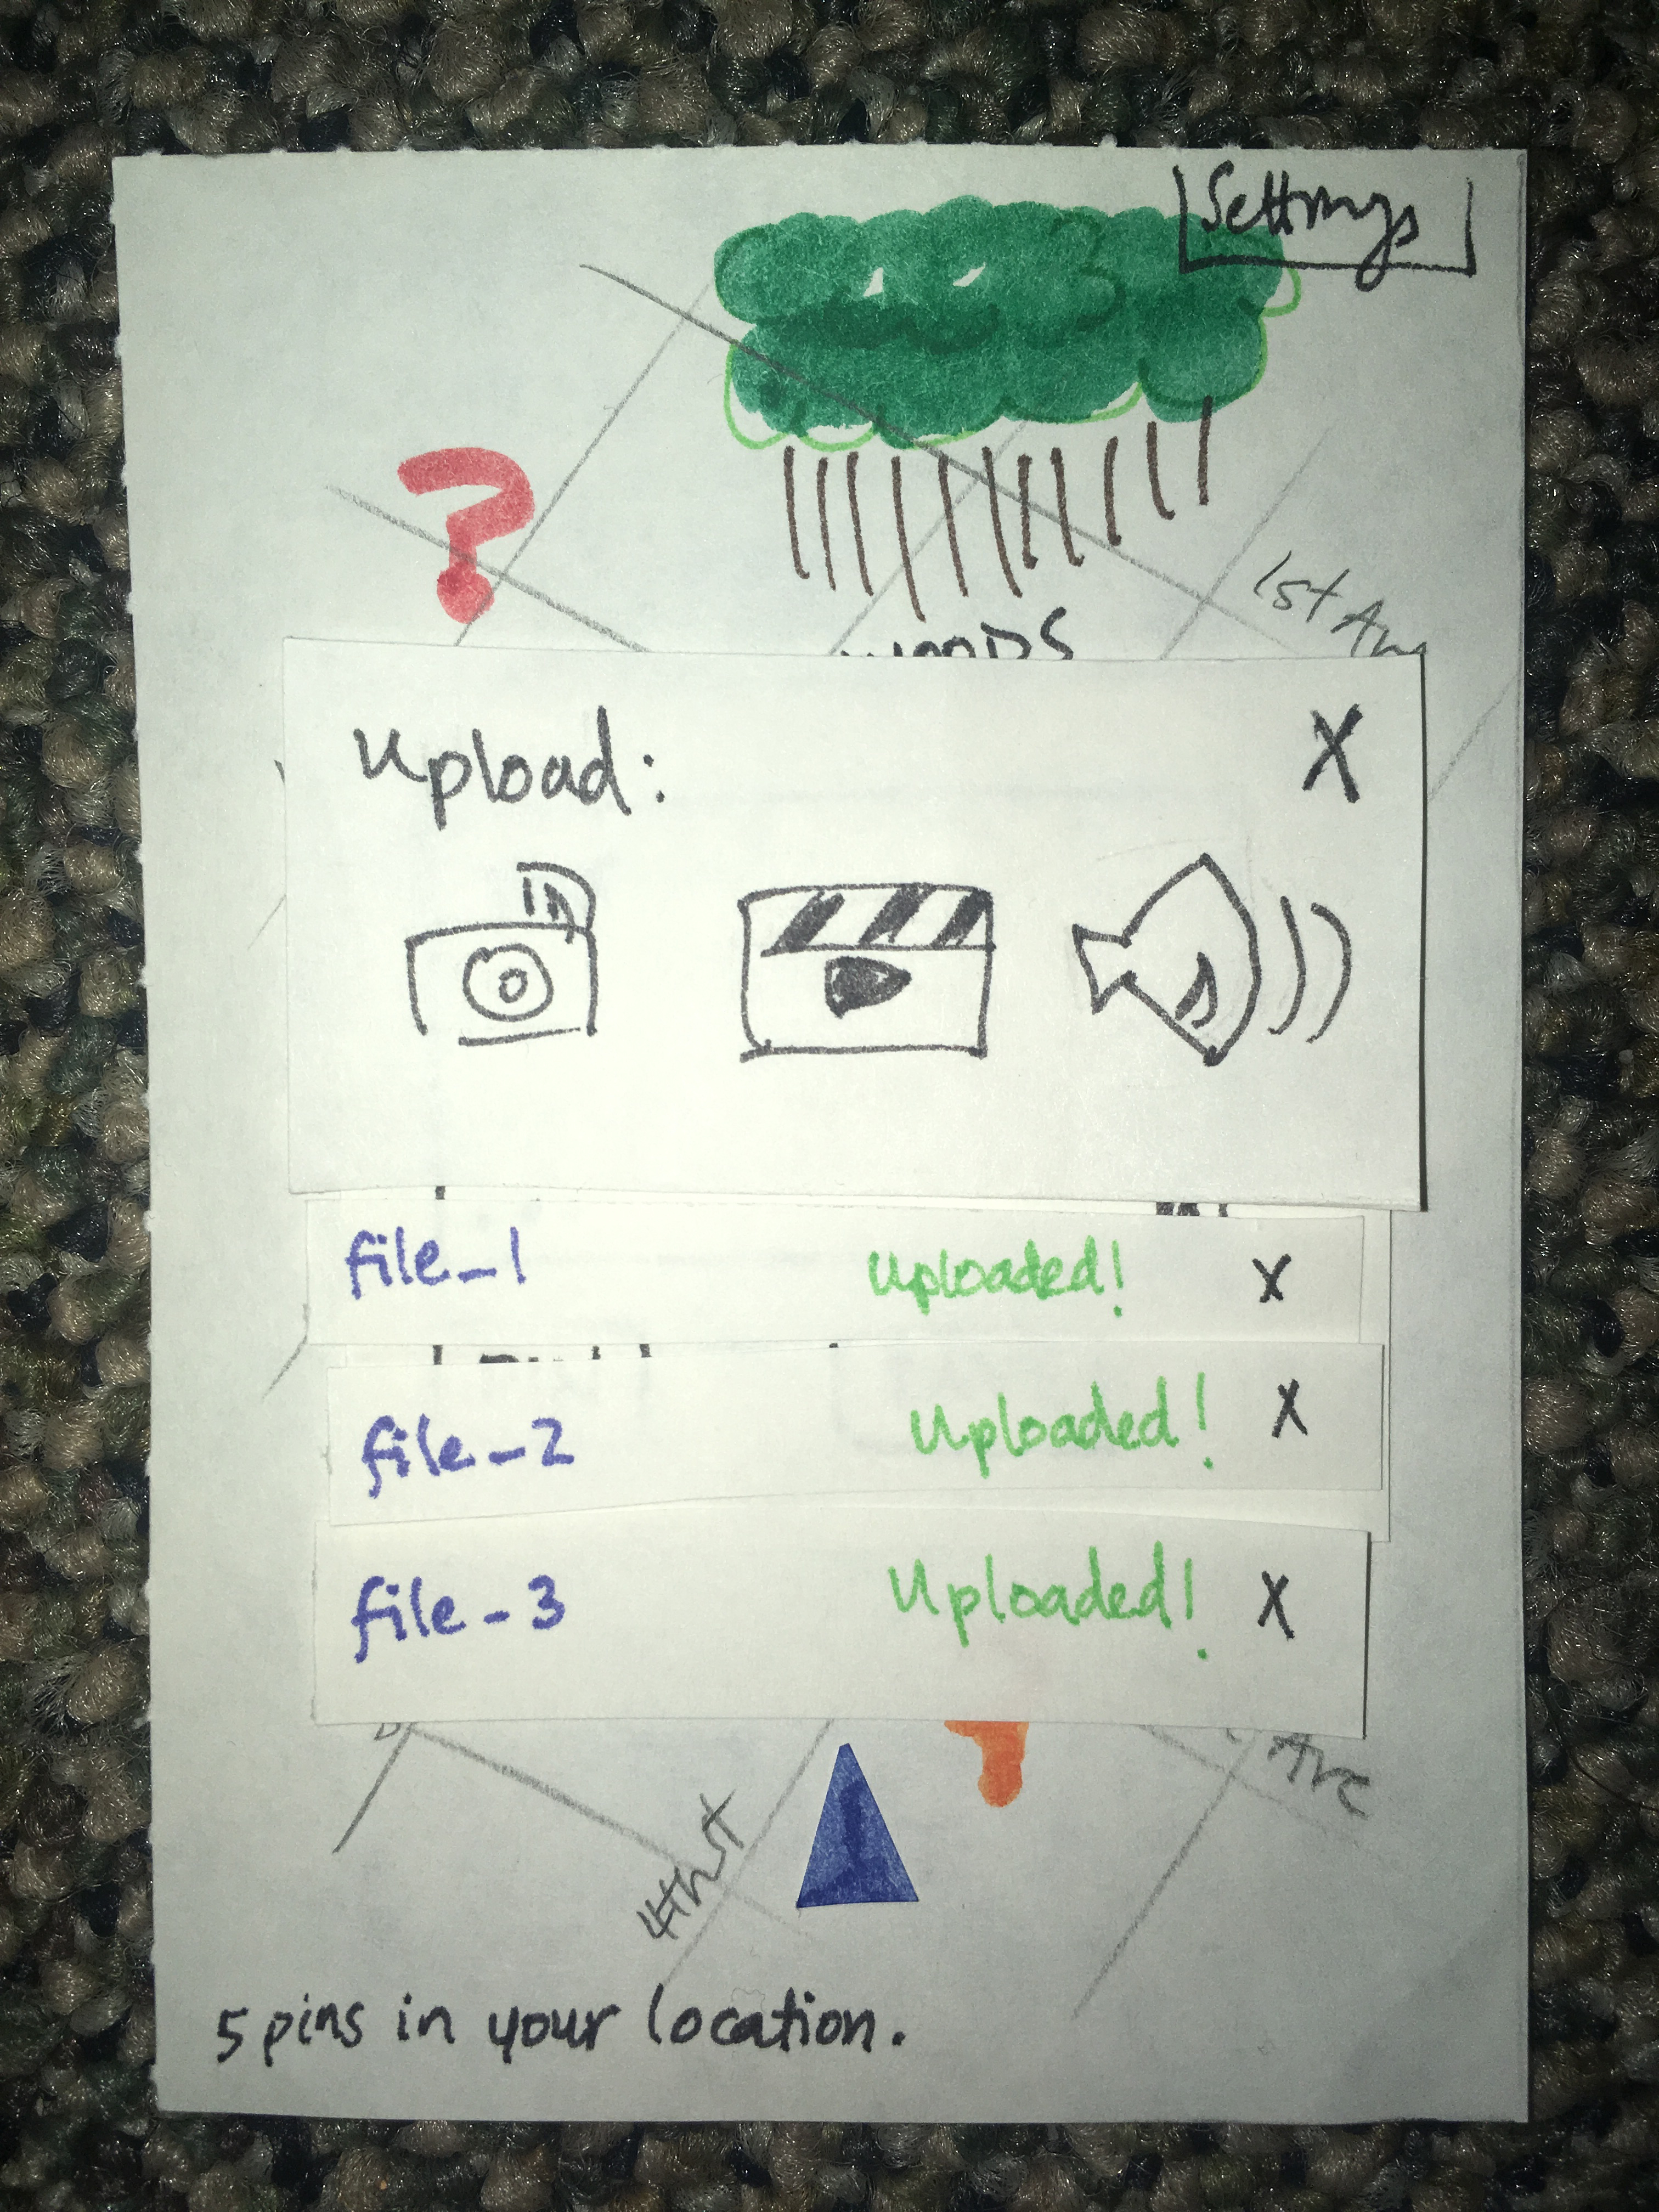
Clicking the paperclip allows the user to upload other media, including photos, video, and sound bites. Media can be attached either by looking through items saved on the device or by capturing content immediately from the app.
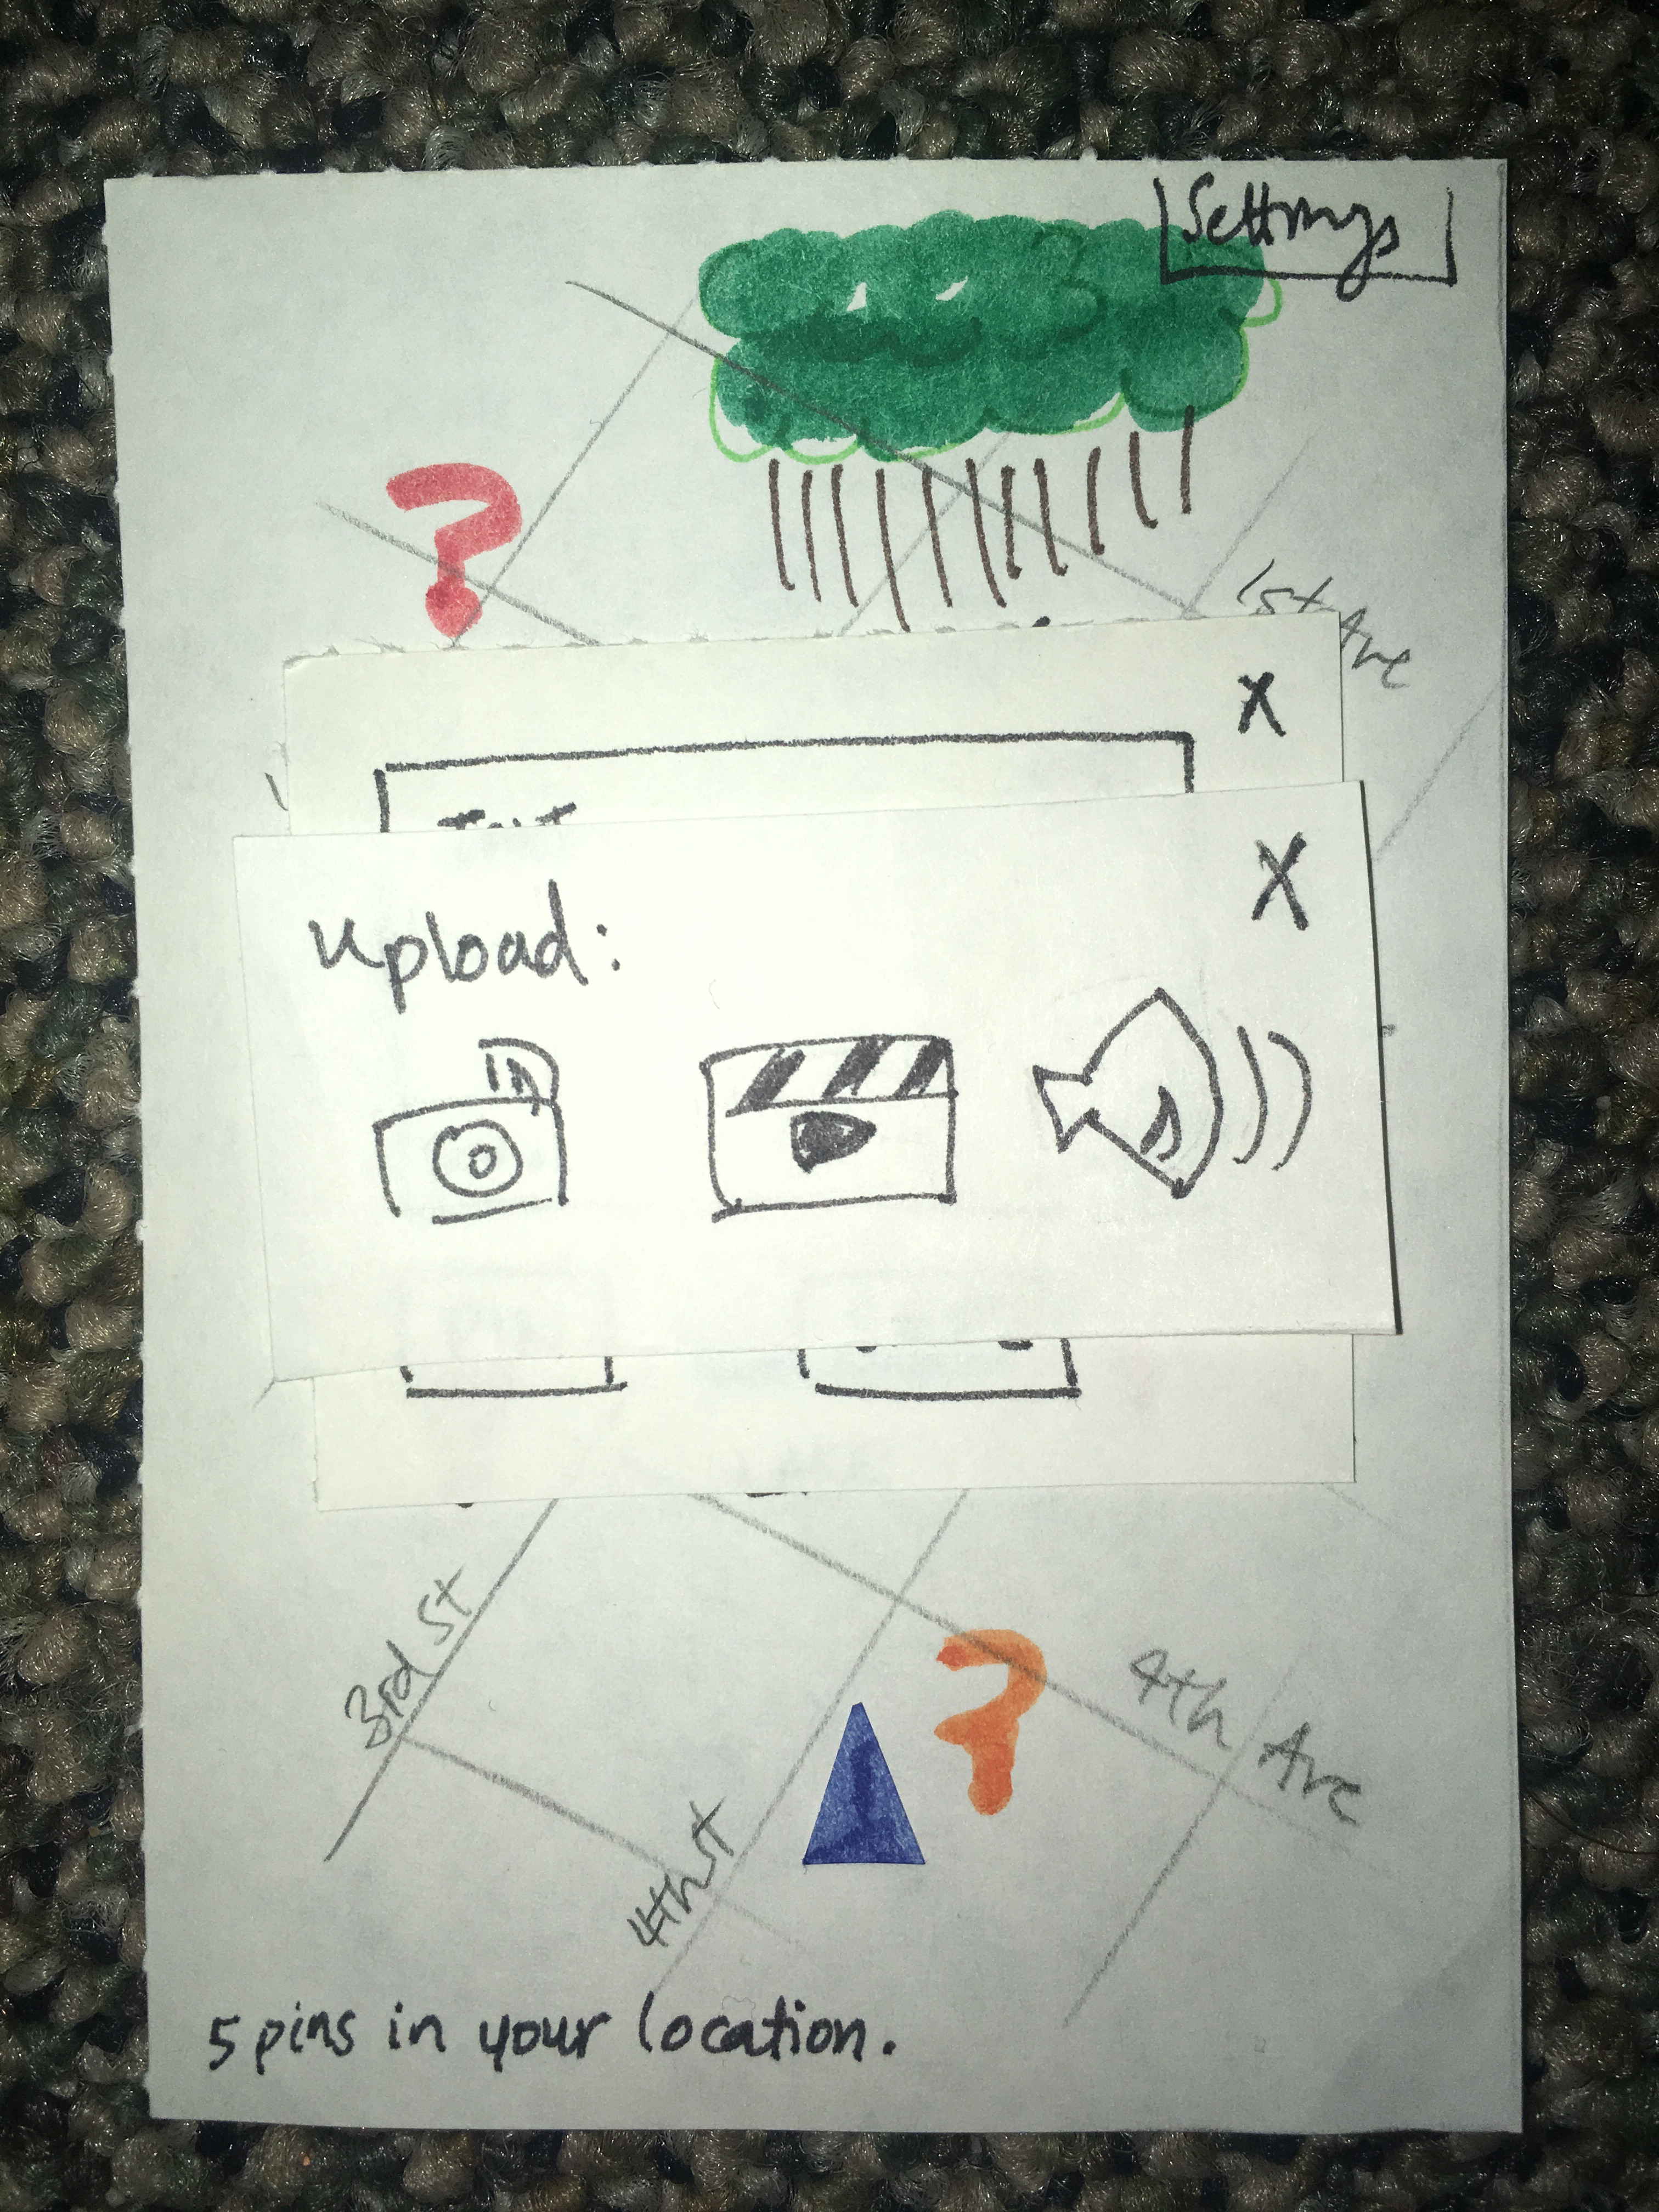
The files are uploaded. Clicking the X next to each file removes that file from the post, and the X on the upload box returns the user to the text box.
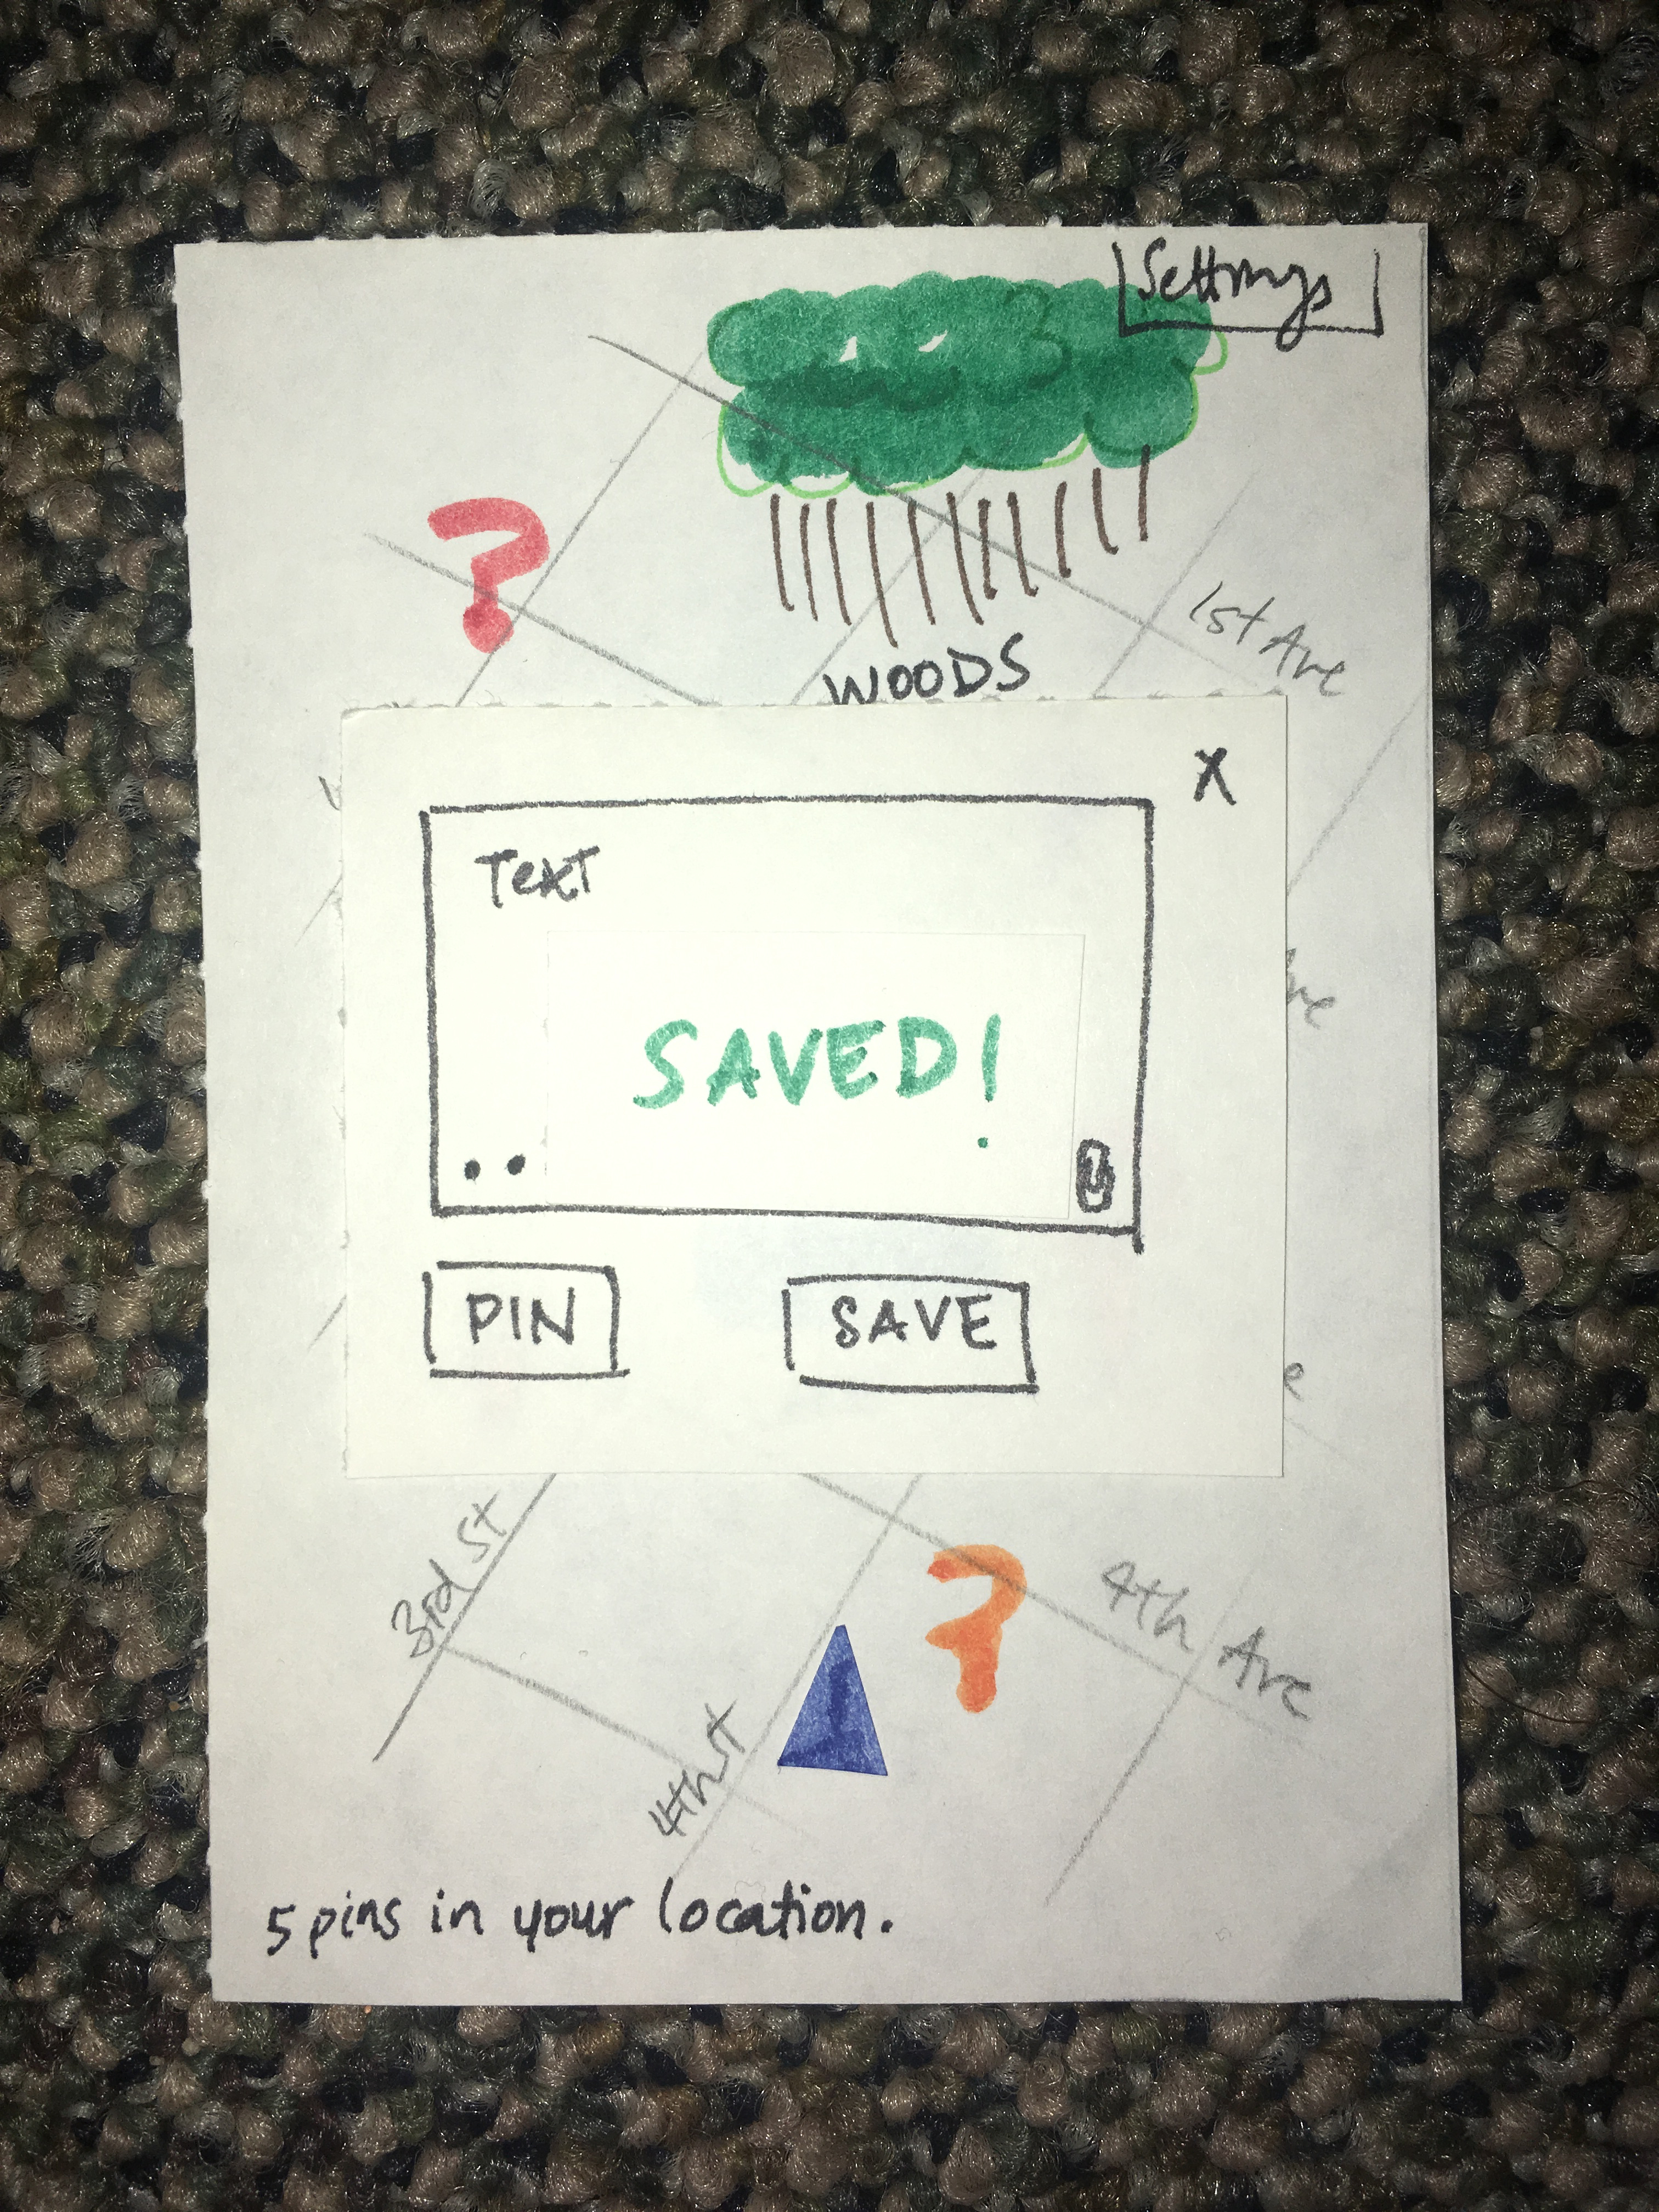
Clicking the SAVE button allows the user to save a pin at a location for later editing.
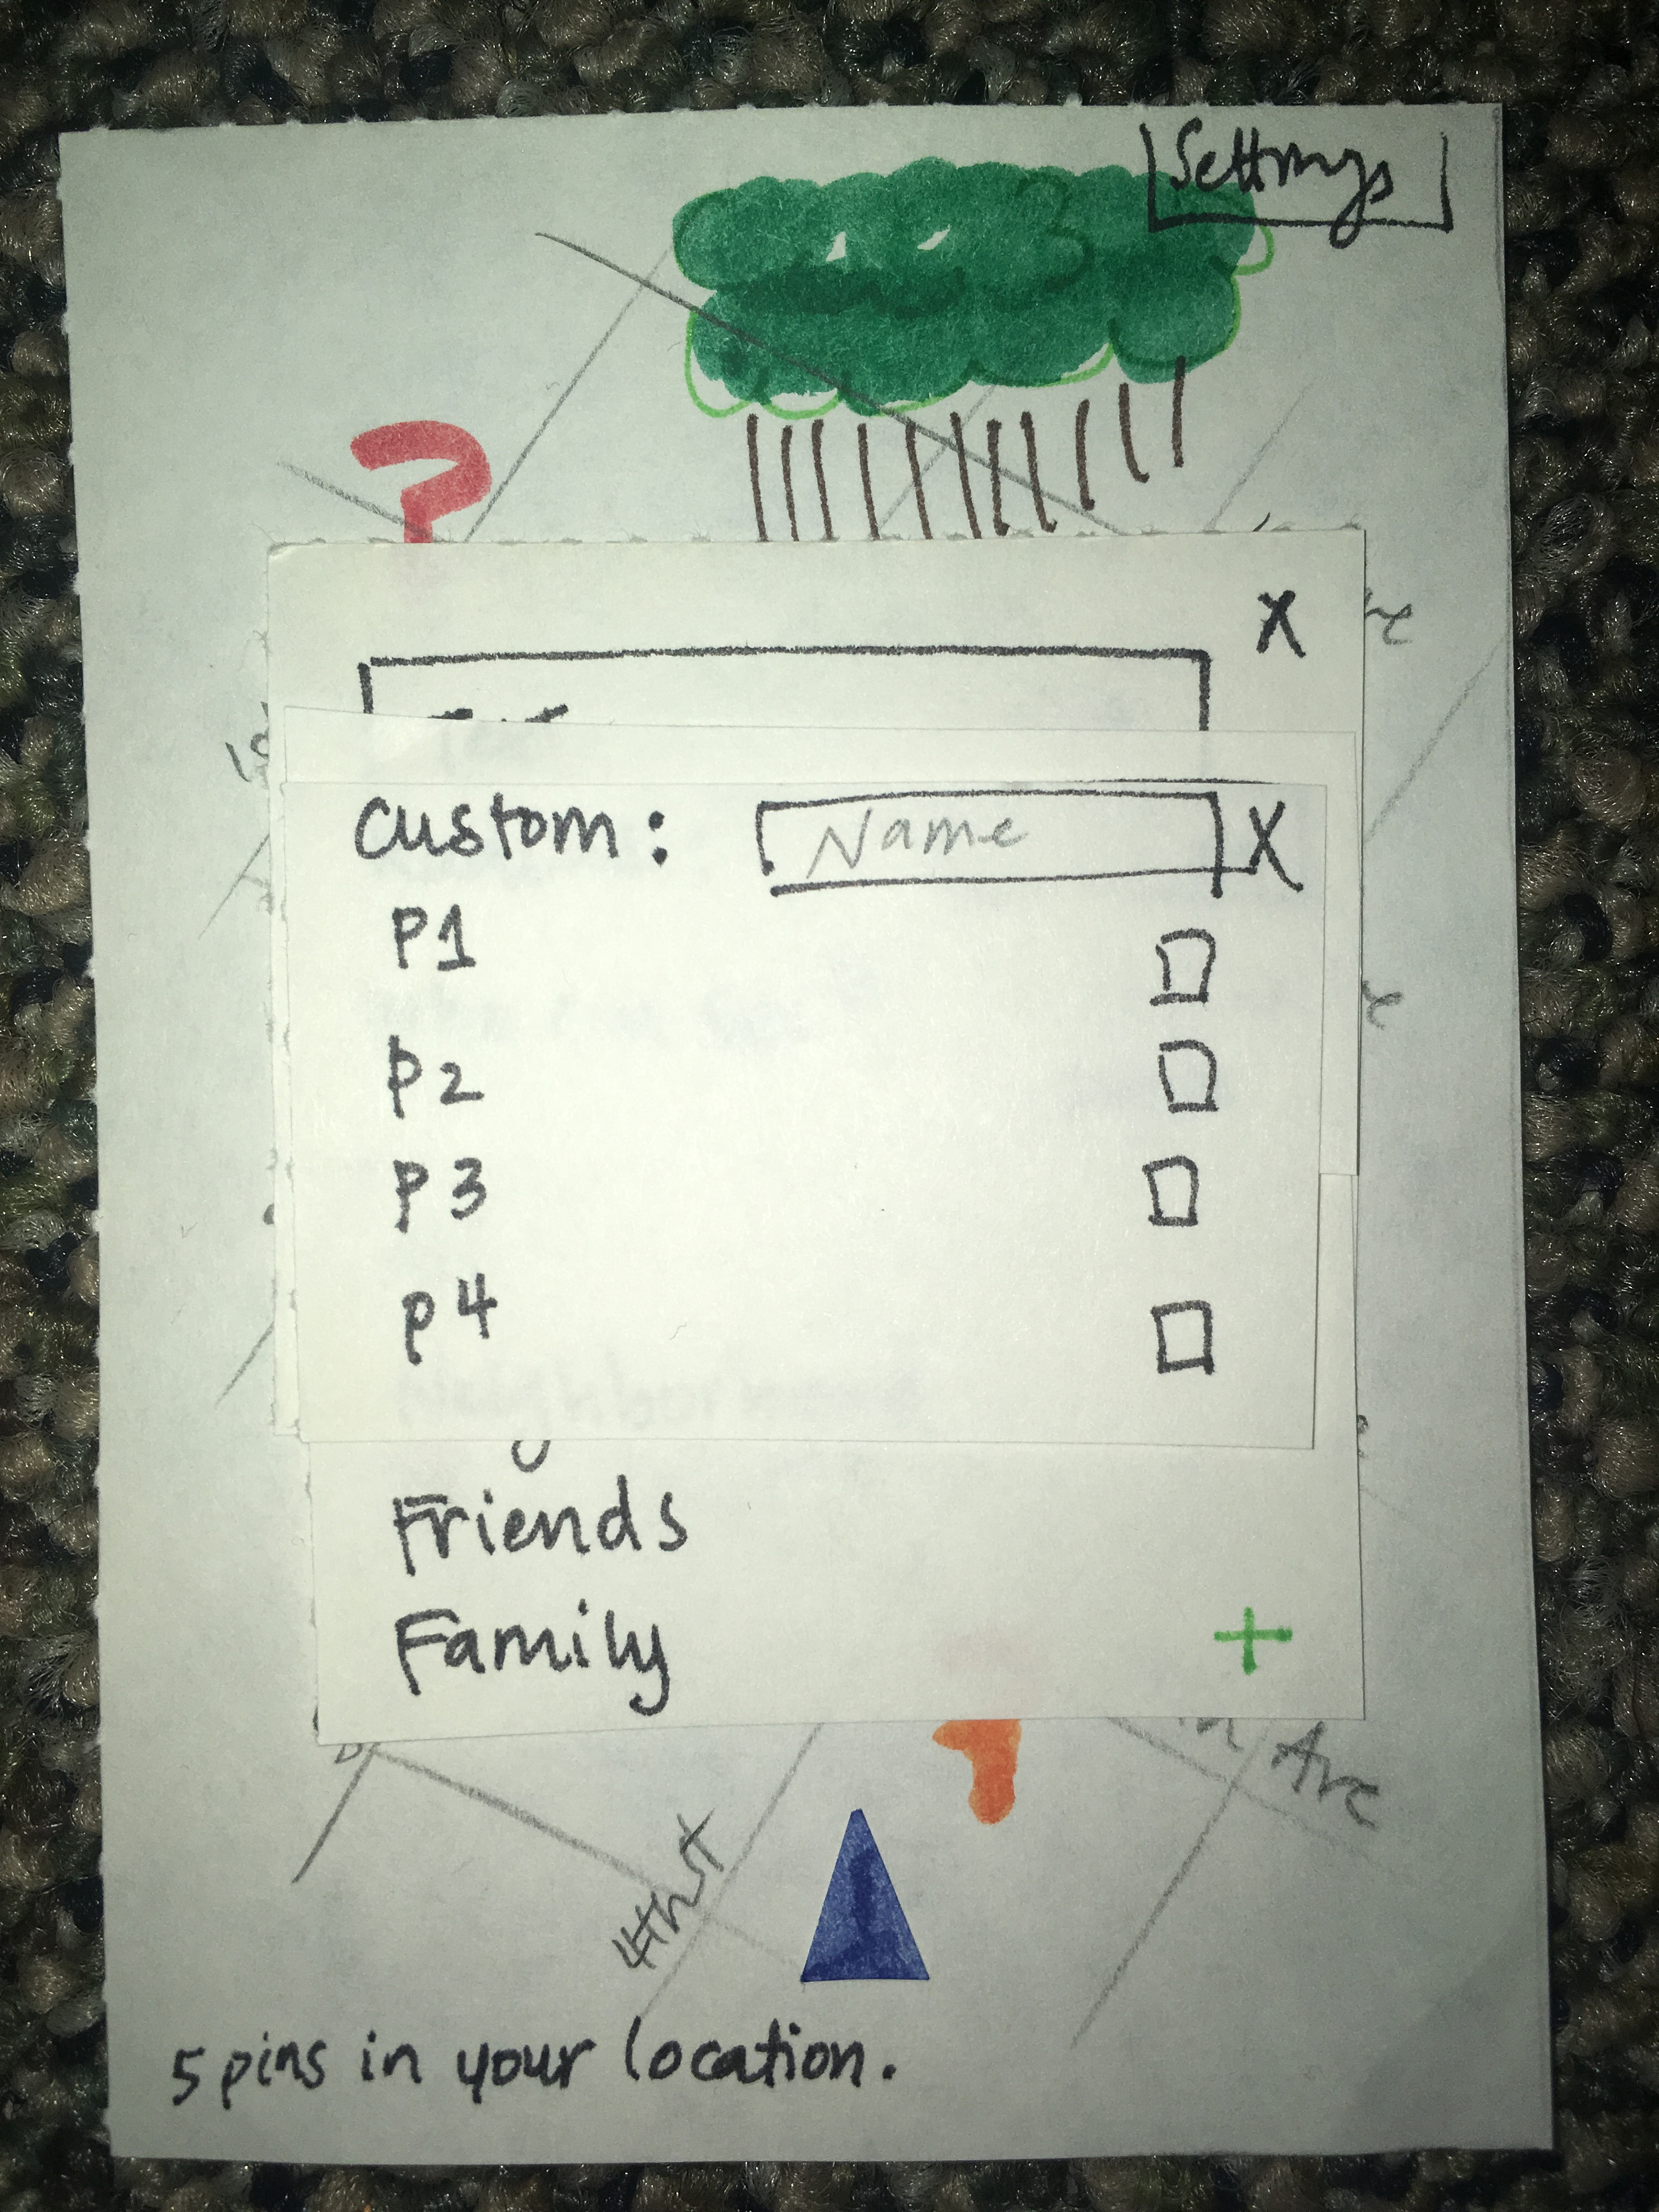
Clicking the … allows a user to edit privacy and viewing options, including the radius of interaction and who the post is visible to. The user can manually edit the radius, but with a lower threshold of 10m and upper threshold of 5km. Clicking the DONE button confirms the settings.
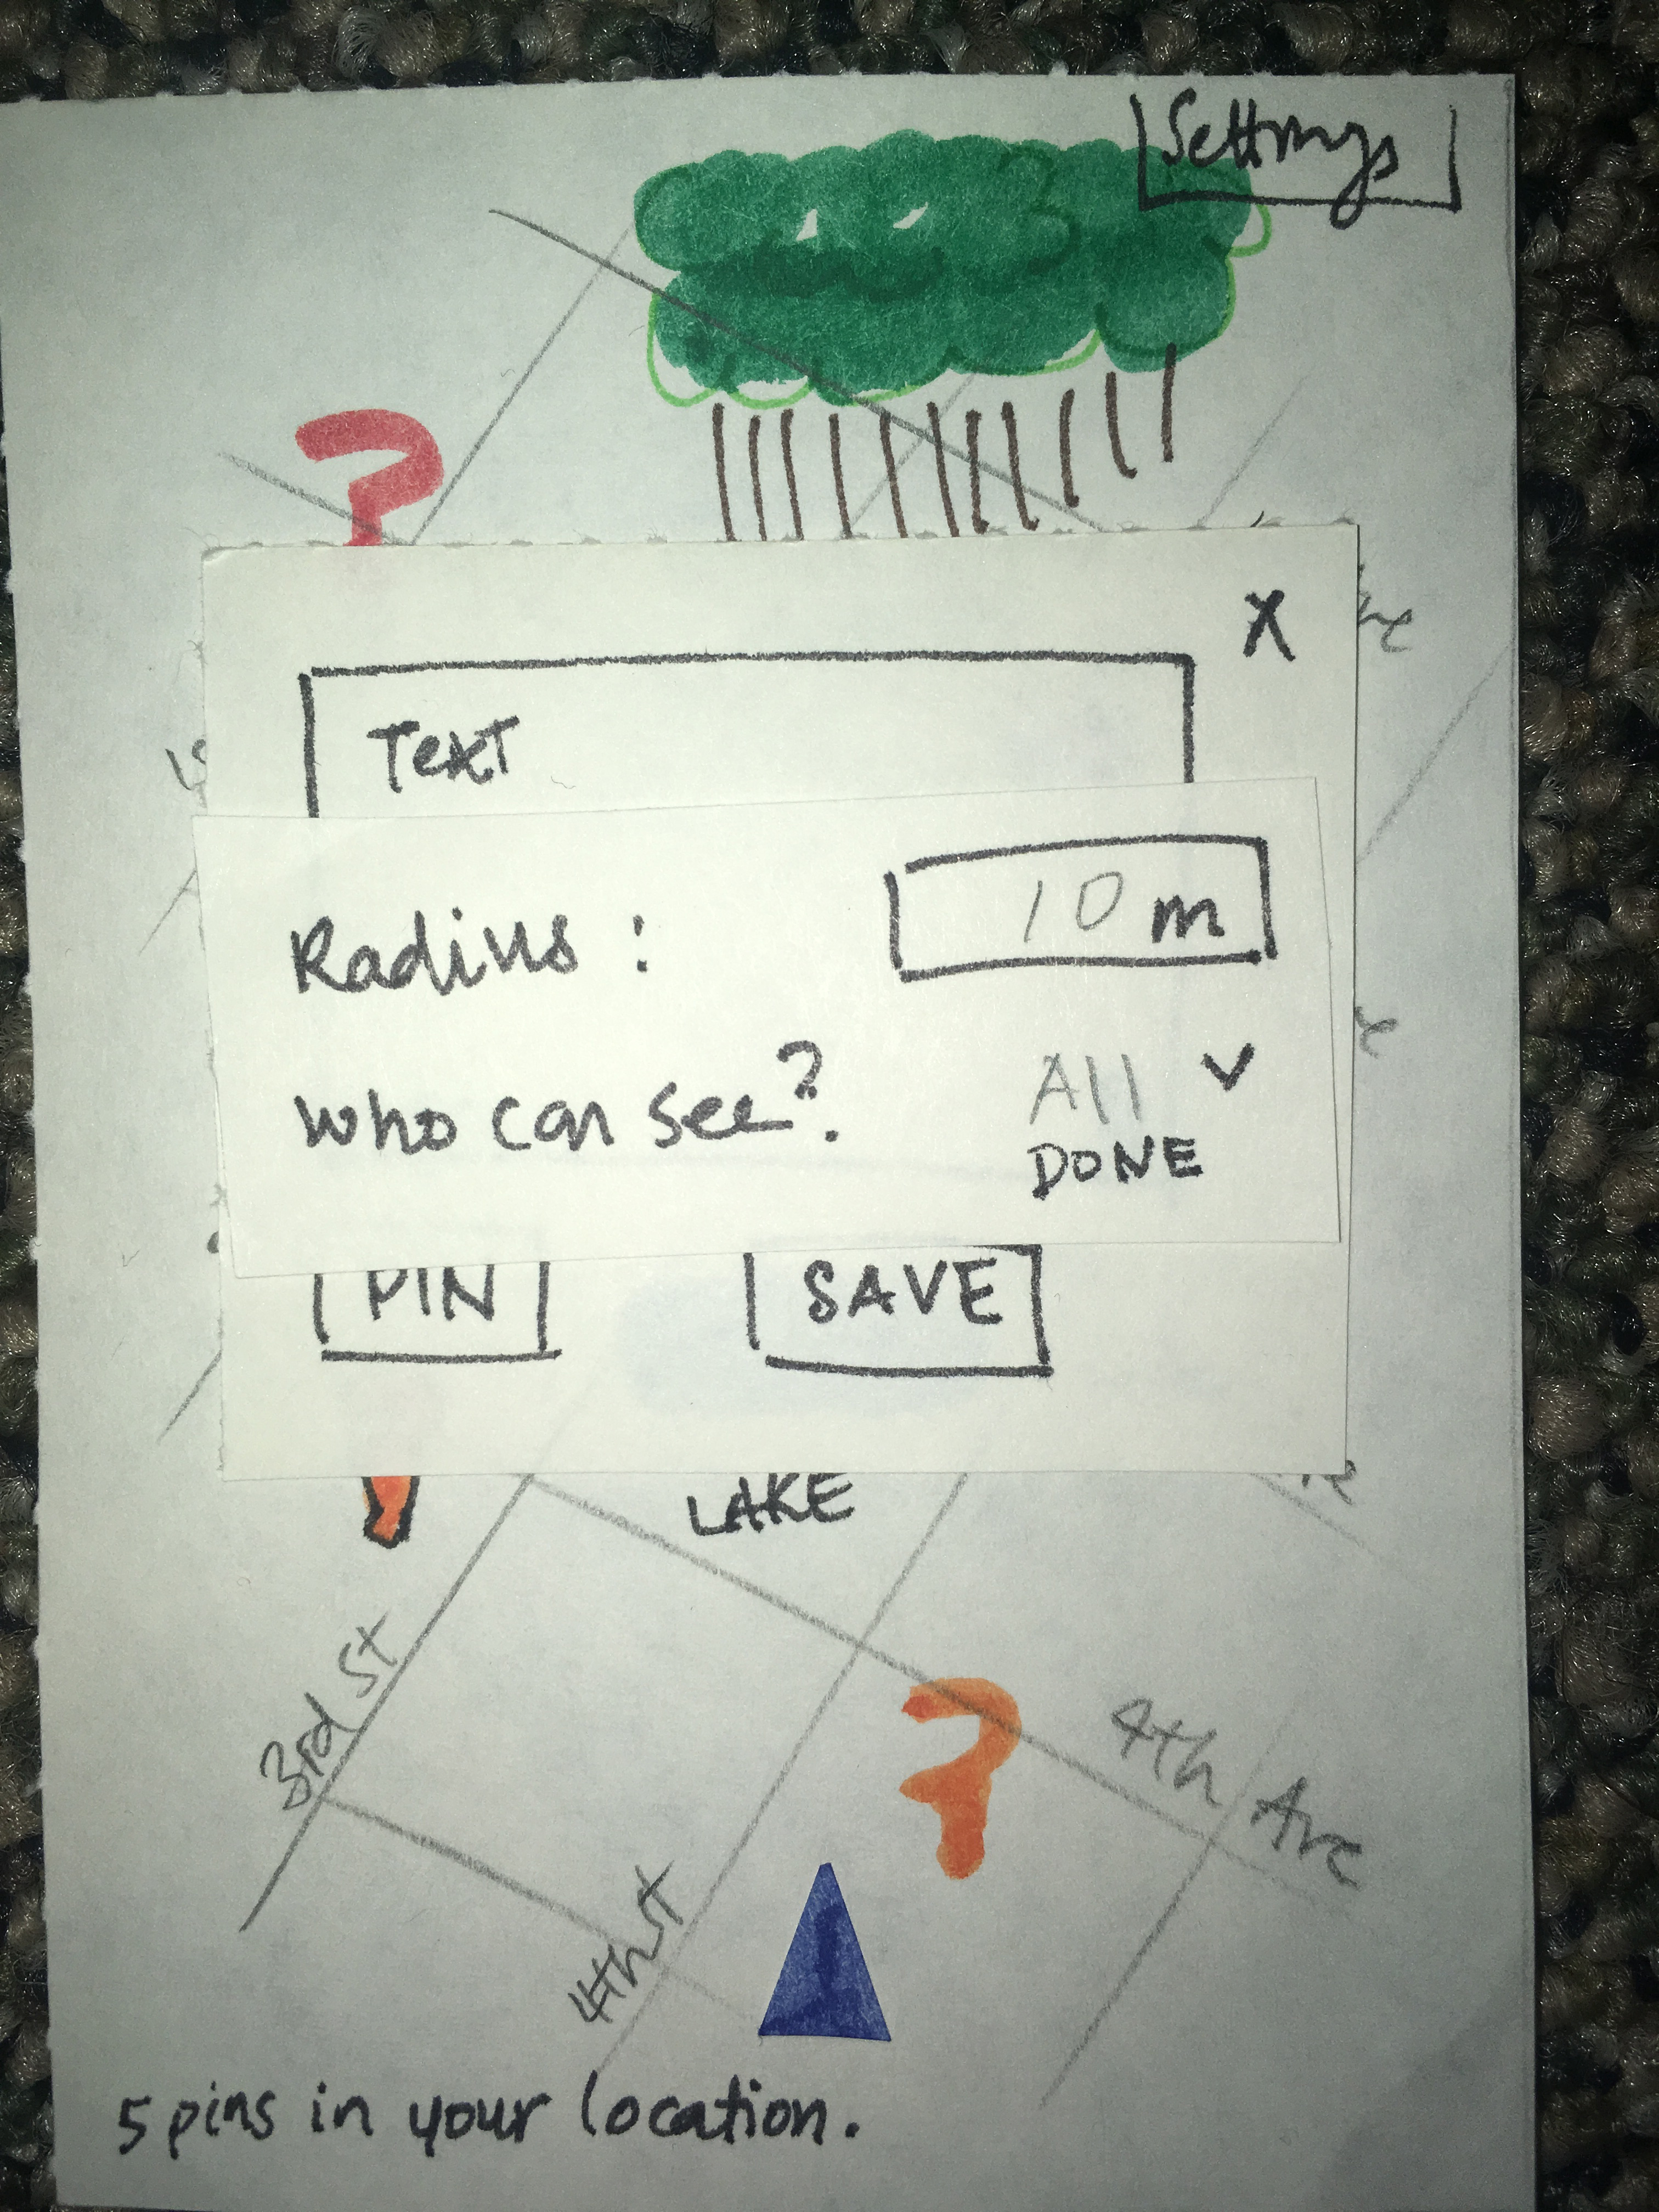
Clicking the “Who can see?” menu shows the default options for viewing. Clicking again closes the menu.
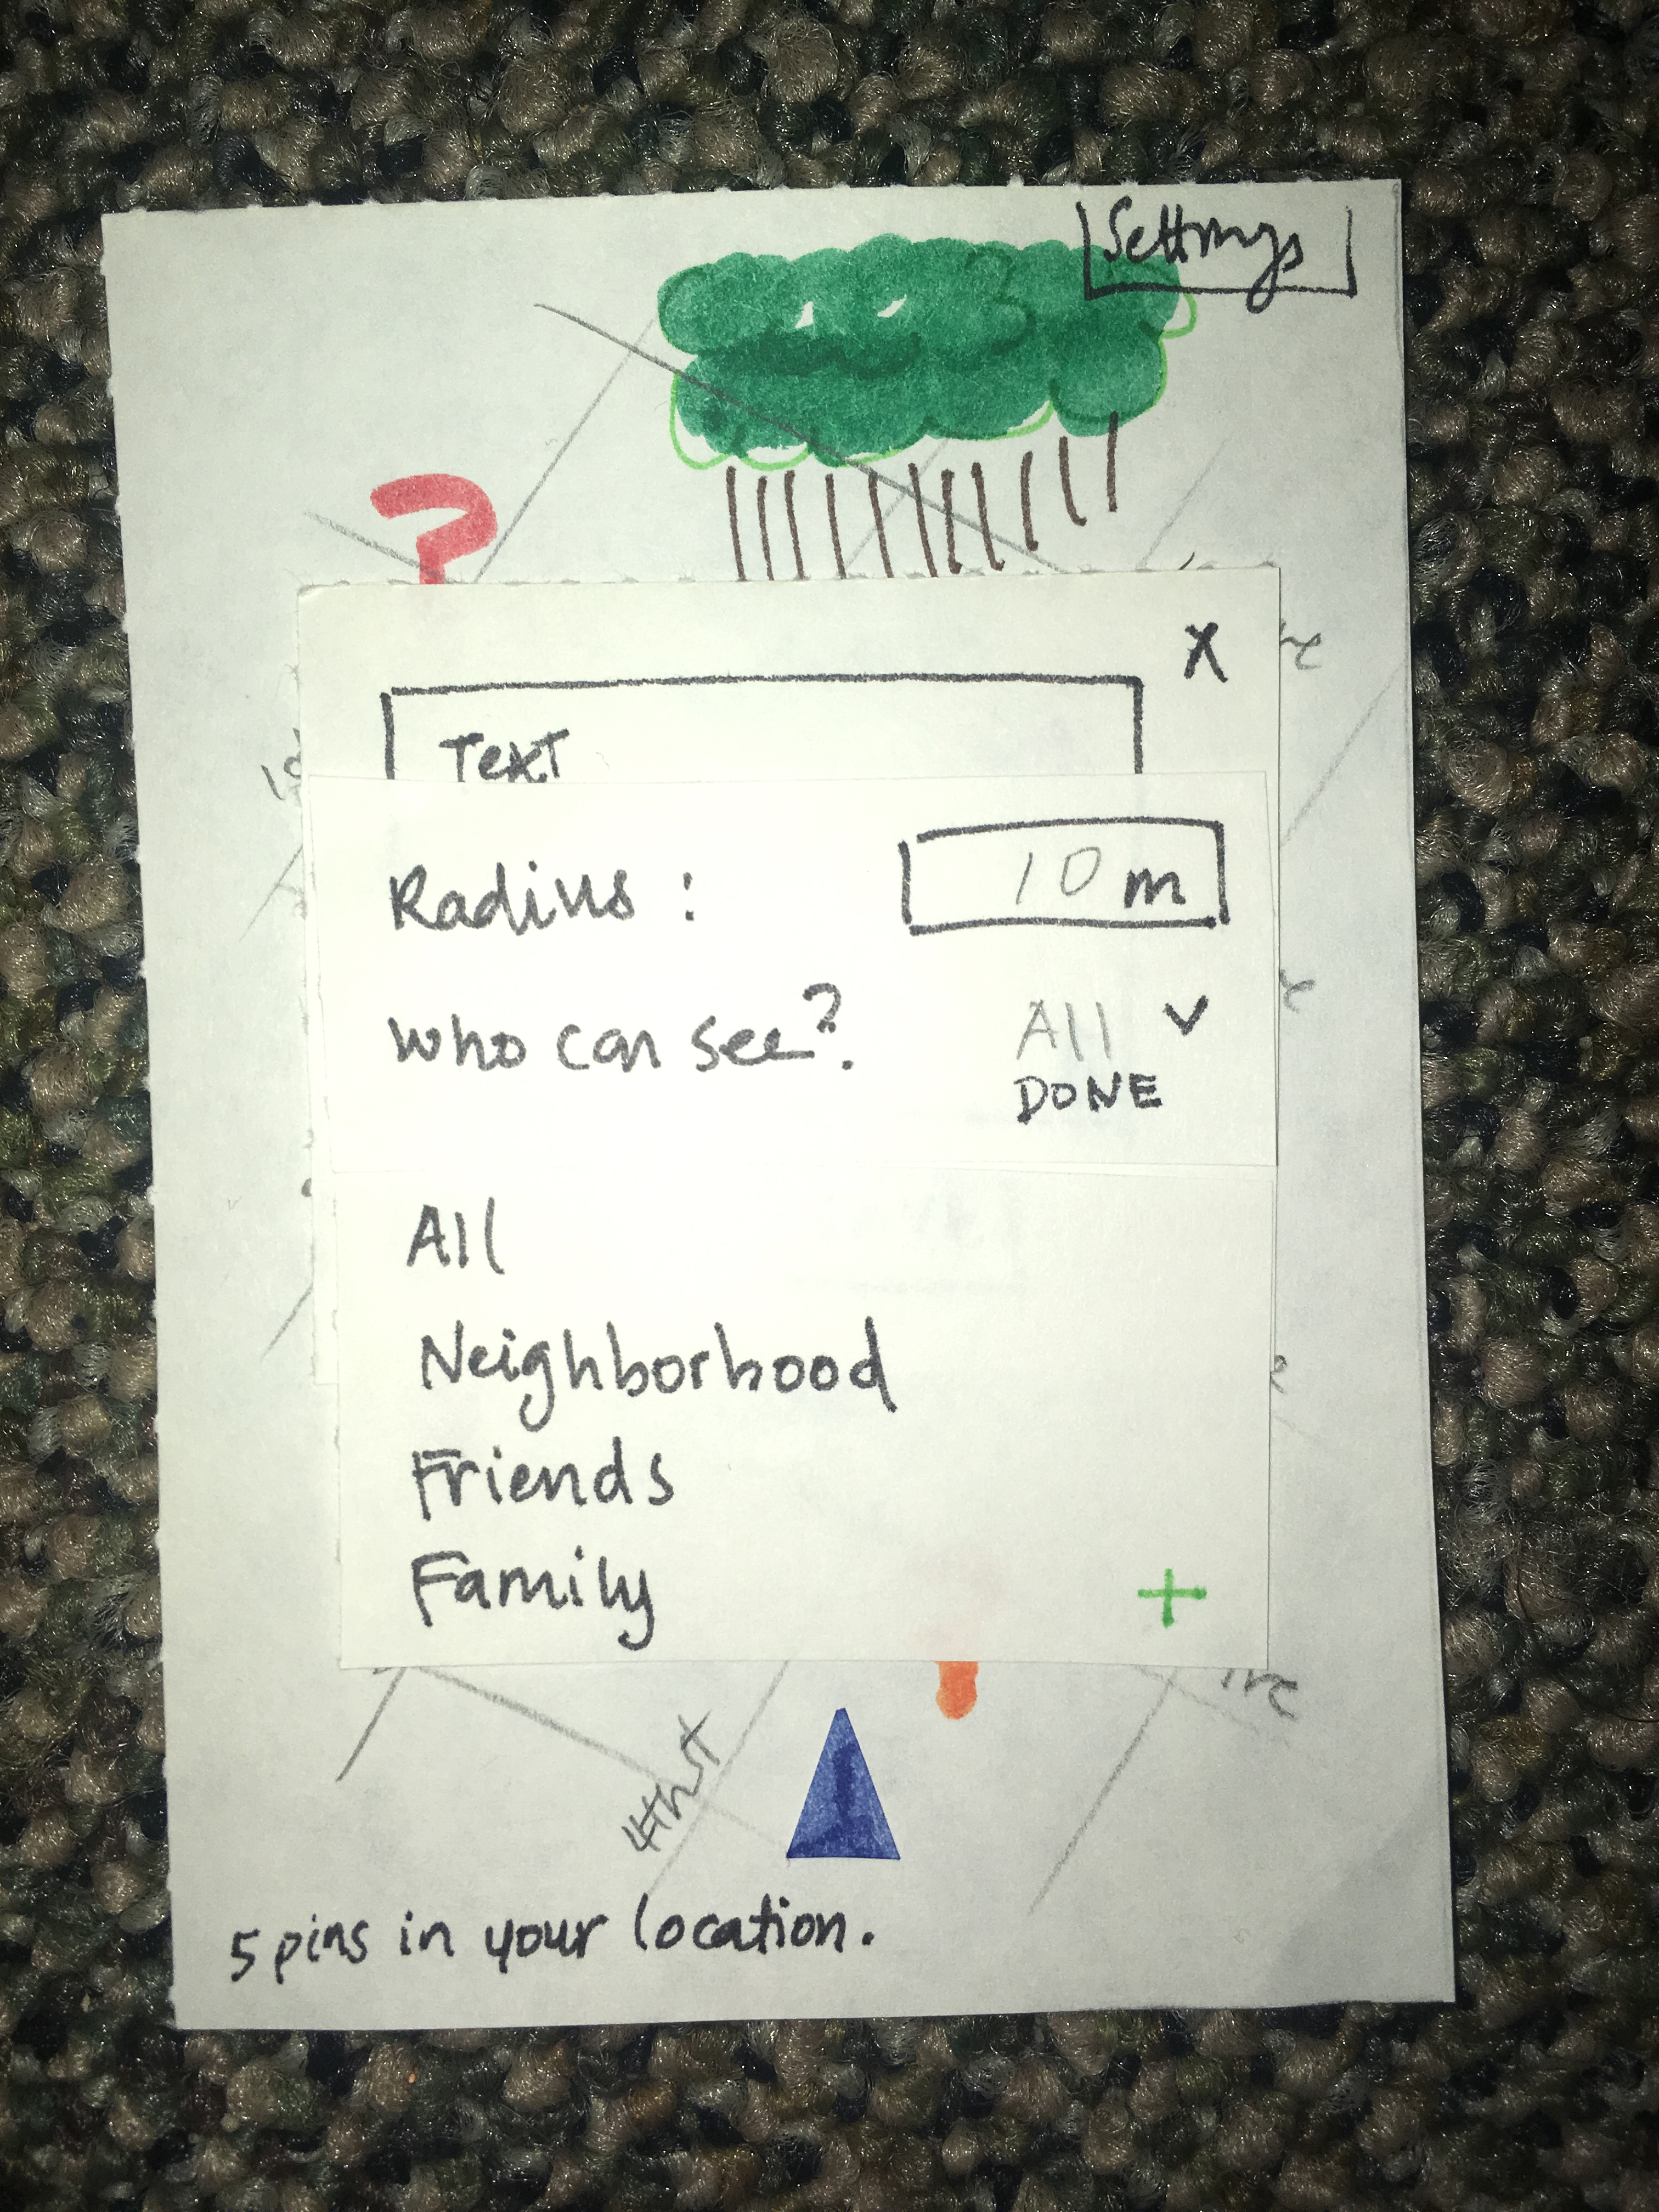
Clicking the + allows a user to create a custom group for this pin and future pins, using checkboxes for people they know.
Clicking the PIN button creates and posts the pin.
Task2: Answering a Question
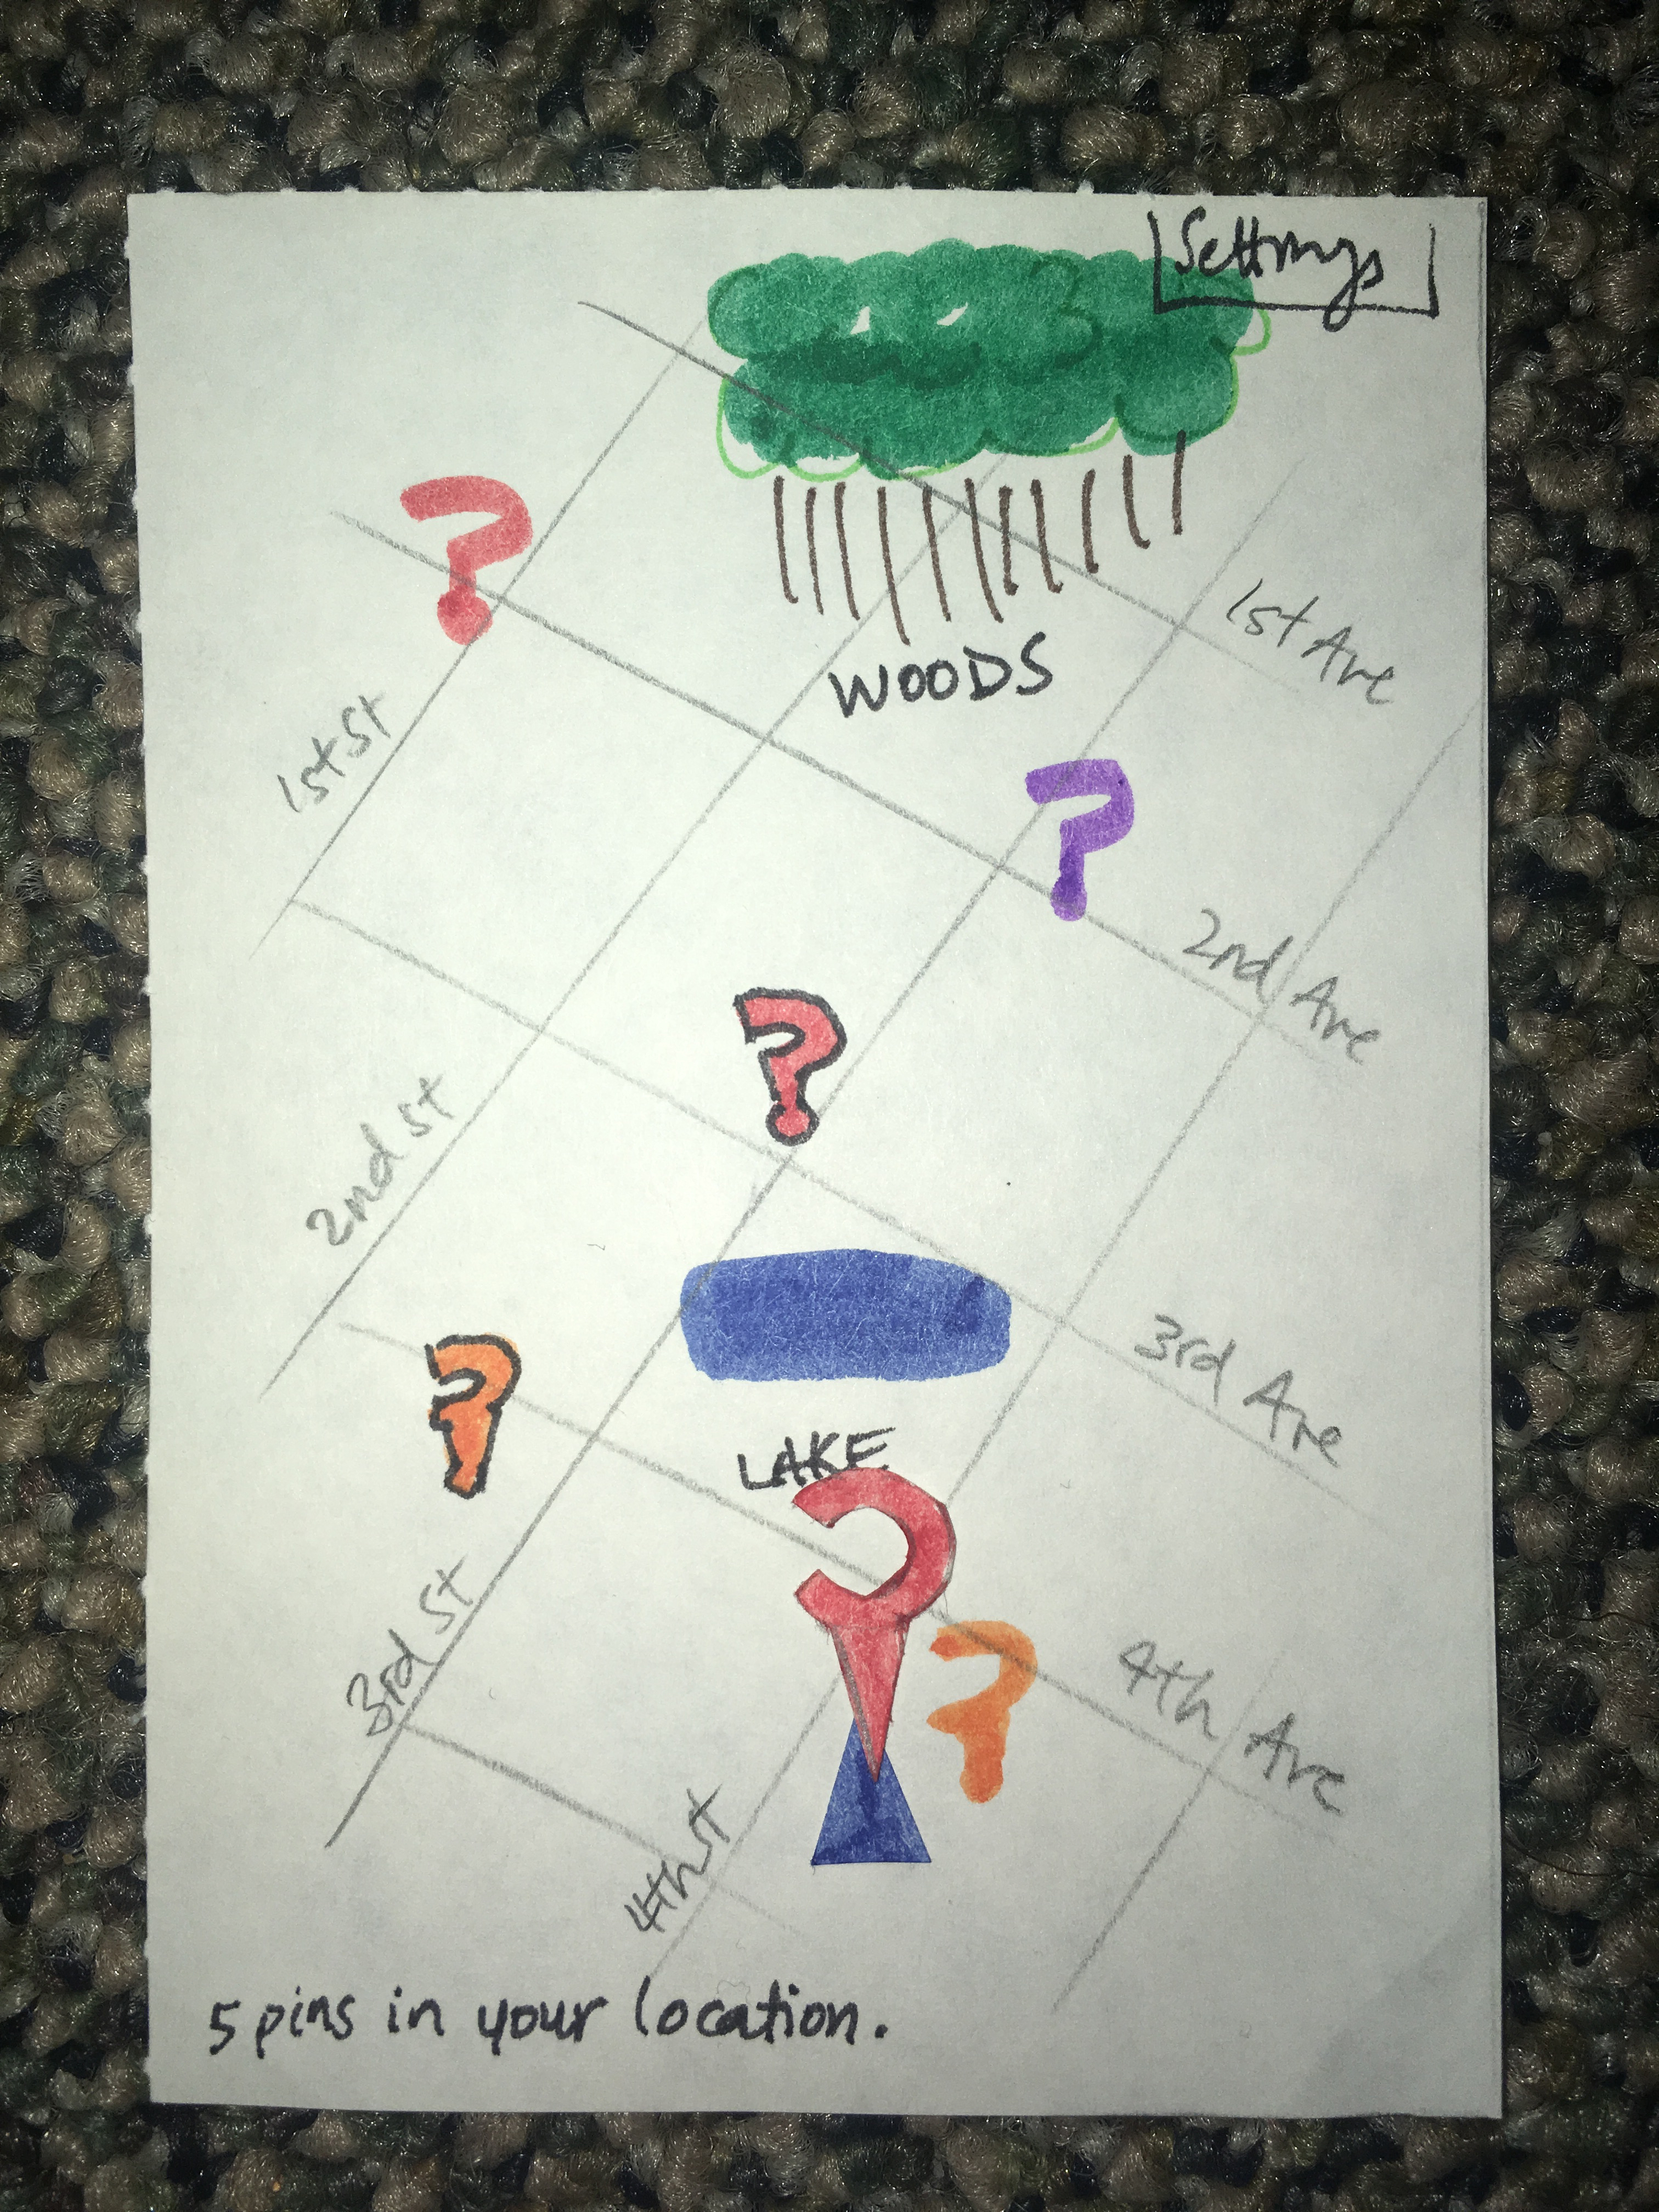
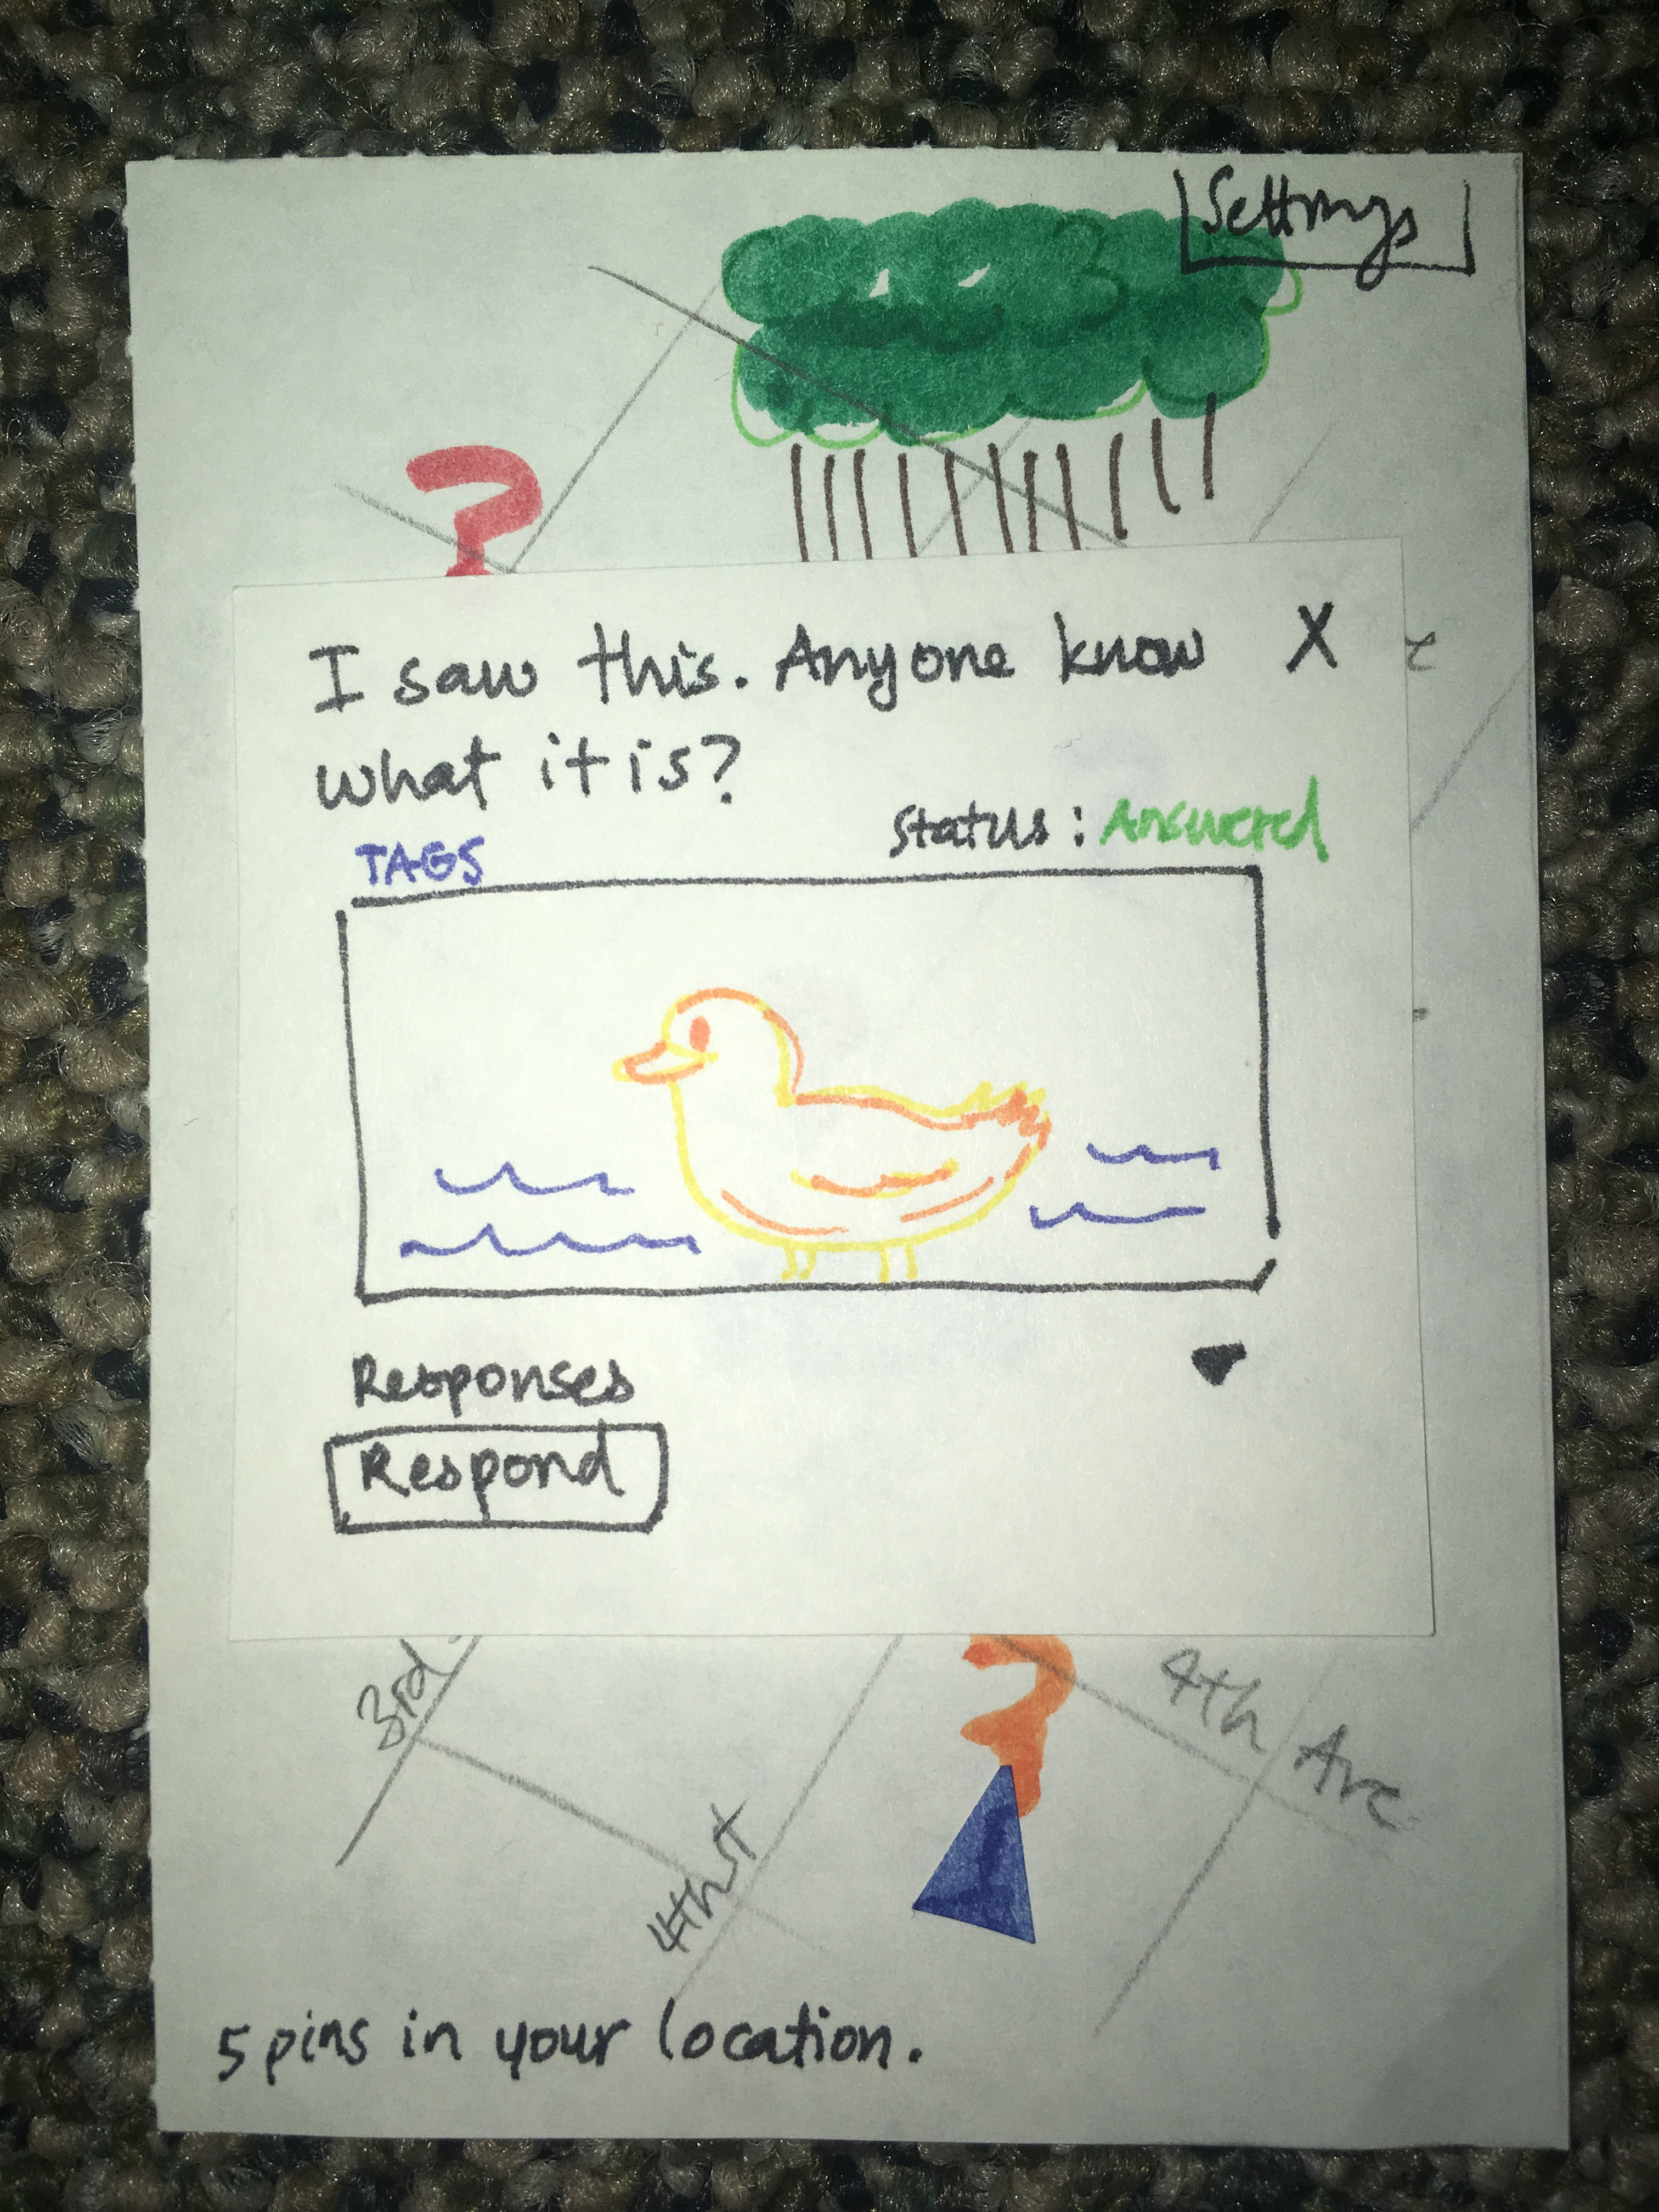
Clicking on a pin produces the post attached to it. This pin’s status is marked as ‘Answered.’
Clicking the Responses button reveals the responses to the post. Clicking it again closes the menu. Clicking on either the √ or the X for each response contributes a vote to the response. Responses with a greater ratio of √ to X will be presented higher up (when in default sorting mode)
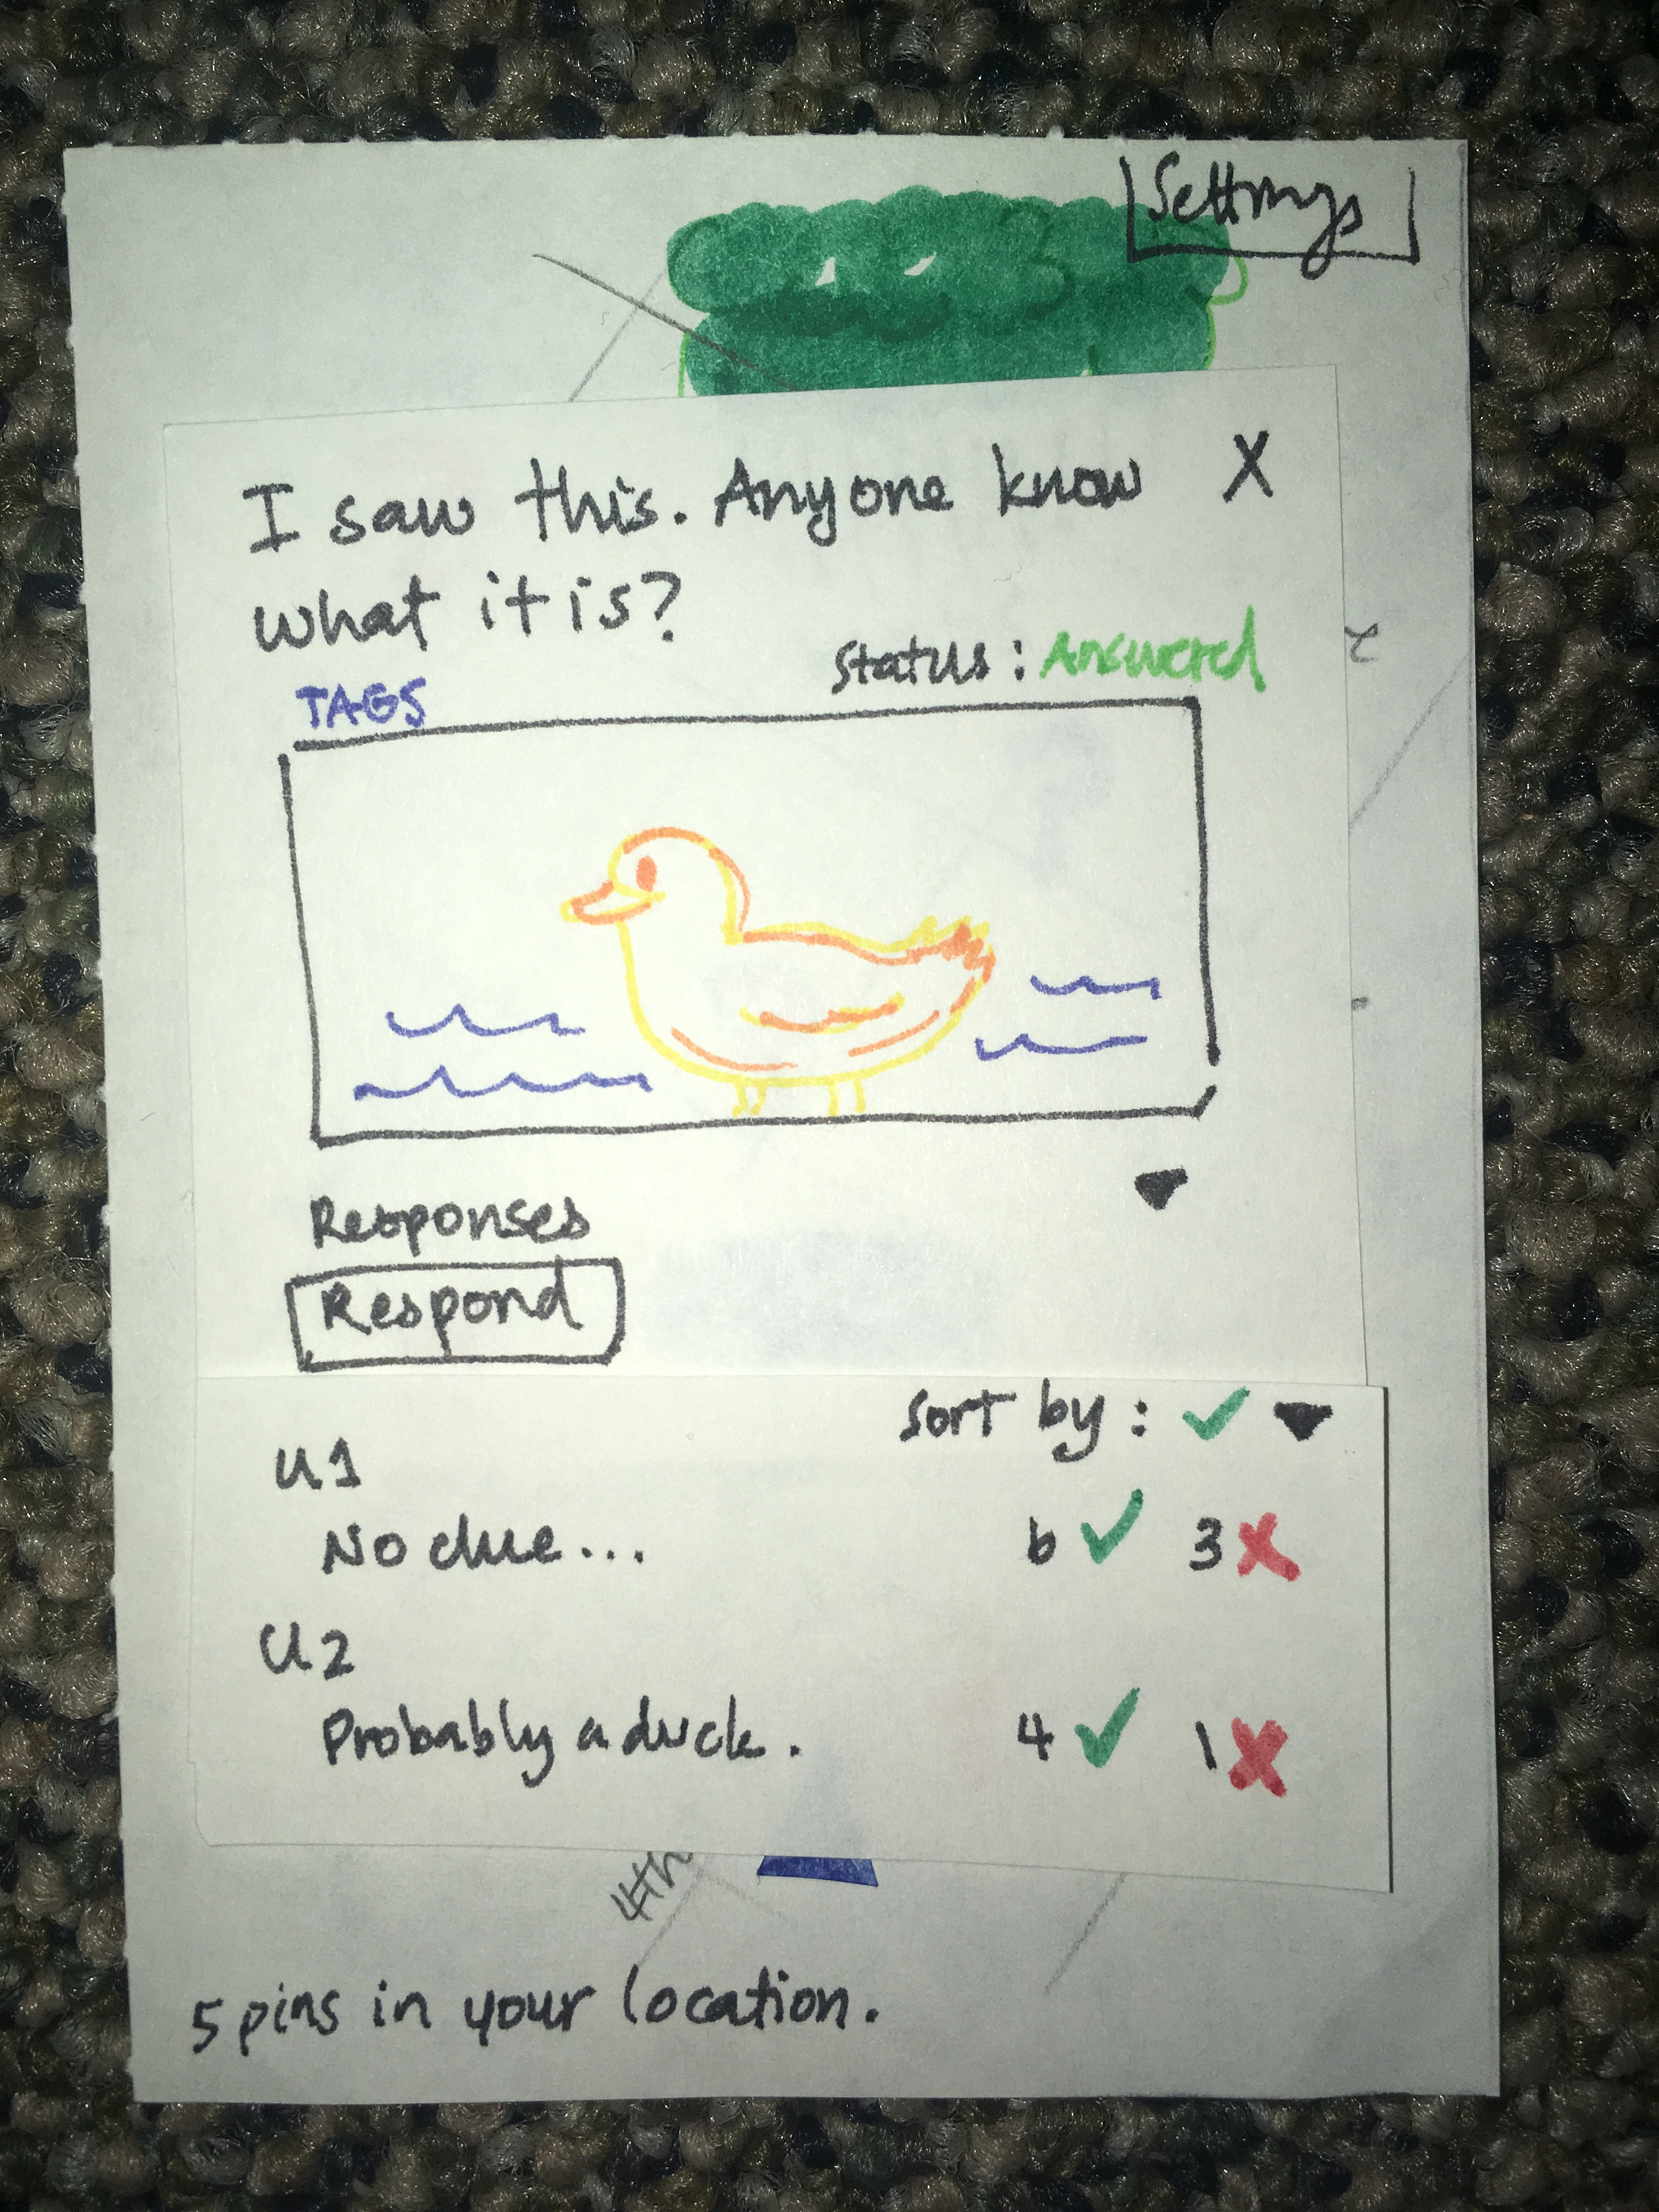
Clicking the Sort By menu allows a user to sort the comments depending on what they want to see. Clicking it again closes the menu.
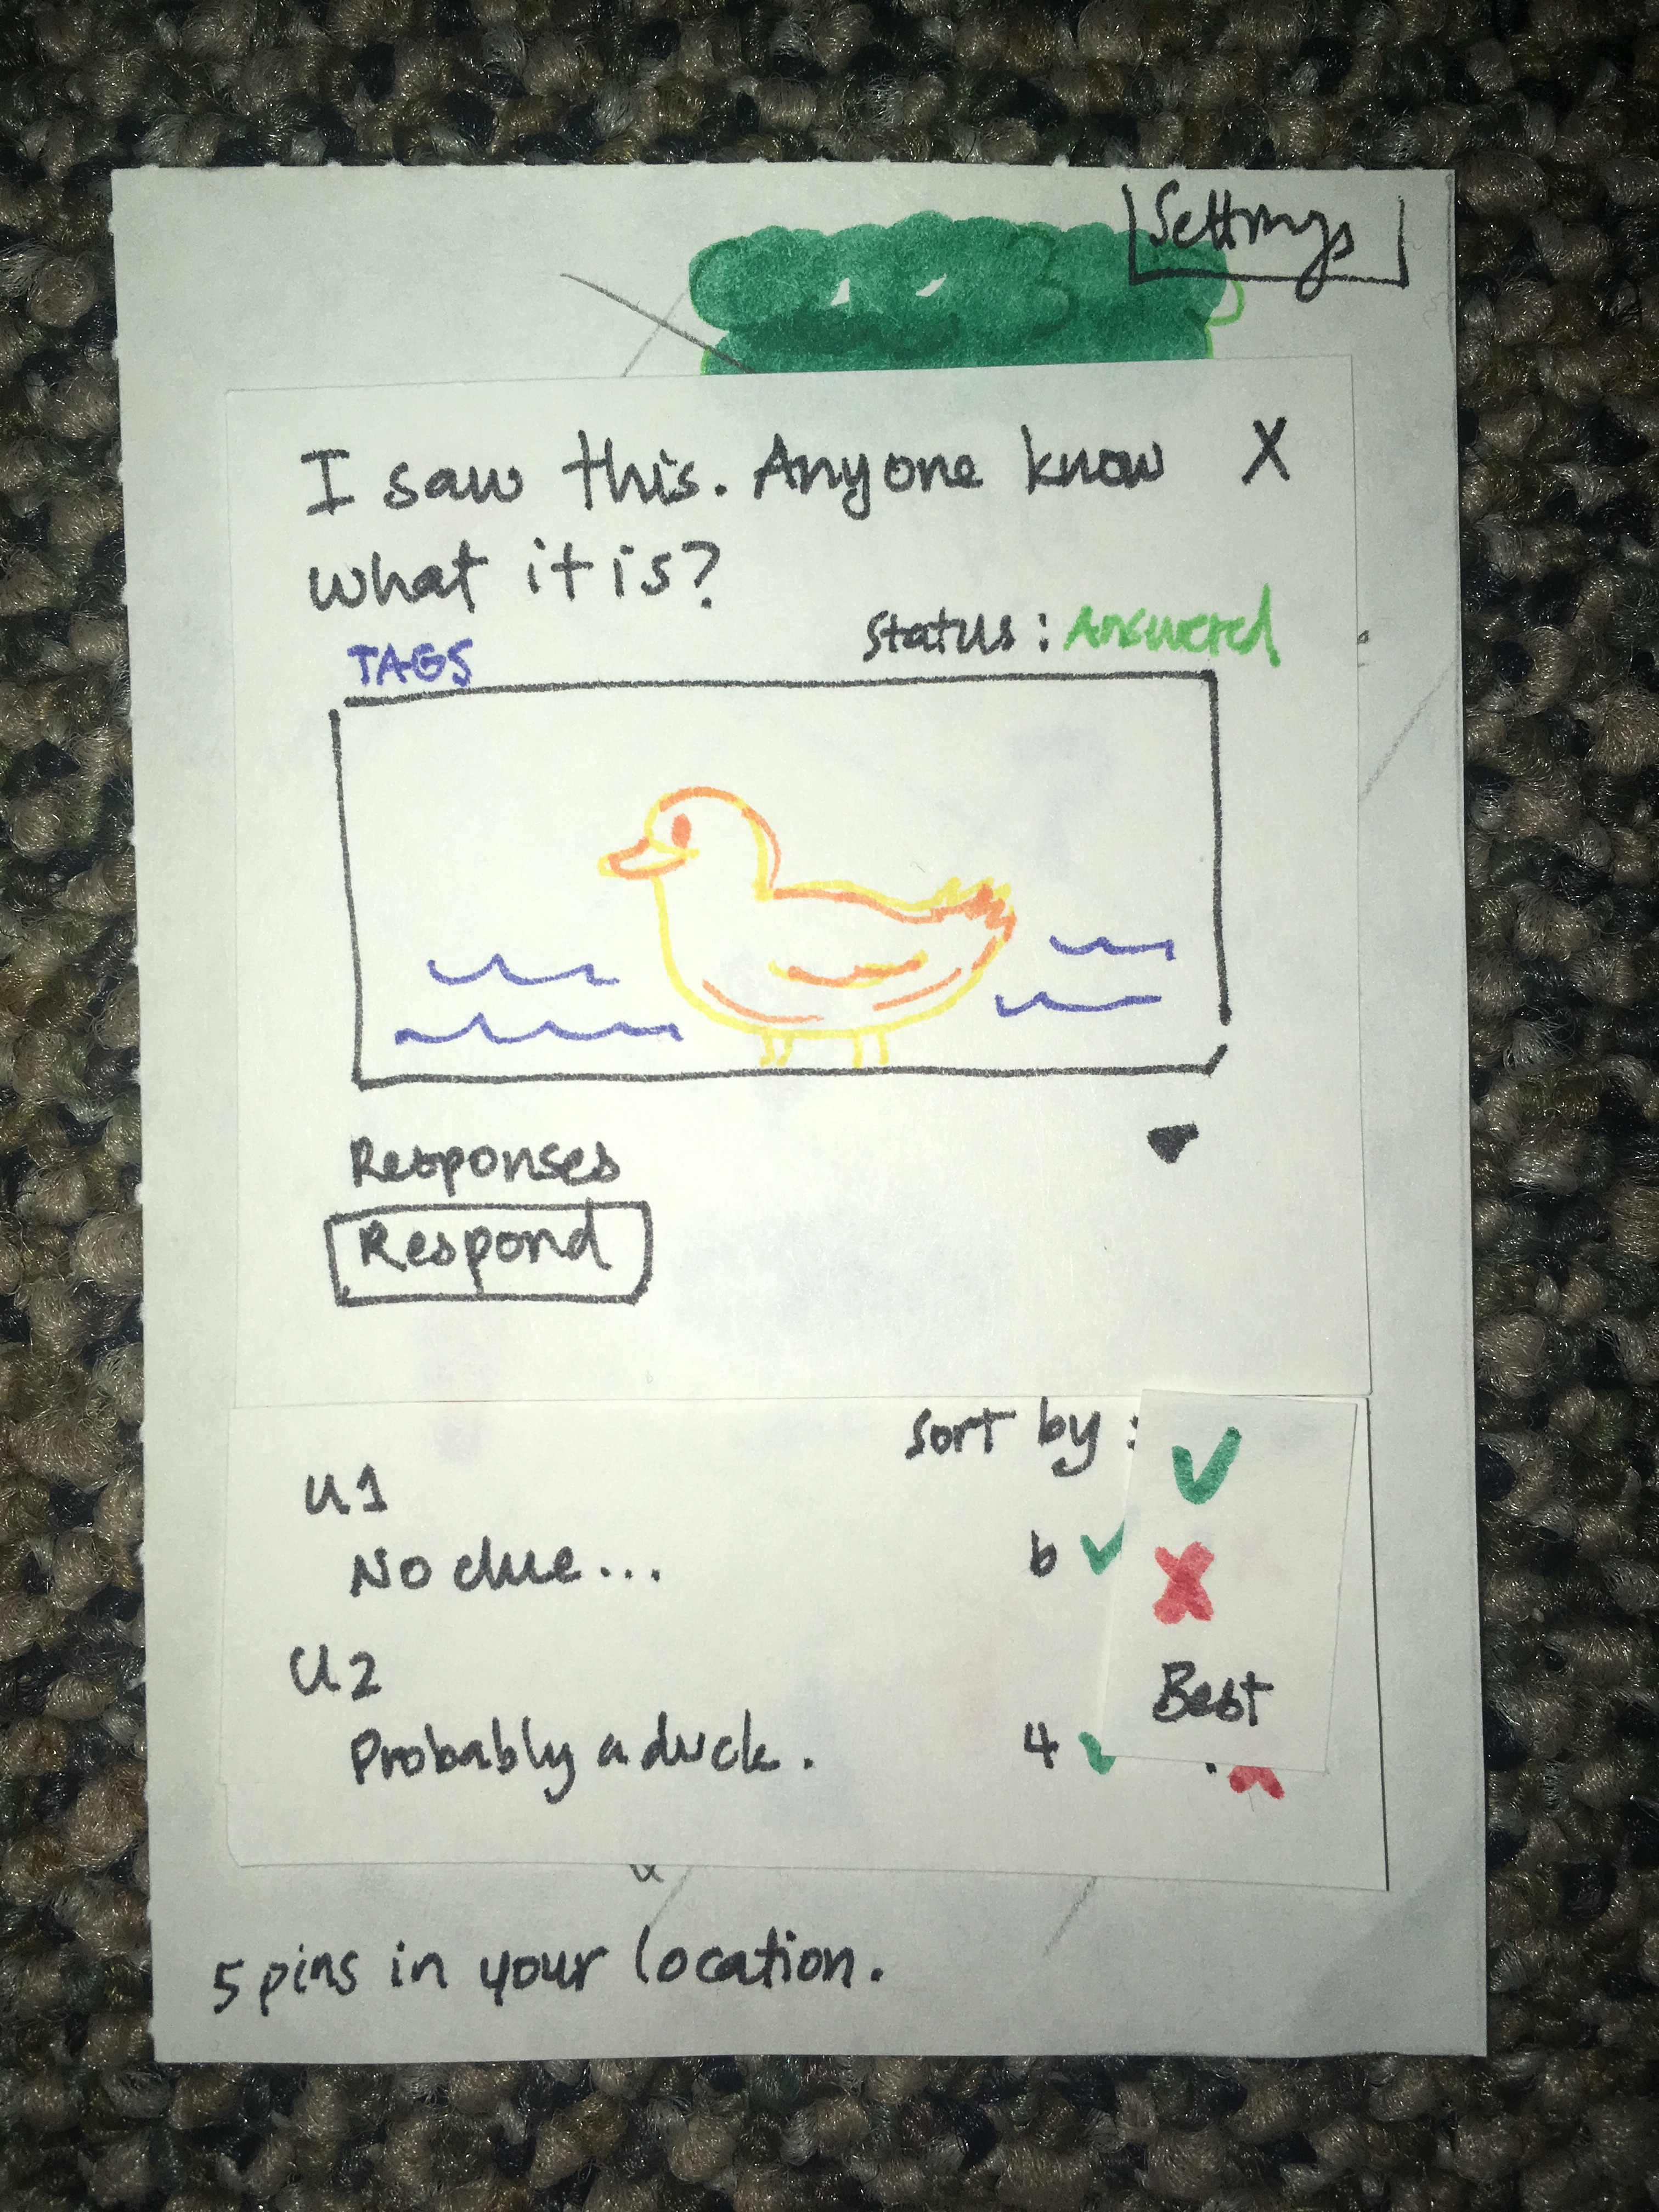
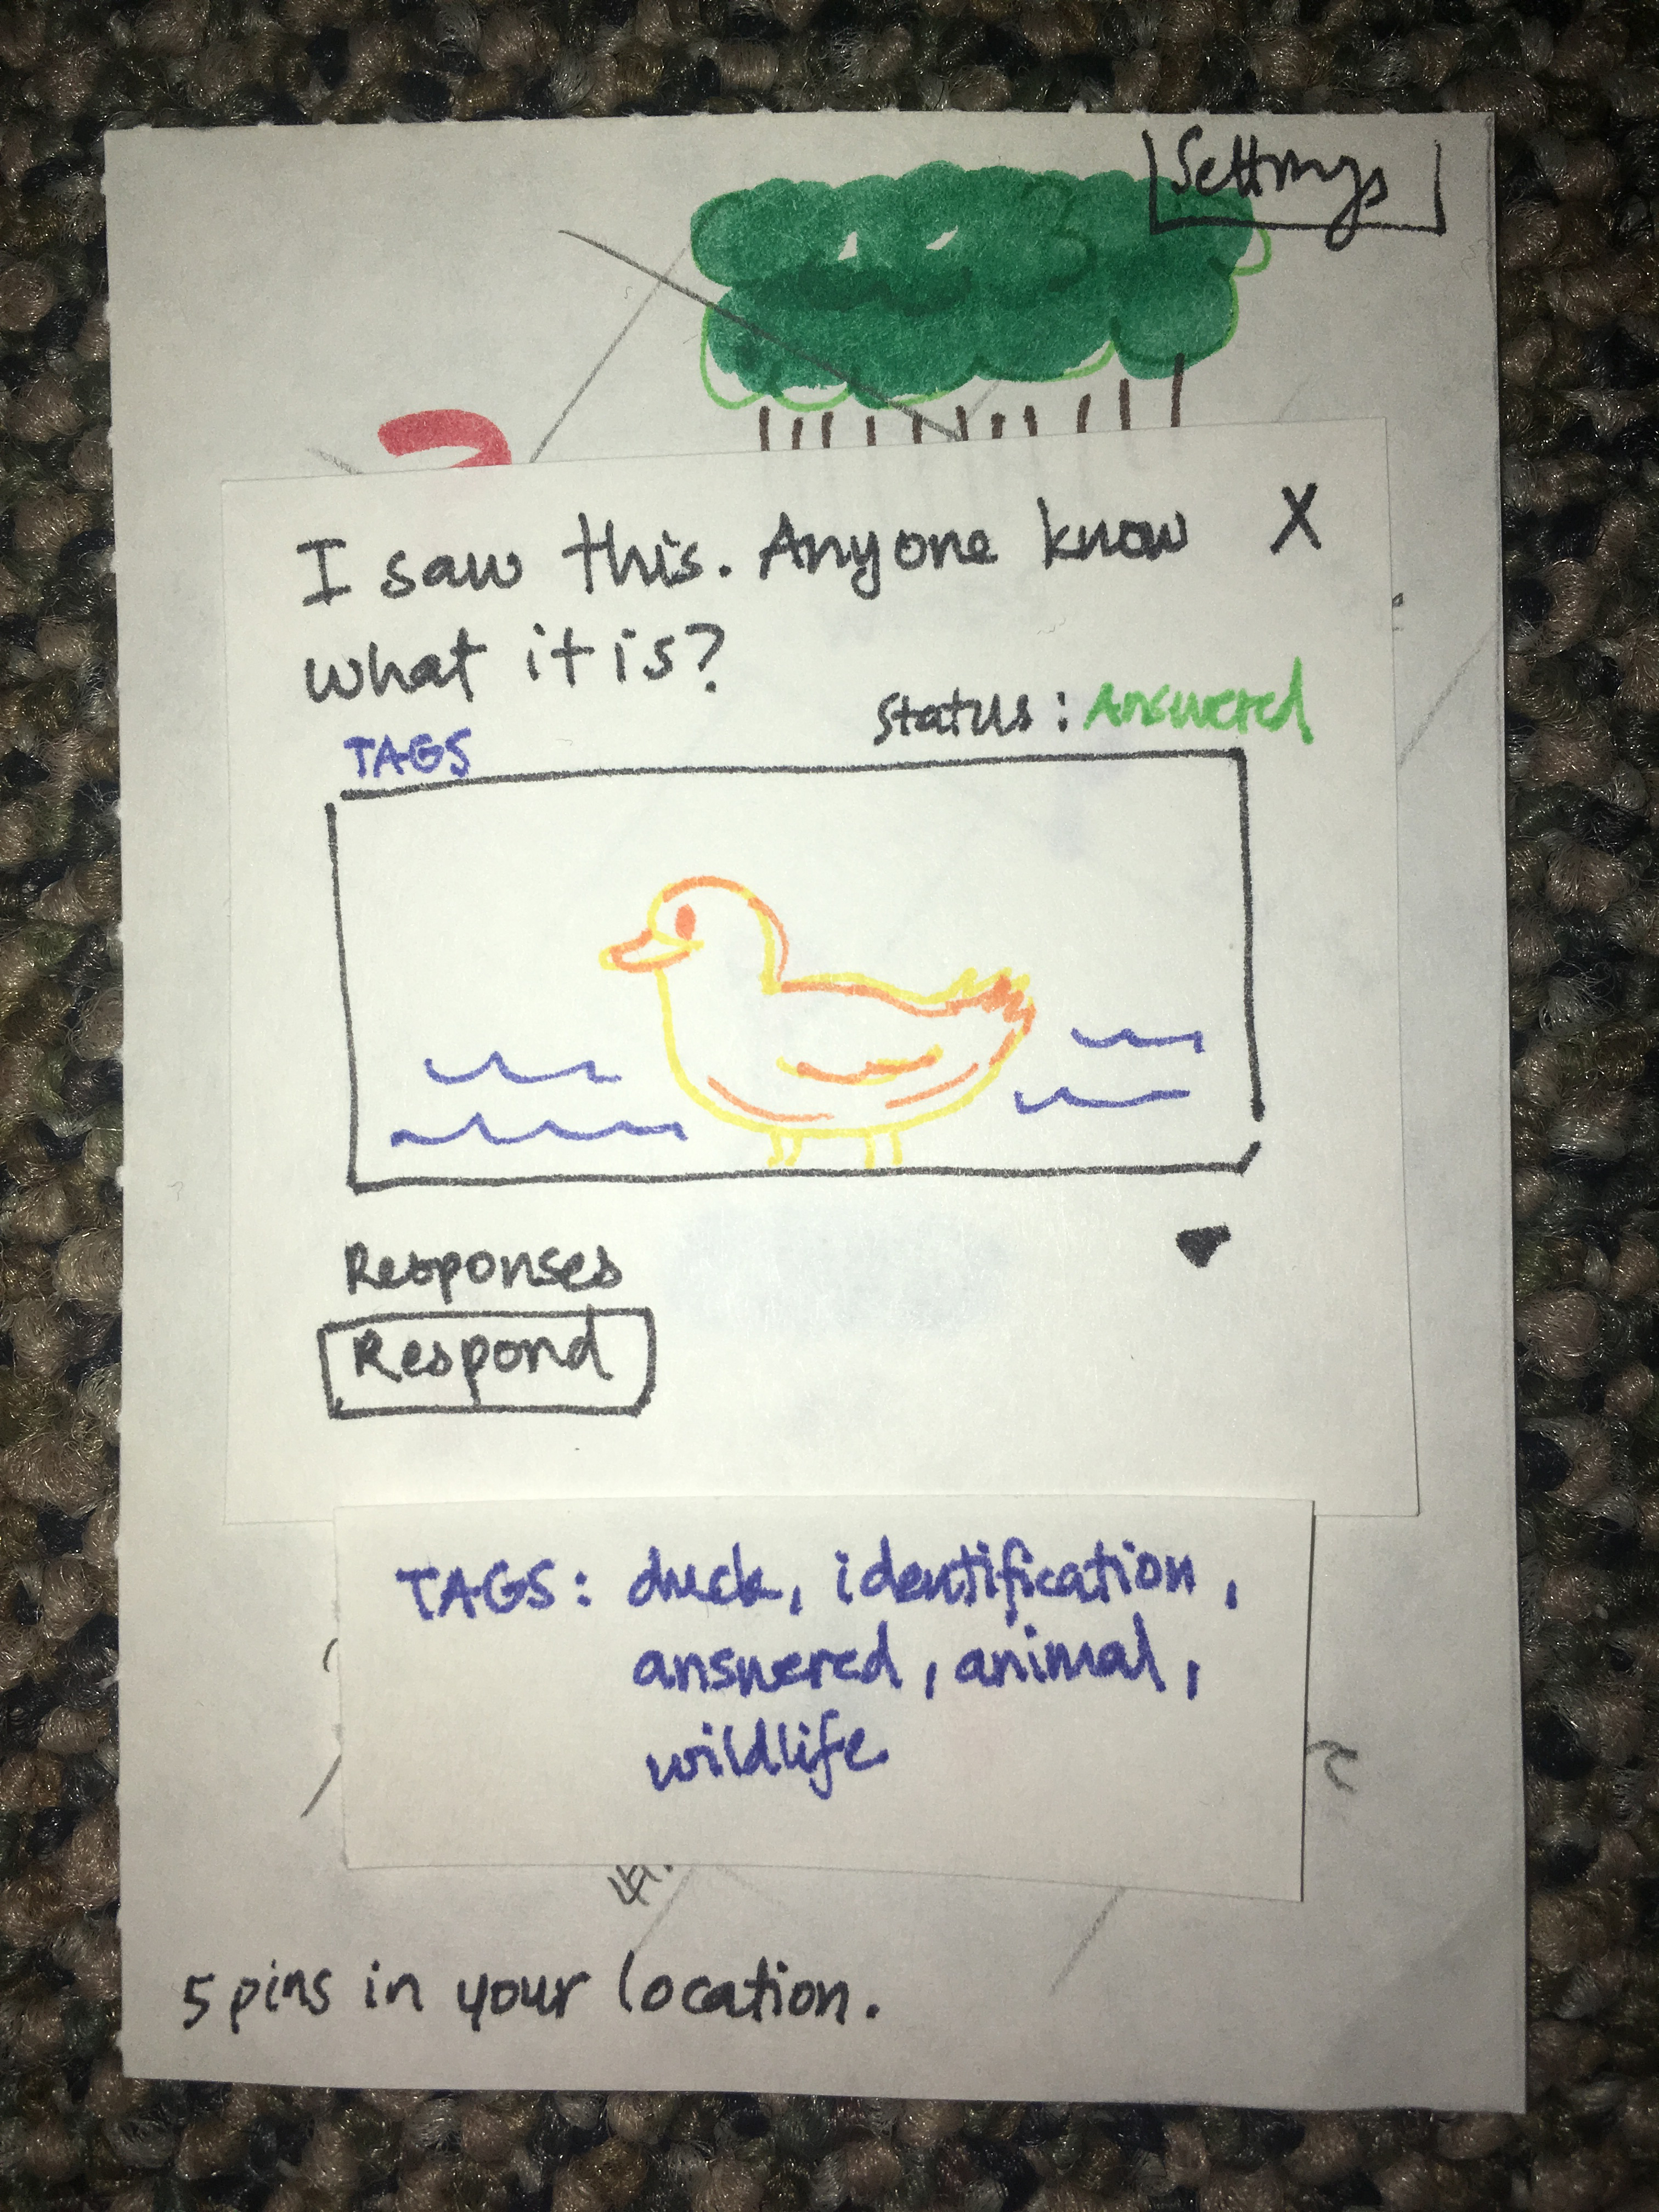
Clicking on the TAGS button shows all tags associated with the post.
Clicking Respond will send the user to the posting text box, where Task 1 is repeated.
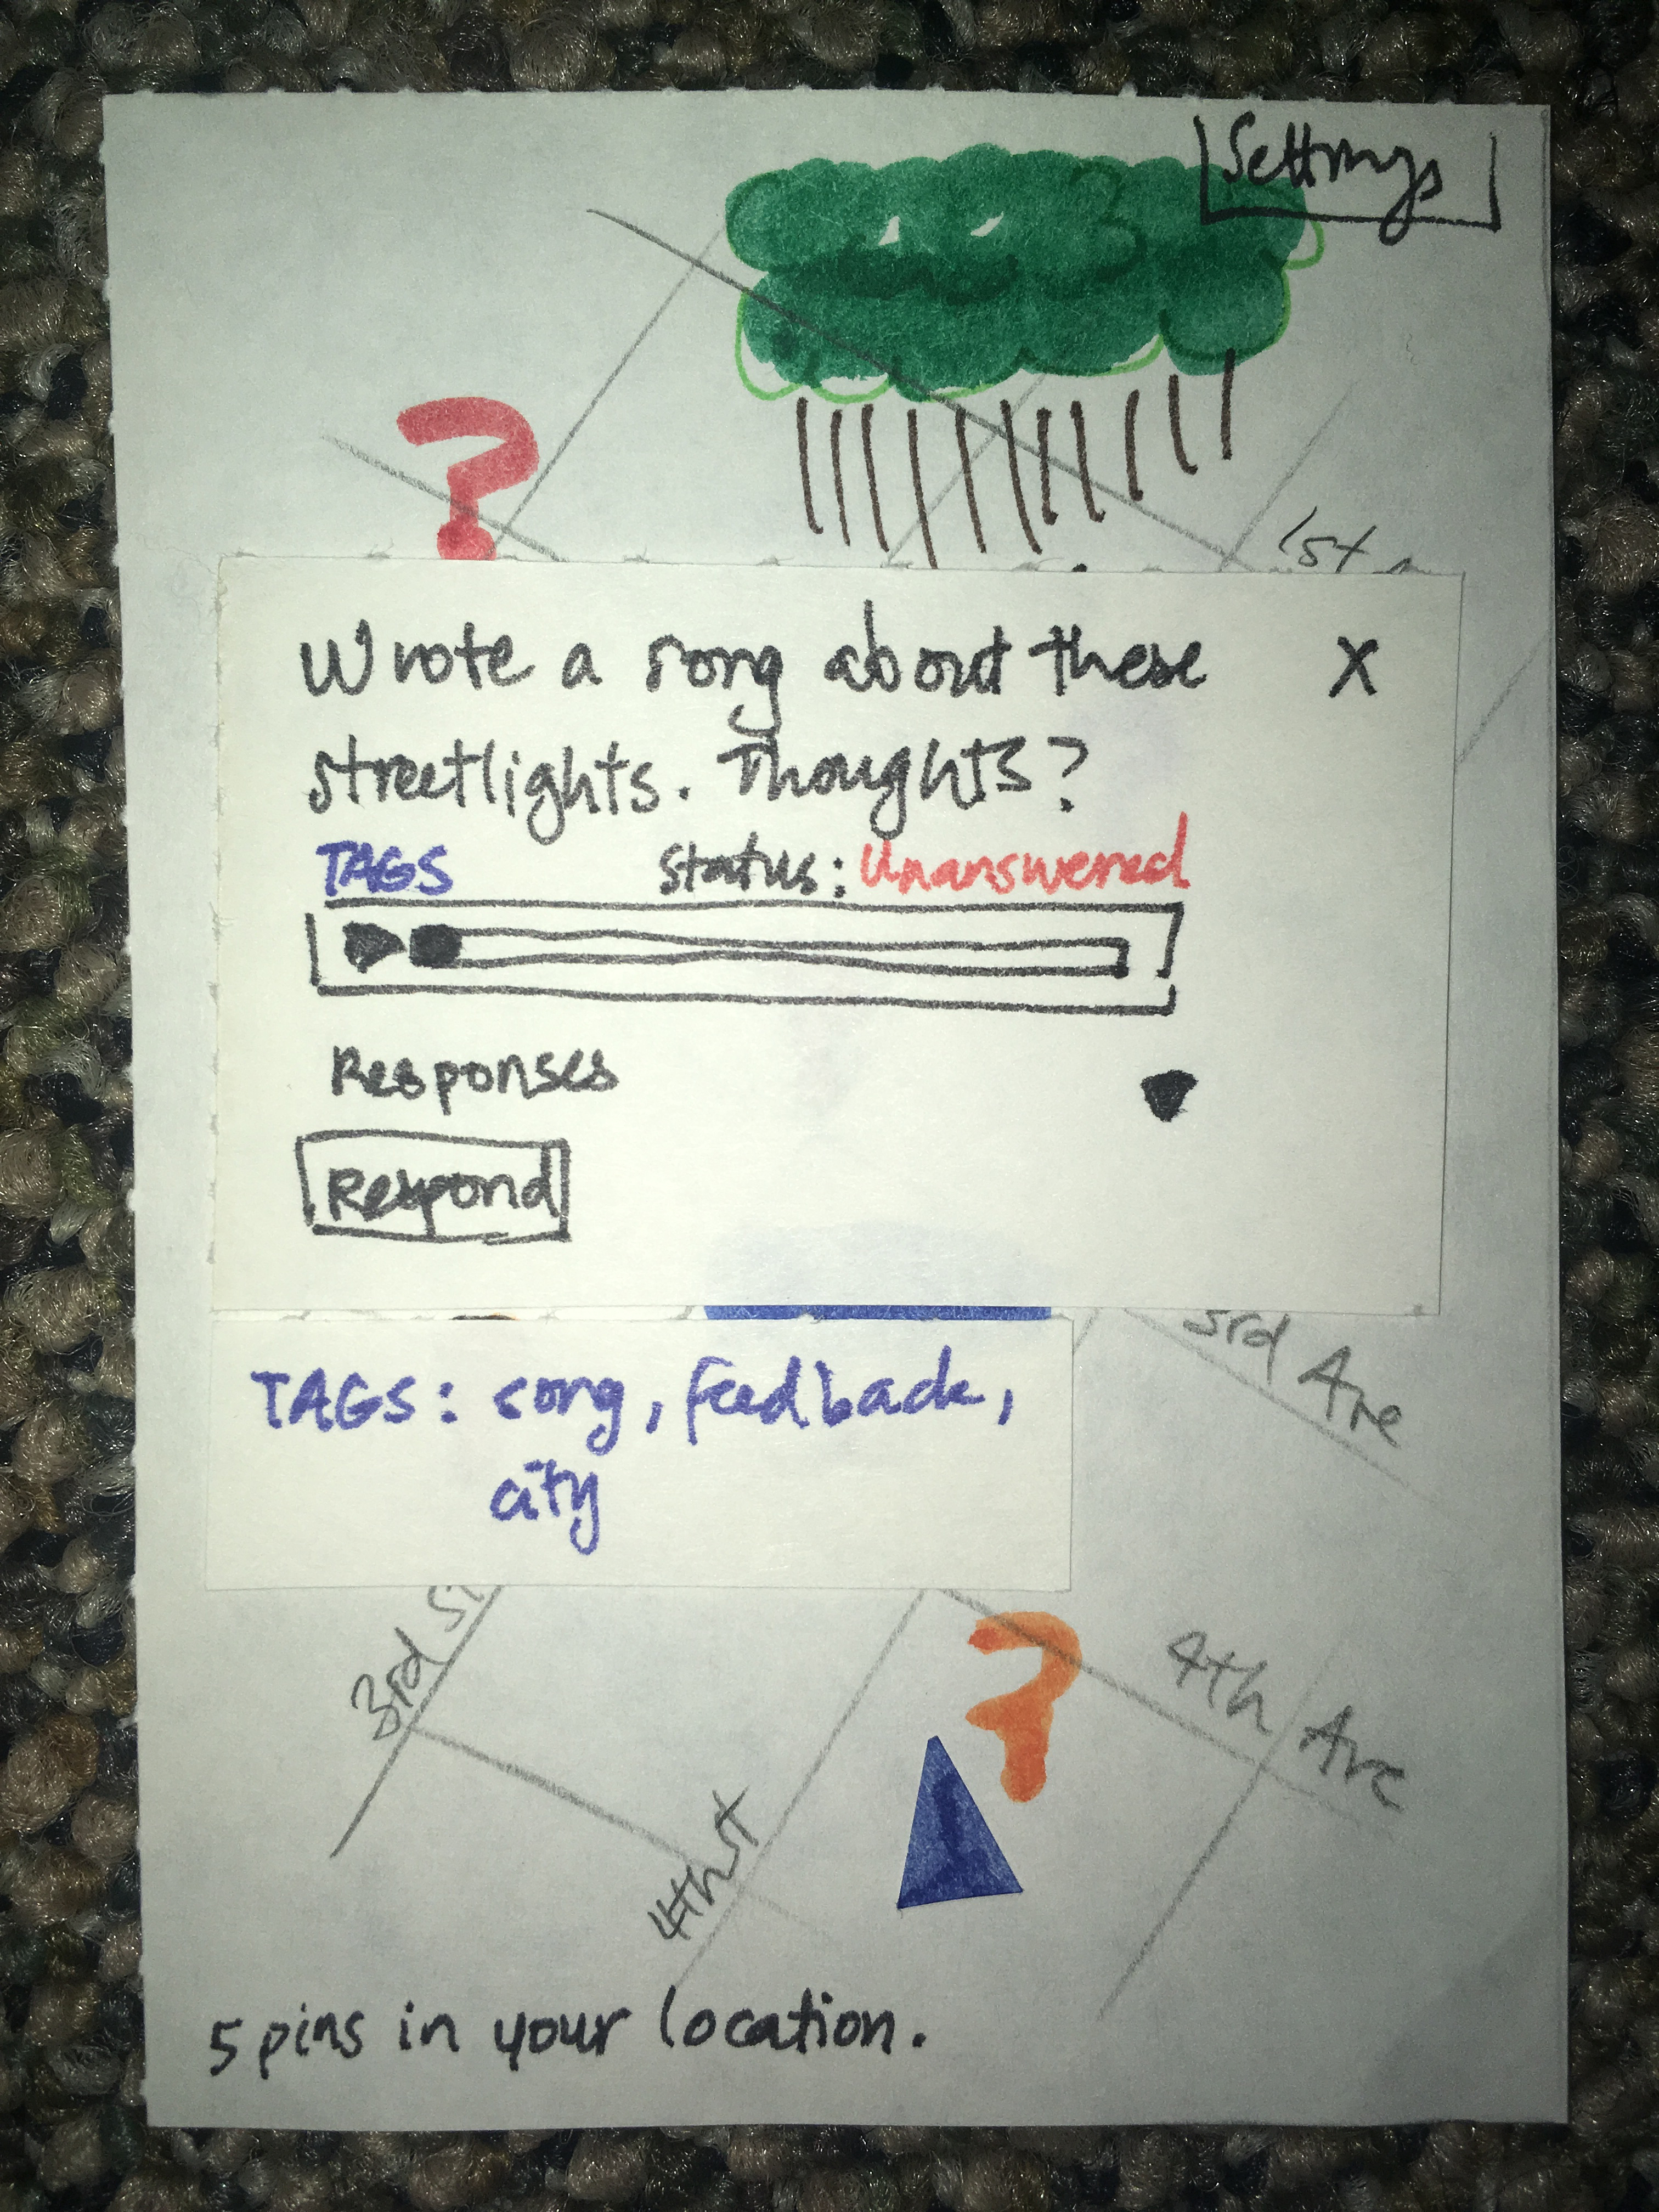
Clicking on a pin without an outline indicates it has not yet been answered. A pin of a different color indicates a different kind of question, that is a question listed under a different category. The first pin was an identification question, whereas this one asks for feedback.
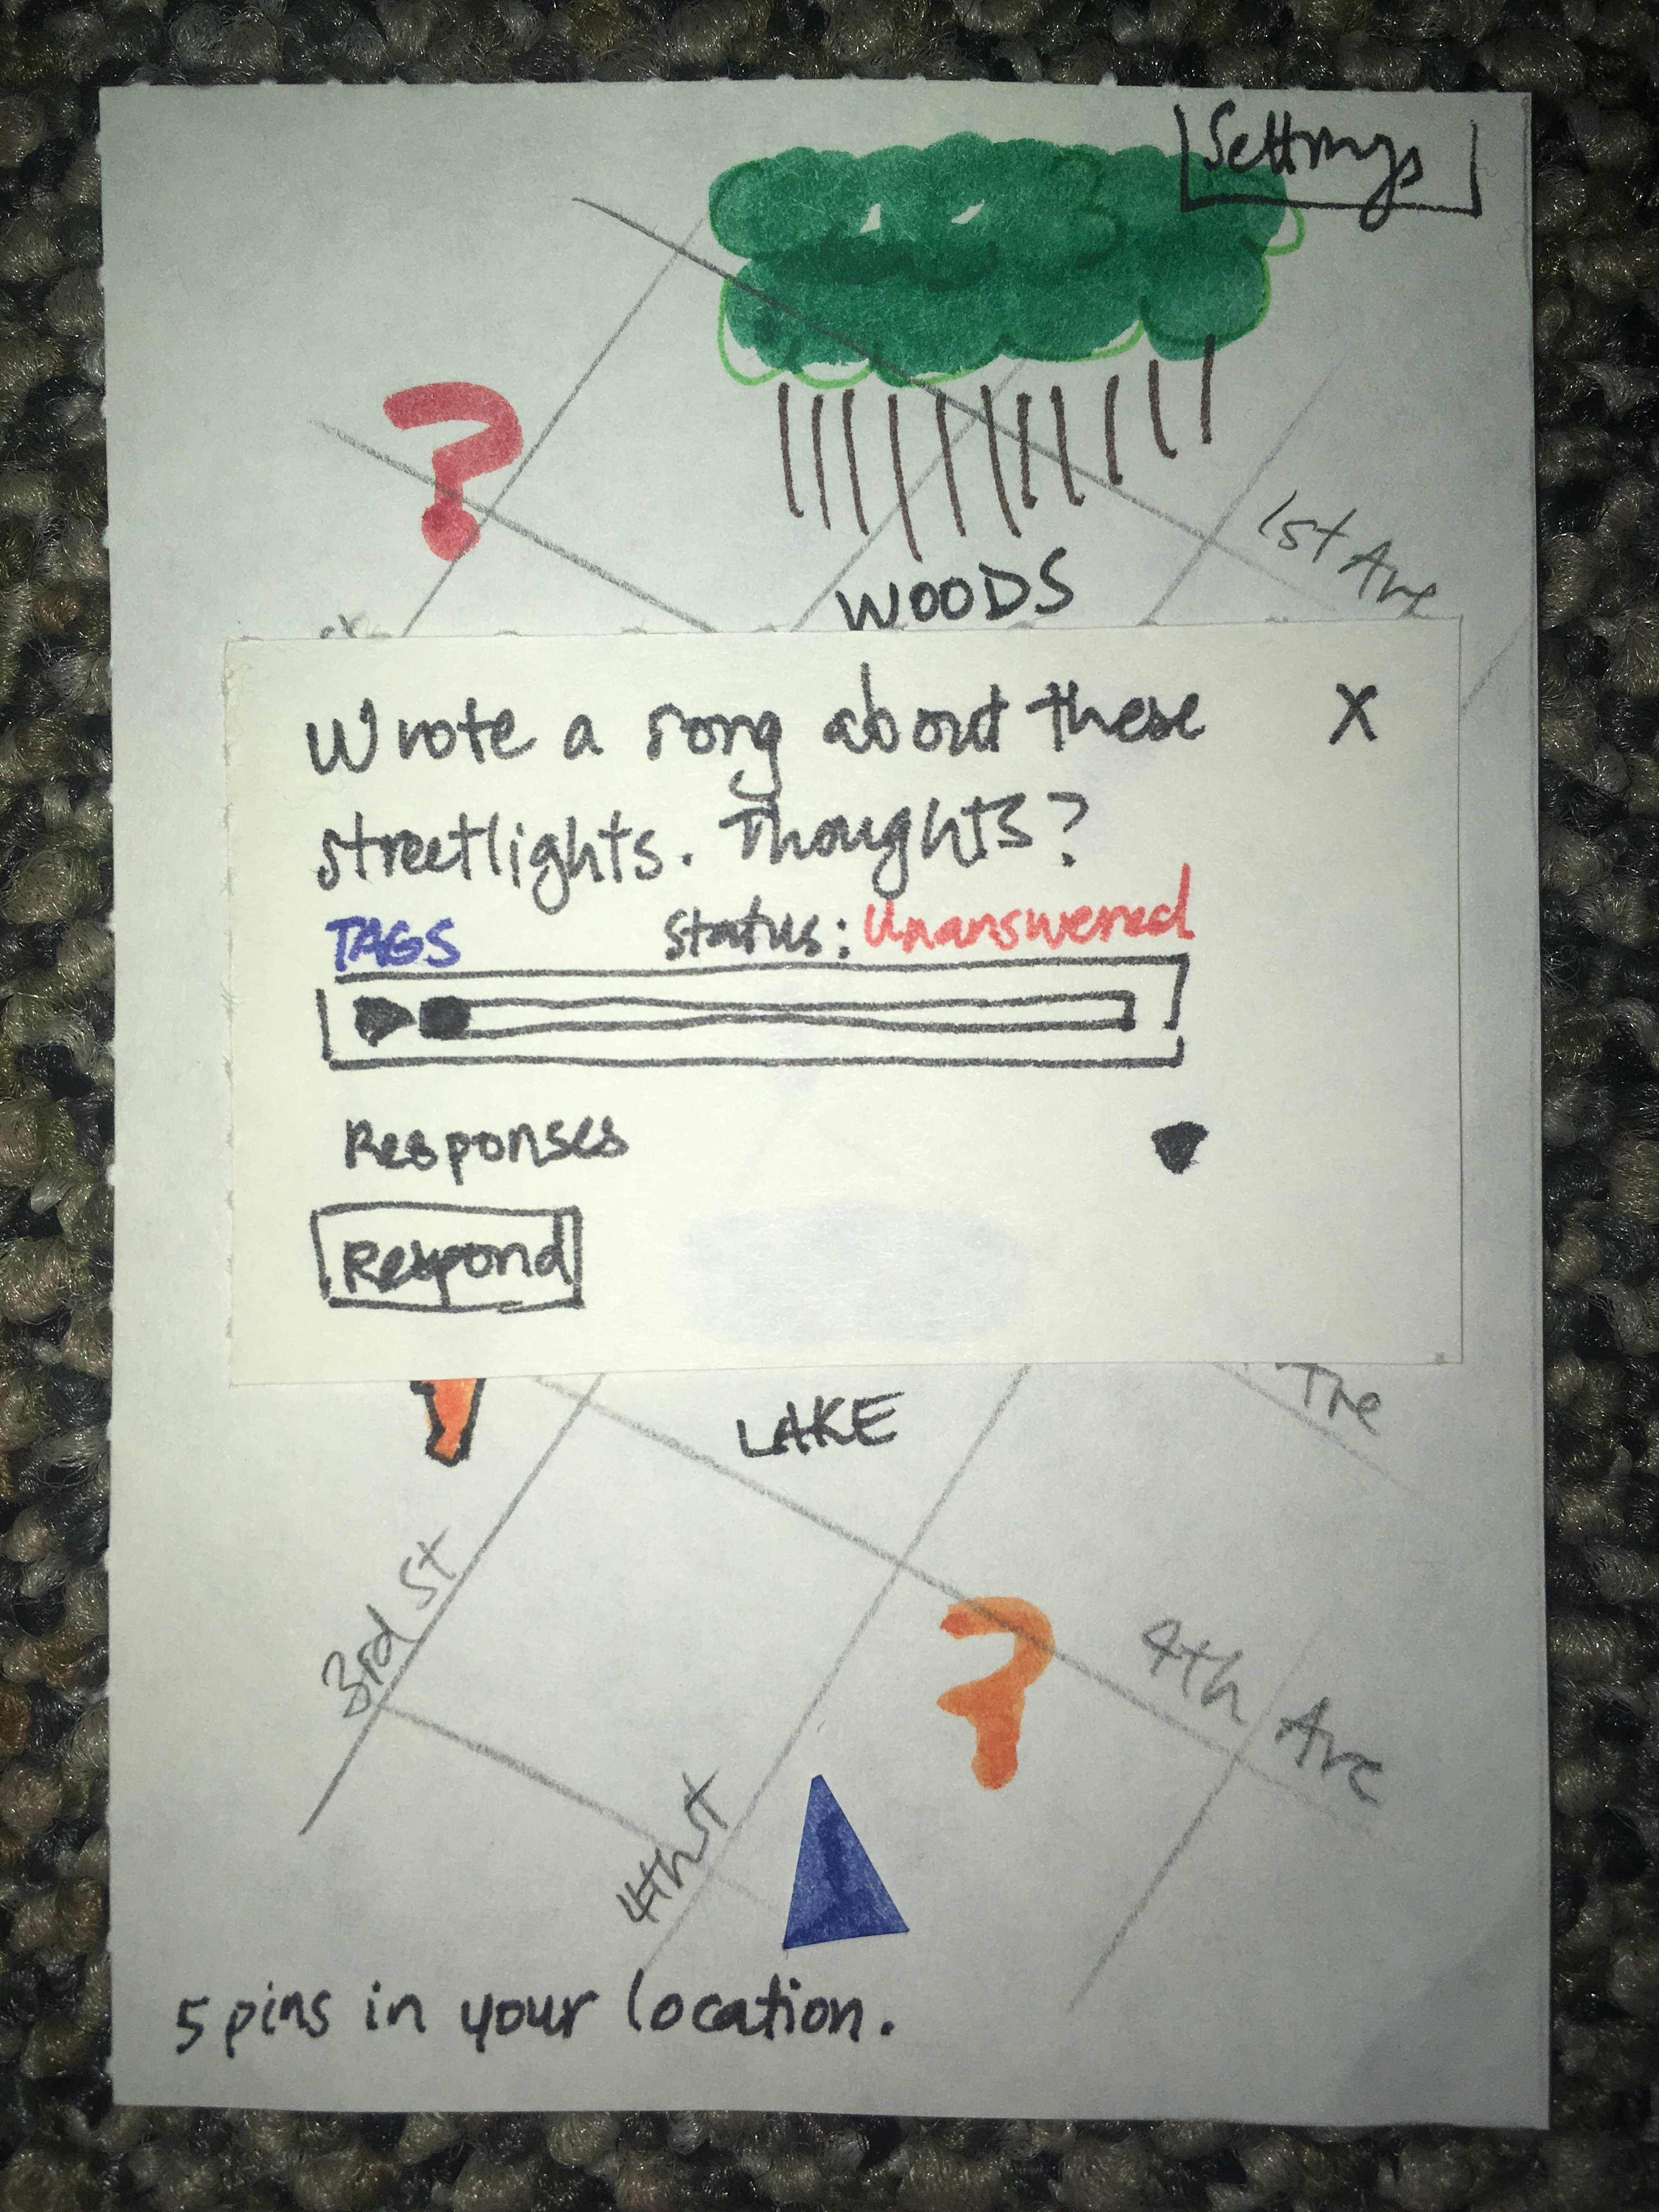
In this case, this post has no responses when the Responses button is clicked.
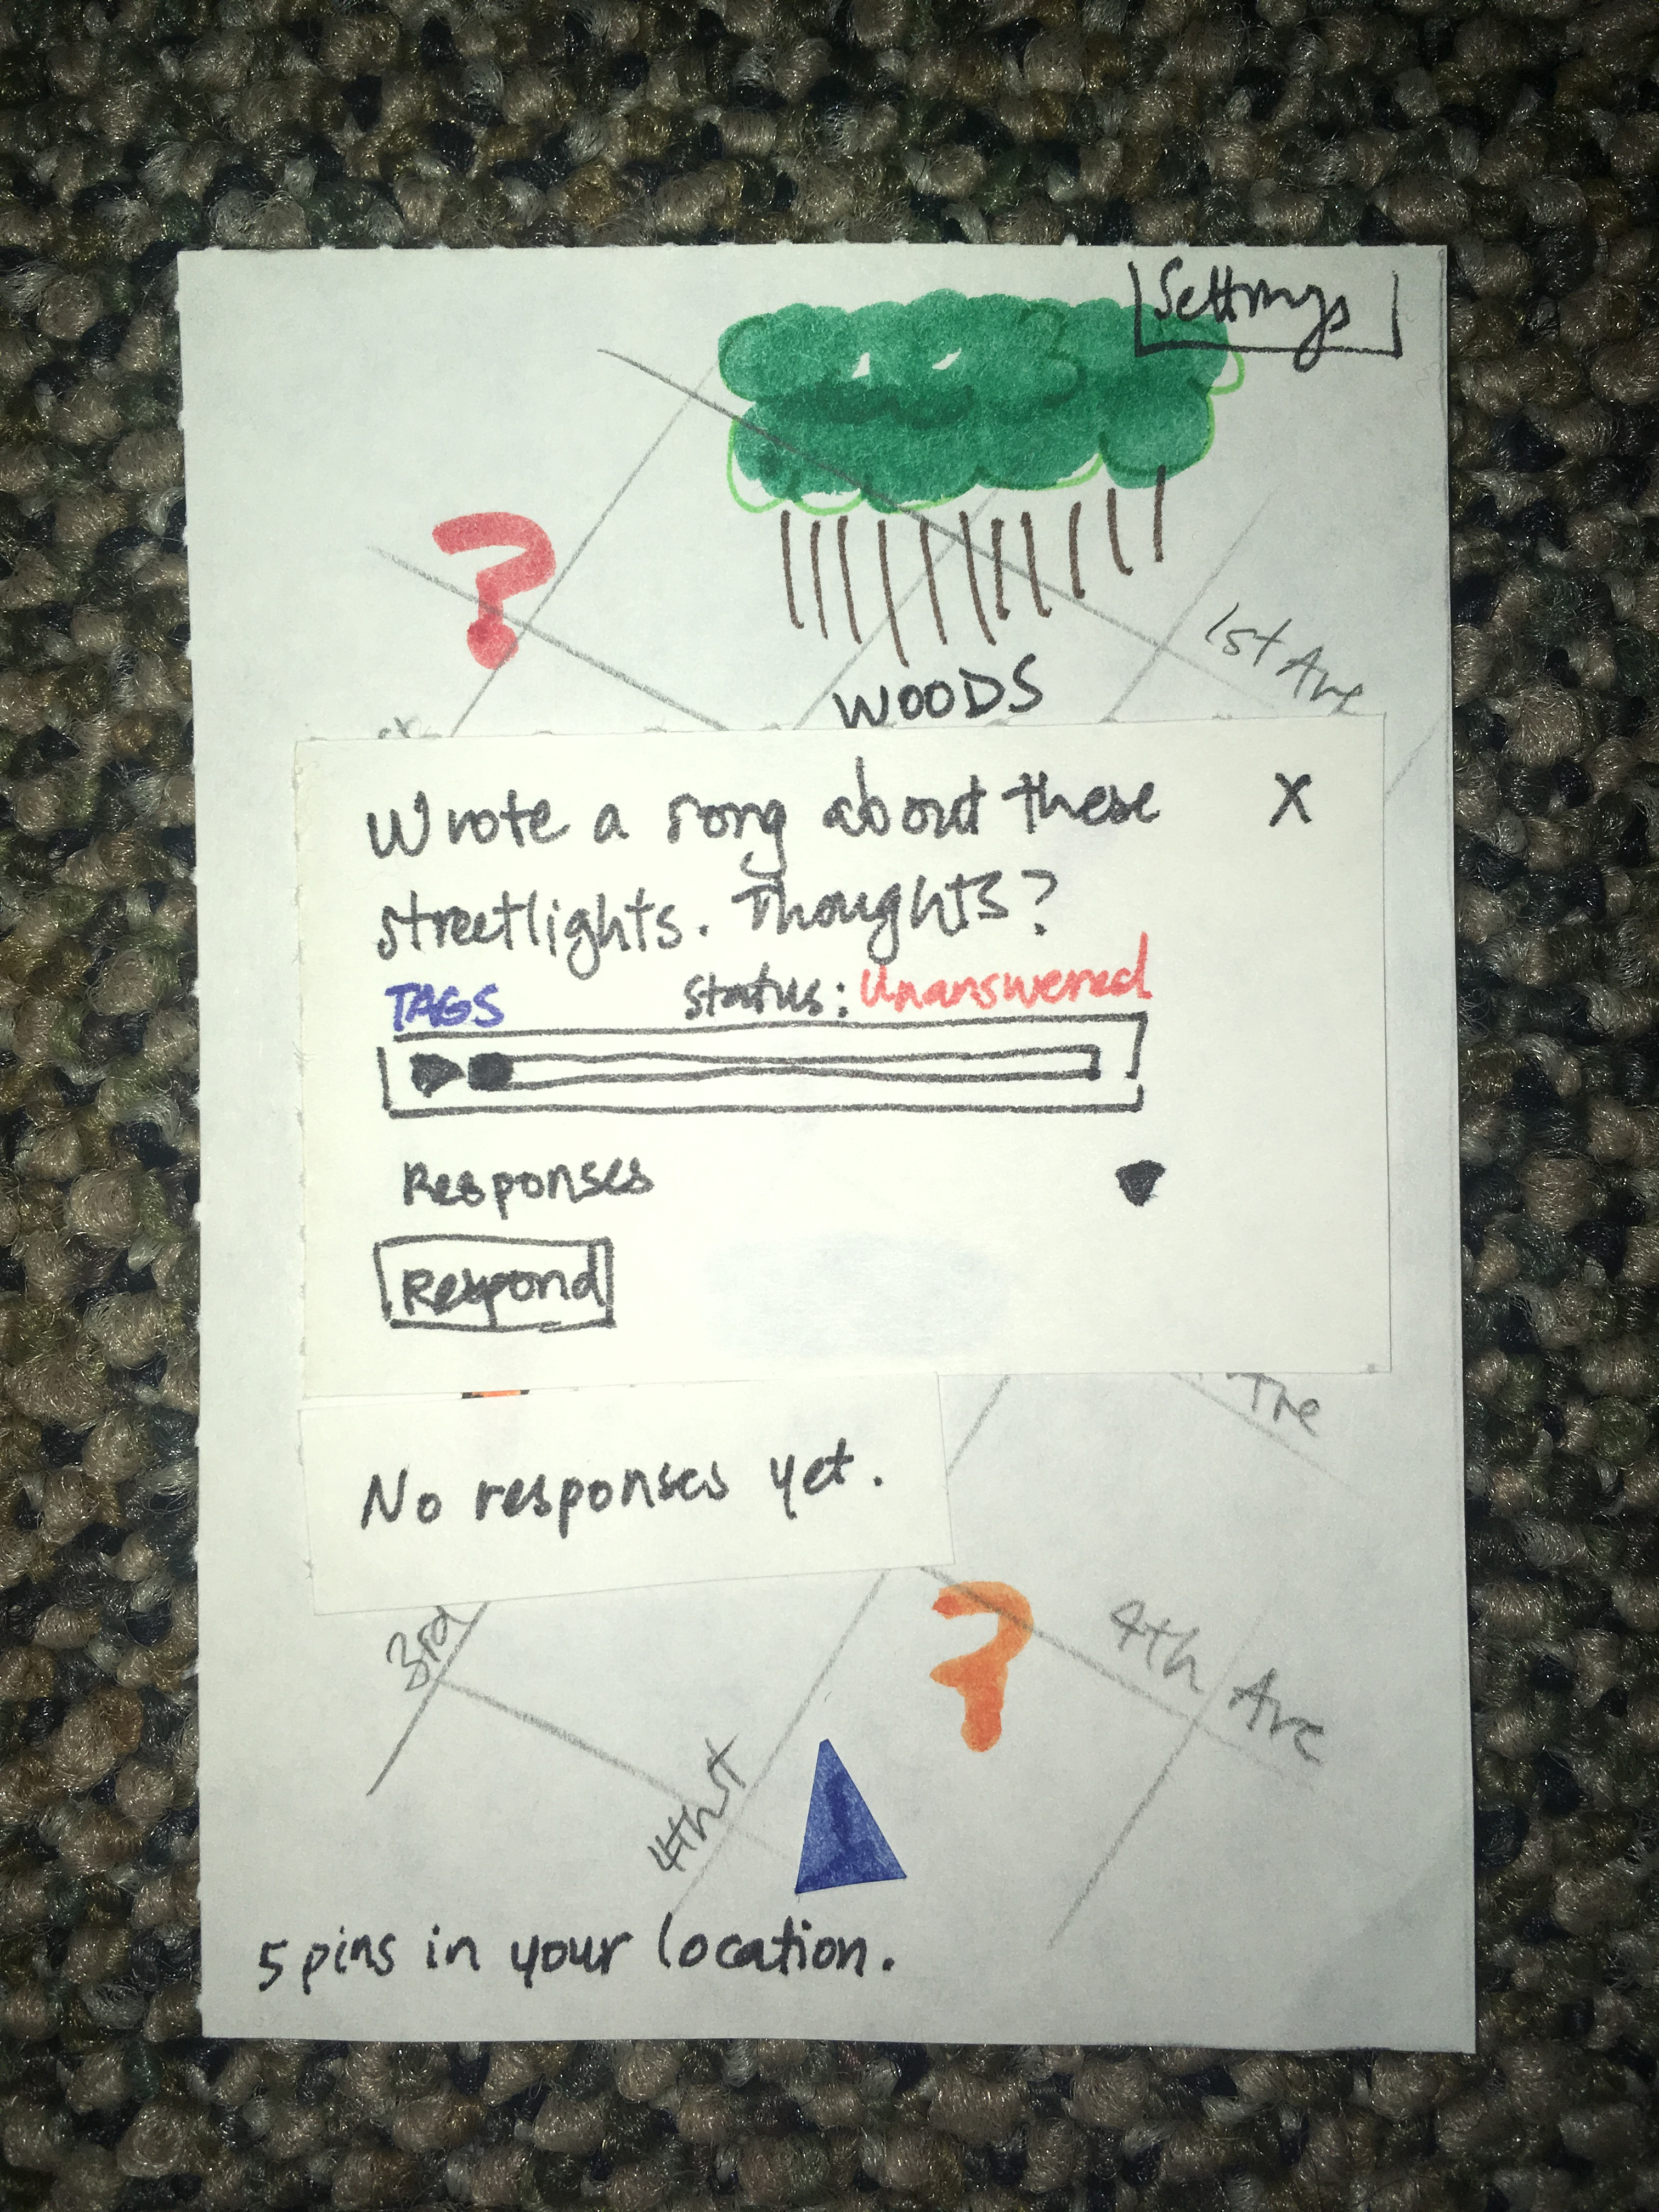
Again, clicking on the TAGS button produces the tags associated with this post.